Defining Your Site
advertisement
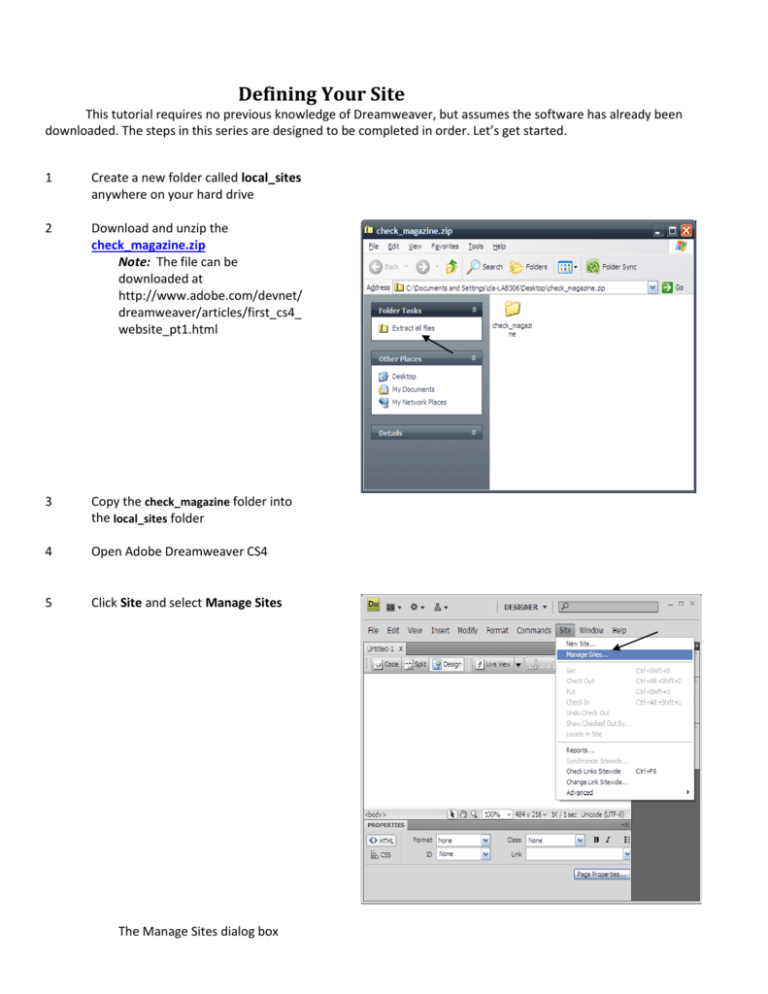
Defining Your Site This tutorial requires no previous knowledge of Dreamweaver, but assumes the software has already been downloaded. The steps in this series are designed to be completed in order. Let’s get started. 1 Create a new folder called local_sites anywhere on your hard drive 2 Download and unzip the check_magazine.zip Note: The file can be downloaded at http://www.adobe.com/devnet/ dreamweaver/articles/first_cs4_ website_pt1.html 3 Copy the check_magazine folder into the local_sites folder 4 Open Adobe Dreamweaver CS4 5 Click Site and select Manage Sites The Manage Sites dialog box appears 6 Click New button and select Site The Site Definition dialog box appears 7 Click Advanced tab and select Local Info 8 Locate the Site Name text box 9 Enter “Check Magazine” 10 Locate the Local Root Folder text box and click the folder icon 11 Browse local_sites select 12 13 check_magizine Locate Default Images Folder text box and click the folder icon Select the images folder that already exists 14 Click OK The Manage Sites dialog box will show your new site 15 Click Done The Manage Sites dialog box closes Now that we have defined our site, we can proceed with the page layout and adding content to the page Creating a Page Layout Using an Adobe Dreamweaver Template Now that you have created a website, you need a page layout in which to enter your content. Dreamweaver makes this step very easy by supplying you with premade starter pages. For the purpose of learning, we are going to start with a two column fixed layout with right side bars, a header and the top, and a footer at the bottom. In the future, you can choose any layout that suites you needs. Let’s get started. 1. Open Dreamweaver. 2. Click File and select New. New document menu appears. 3. Select Blank Page. 4. Under Page Type select HTML (first choice). 5. Under Layout, select 2 column, fixed, right side bar, header at top, footer on bottom. 6. For document type choose XHTML 1.0 transitional. It is standard so we will start with that. 7. Under Layout select Add to Head. 8. Click Create. 10. To save this page, Click File, select Save As. 11. Select a file to save file in. Note: The layout file will automatically be saved as twoColFixRtHdr. You can rename the layout file if you like. 12. Click Save. You now have a page layout! Now you can replace the placeholder content with your text and images. Adding Content to Your Newly Designed Website The following section shows you how to add content to web pages using Adobe Dreamweaver CS4. You can add many different kinds of content to web pages, including background, images, text, hyperlinks, and tables—to name just a few. After you've added content to your pages, you can preview your work in Dreamweaver so that you can see what it will look like on the web. 1. Click Start, select All Programs, and select Adobe Dreamweaver CS4. 2. Click HTLM under Create New. A new “untitled document” will appear. Adding Background 3. Click on Page Properties located at the bottom of template under the Property Menu. Property Menu Page Properties 4. Select Appearance (HTML) under Category. 5. Select the Background color and click OK. Entering Text 6. Click on the Template and type. Inserting Images 7. Select Insert and click Images. 8. Select the folder containing your desired image from the Look in drop-down menu and click Ok. 9. Disregard this box and click OK. 10. To resize the image, adjust the width (W) and height (H) in the Properties Menu located at the bottom of the window. Property menu Inserting Hyperlinks 11. Select Insert and click Hyperlink. 12. Click on the Text: cell and put the name of the link. 13. Click on the Link: cell and locate the folder containing your link. 14. Select the Target: cell from the drop-down menu and click –blank. Leave the Title:, Assess key:, and Tab index: blank 15. Click OK. “ Technical Writing” is the name of the hyperlink I created and it is linked to the website www.csulb.edu/~cdamschr. Creating Tables Creating a table can help us organize our webpage 16. Select insert and click table 17. Fill in the number of rows and columns wanted and click OK. Disregard the other entries 18. Select the images and/or text previously added and copy/paste them into the desired cell. Now that the site and project files are set up, the page layout is created, and the preferred content is added, we are finally done with the webpage.
