Latarjet Procedure
advertisement
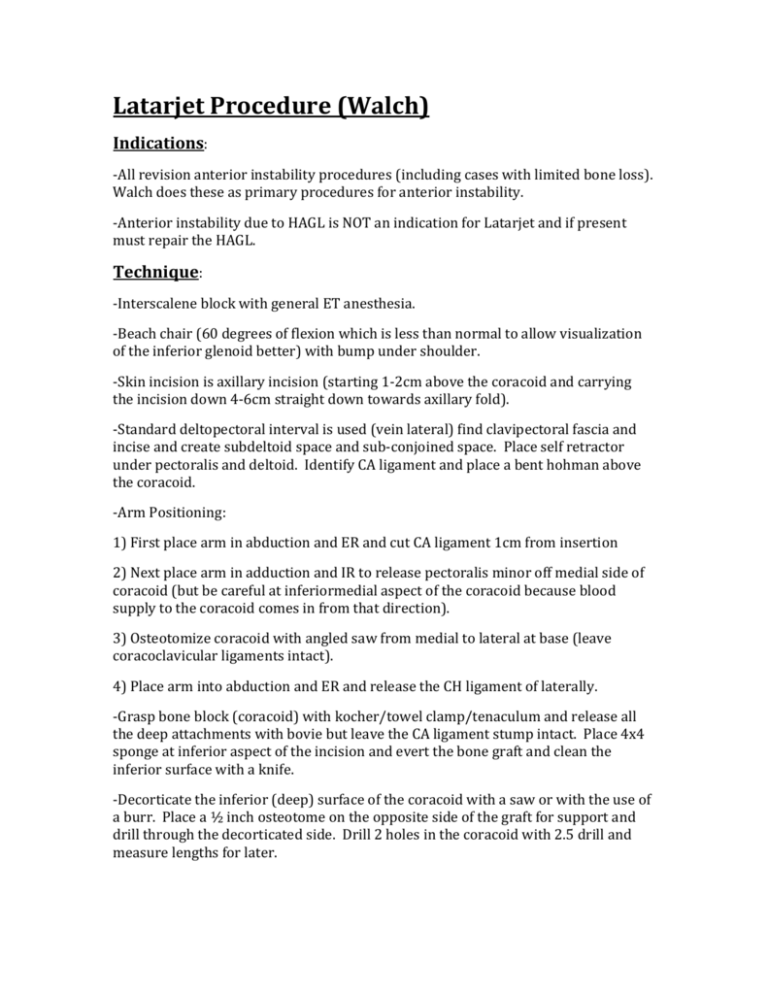
Latarjet Procedure (Walch) Indications: -All revision anterior instability procedures (including cases with limited bone loss). Walch does these as primary procedures for anterior instability. -Anterior instability due to HAGL is NOT an indication for Latarjet and if present must repair the HAGL. Technique: -Interscalene block with general ET anesthesia. -Beach chair (60 degrees of flexion which is less than normal to allow visualization of the inferior glenoid better) with bump under shoulder. -Skin incision is axillary incision (starting 1-2cm above the coracoid and carrying the incision down 4-6cm straight down towards axillary fold). -Standard deltopectoral interval is used (vein lateral) find clavipectoral fascia and incise and create subdeltoid space and sub-conjoined space. Place self retractor under pectoralis and deltoid. Identify CA ligament and place a bent hohman above the coracoid. -Arm Positioning: 1) First place arm in abduction and ER and cut CA ligament 1cm from insertion 2) Next place arm in adduction and IR to release pectoralis minor off medial side of coracoid (but be careful at inferiormedial aspect of the coracoid because blood supply to the coracoid comes in from that direction). 3) Osteotomize coracoid with angled saw from medial to lateral at base (leave coracoclavicular ligaments intact). 4) Place arm into abduction and ER and release the CH ligament of laterally. -Grasp bone block (coracoid) with kocher/towel clamp/tenaculum and release all the deep attachments with bovie but leave the CA ligament stump intact. Place 4x4 sponge at inferior aspect of the incision and evert the bone graft and clean the inferior surface with a knife. -Decorticate the inferior (deep) surface of the coracoid with a saw or with the use of a burr. Place a ½ inch osteotome on the opposite side of the graft for support and drill through the decorticated side. Drill 2 holes in the coracoid with 2.5 drill and measure lengths for later. -The lateral side of the conjoined tendon is then released further distally and this helps expose the subscapularis. ER the arm in adduction to expose the subscapularis and mark the superior and inferior aspect of the subscapularis. Divide the subscapularis in its midline with a bovie (start medial to the insertion on the lesser tuberosity) until you encounter the capsule. Place 4x4 sponges into the subscapularis fossa medially and perform a L-shaped capsulotomy. Remove the periosteum and medial capsule and labrum off the anterior inferior glenoid from 3 to 6 o’clock. Remove the sponge from the subscapular fossa. -Place the arm in full IR and place a Fukuda retractor into the joint leavering on the posterior glenoid. Place an anterior Bankart retractor anteriorly and clamp with a Kelly clamp. Place a 2.5 or 2.8mm Steinman pin into the superior part of the scapular neck to retract subscapularis superiorly. Place a Homan retractor inferiorly on the 6 o’clock position of the glenoid. -First drill the inferior hole on the glenoid about 5mm inferior to the articular surface and depth gauge (add this number to the previous measurement of the coracoid) and place a 4.0 partially threaded cancellous screw. Next line up the graft as you want it and drill the superior hole through the previously drilled hole on the graft as your guide and place a second screw. -Attach the CA ligament stump (on the transferred coracoid) to the lateral capsule using 2 interupted #1 vicryl sutures. Place 1-2 sutures in the split within the subscapularis. Place bone wax on cut coracoid surface. -Drain for 24 hours Post-Op Protocol: -Sling for comfort for 2 weeks but start elevation and ER exercises immediately. No restrictions on ROM. At about 2-3 weeks patient may begin swimming and some strengthening and at 3 months may begin all activities including contact sports. Complications: -Inform patients about standard risks of surgery but also: 1) Recurrence of 1-4% (depending on study) 2) Pain (40% but mainly with sports) 3) Limited internal (more common) and external rotation 4) Arm fatigue 5) Pseudoarthrosis (2-5%)
