Animate - Teach ICT
advertisement
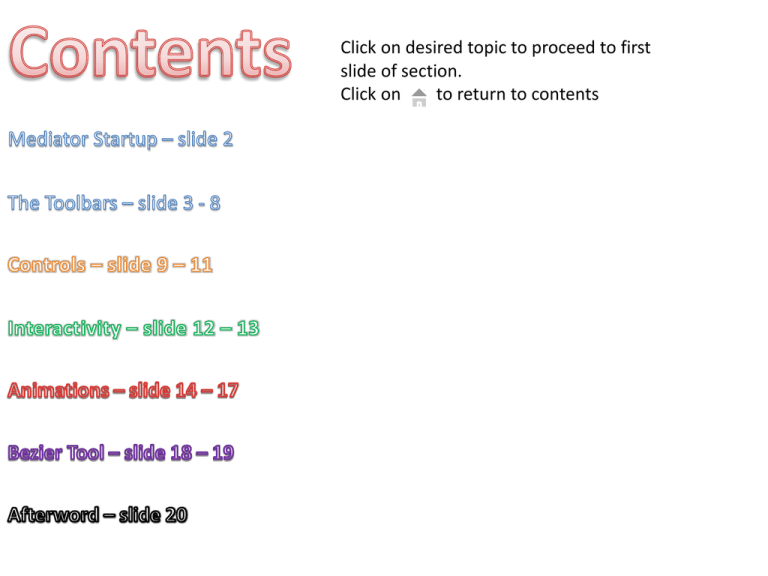
Click on desired topic to proceed to first slide of section. Click on to return to contents Now, down to business. I will be focusing on the Standard(CD-ROM etc.) section of the software – I have not ventured into making my own flash or HTML files. First of all, select the Standard document type, and press OK. You are then confronted with a choice of display type, this makes no difference to the tools we will be using, but makes a difference to how your finished document looks. For any screenshots I use, I will be using the Full screen with frame option, but the choice is up to you. I am going to quickly explain all the toolbars, and tell you which ones I will be covering in this presentation. This is the HOME toolbar, and looks a lot like the toolbar in PowerPoint. It contains the standard Paste, Cut, Copy and Duplicate, which don’t need any explanation. You then have the ‘New’ button, which doesn’t give you a new blank page, but lets you choose from a selection of preset designs for your webpage, complete with ‘objects’ which are listed below the page information. You then have the Delete button, which deletes the selected page from the document. Rename will let you rename the page, and Colour lets you choose a new background colour for the selected page. This toolbar is, as the name suggests, used to put ‘objects’ (where possible I try to use the same terminology as the software) into your document. From the left you have Picture – lets you choose a picture from within your computer – however before you place it you must set its dimensions. Rectangle allows you to draw a rectangle with and side length you wish. Polygon has two options – if you click on the shape you go to a separate screen where you can set the number of sides, and their length. The other option – if you click on the arrow – brings up a drop down menu with different preset shapes in it, such as circles, regular polygons and callouts and banners. The Drawing tool opens up a menu, which gives you the choice of creating a new drawing, or loading a already made one. If you select ‘create new drawing’ you will be taken to a separate piece of software, much like paint.net, which allows you to make your own shape from scratch, complete with colours and text. Bump Map lets you insert an object that is either a texture, i.e. marble or wood, or an effect, such as an arrow with a shadow, or a rectangle with curved edges and a shadow. Text allows you to put in a text box, and Headline inserts something almost identical to WordArt from PowerPoint. Windows Media Player lets you insert a video which plays through windows media player, and Video does the same thing. Animated GIF lets you insert a small animation from a selection of animations that come with the software, or one of your own. Flash does the same as video, but inserts files that play through the flash player. The CONTROLS section of the toolbar is covered in slide 9 - 12 The New, Delete, Rename and Colour tools are covered on slide 3. The Properties button displays the properties list should you have closed it earlier. Events is covered on slide 12. Variables, Macros and Scripts are not covered because, to be honest, I have no idea what they are. Run Document runs the entire document as if it were being run over the web, Run Page does the same but only from the page you are currently viewing. Preview Page, as far as I can tell, does the same as Run Page. Check Document checks the entire document for errors, while Check Page only checks the page you are currently viewing. Spellcheck Document and Spellcheck page check the document or page (respectively) for any spelling errors. Spelling Options allows you to change the search fields of the spell check, and change what language dictionary it uses. Search Manager lists all the words and numbers in your document, and tells you how many times they occur on specific pages, and which pages they occur on. The first five buttons on the toolbar are simply show/hide buttons, they let you choose which toolbars you can and cannot see, the default is Page list, Object List and properties all selected. Multimedia Catalogue shows you a list of all the animations, video's, music or anything else of that genre in your document. Multi-User Status The INTERATIVITY section is covered in a separate slide, see the contents for more details. Grid lets you see a grid to place your objects, it doesn’t appear as a grid, but as dots where the grid lines would intersect. You can specify the spacing of the grid lines, along the X and Y axis, and you can set ‘snap to grid’ to perfectly align all your objects. This only allows the edge of your object to be on a grid line, or half the with/height of a grid square away. Guides is quite a complex one, it allows you to make them visible, but to place one you 1) right click where you want the guide 2) select ‘guides’ at the bottom of the list 3) click on ‘add vertical’ or ‘add horizontal’ according to what you want. Cascade allows you to see the canvas in a separate window, so you can view more than one page at once. Adjust Window allows you to change the size of the window between two sizes, for example you could have it almost minimised so that you can see more than one at once, going to full screen for the fine details. Switch Windows allows you to quickly switch between pages that you have open simultaneously, it simply lists them, and highlights the one you are viewing – if you were editing two different documents, you could easily switch between them. Now – the CONTROL toolbar only has six buttons, so this wont take long. Button has two different options. If you click on the picture it puts this type (below) in – you have to option of changing the text if you so wish. If you click the downwards arrow a drop down menu appears, and gives you a large selection of designs, which offer you more customisation options for your document. Animation Path allows you to insert a route for an object to take – you have options at the top of the screen to make curved paths or routes. Embedded Document allows you to make a ‘window’ to a webpage inside your document. First you type the address of the webpage you wish to embed. It looks like this when you are editing the page: When you are viewing the document it looks like this: You can adjust the size of the window through which you view the webpage, and use the sliders to adjust your view. HTML Object allows you to put an interactive ‘object’ in your document. For example, if you click on the downwards arrow, and select ‘calculator’ from the sub menu’s you can insert a useable calculator into your document, so that when you run it you can use it for simple calculations. Input Object inserts an object that is much like a text box – that you can type in while your document is running. List Box is a text box where you have a scroll bar – so that if you have a long paragraph of text it doesn’t have to take up all the screen. AcitveX is not dealt with in this presentation. Events allows you to set the order of anything that happens in your document, from auto switching pages to animations. It also allows you to set the triggers for actions, for example starting an animation on a mouse click, or having the document go to the next page after a certain amount of time. When you click on Events you get a pop-up window that looks like this: Along the side of the window you have the triggers, for example Mouse Click means that your documents animations/actions start when you click on the mouse. Along the top you have actions for the document to perform, all categorised into sub-sections. For example in the STANDARD toolbar Go to Page means that when the trigger ‘happens’ the document will go the selected page, so you could have the document jump to page 4 when you click the mouse. Timeline is the most complicated, and most useful tool of them all. So, you have your animation, and so long as your animations don’t get much more complicated than that, you will never need to bother with Timeline. However, if you want to make more advanced animations, with things happening simultaneously, or after certain time intervals, you will need Timeline. If you insert timeline into your events, you need a trigger first, such as Mouse Click. It should look like this: In timeline you have a number of things. Along the bottom you have a ‘scale’, where you can define how long after the trigger you want the event to occur. For example, if you wanted you animation from earlier to start say three seconds after you click the mouse you would drag the Animation icon from the MULTIMEDIA toolbar, and position it so that the ‘guide’ is at 3.00s. The lighter blue bar you can see is how long the animation takes to run, the default is 1.00s, but you can adjust that with a simple click and drag. You can repeat the procedure to add any number of events, starting at any time after the trigger, and lasting any amount of time. Events can also happen on one page while another is open. This section deals with animations, from the most basic to some more complicated ones. Lets make a rectangle, that moves from right to left. First of all, draw yourself a rectangle, not too big, you want to be able to see it moving! Go to the INSERT toolbar, and click on Animation Path. Then, with the Add too selected (its selected by default) click somewhere in the rectangle to place your start point, and somewhere over to the right to place your end point. It should look like this: Now, click the Close button to return to your document. Your almost there, one more thing and your animation will run. Click on the Events button, in the VIEW toolbar, and you should see something like this: Now, we want our animation to start when you click the mouse. So select Mouse Click and drag it from the right into the white space. It should look something like this: Do the same for the Animate tool. You should get a pop-up window like this. Under Object to animate select the magnifying glass icon, and select the object called ‘Rectangle’. After that, click OK and your animation is ready to go! To test it, click Run Document in the REVIEW toolbar. Your animation will start when you click the mouse . So far so good, we have an animation that works, and if you don’t want to do any more advanced animations than that, you don’t need to read any more of the ANIMATIONS slides. However, if you want to have more than one animation per page, or have them starting simultaneously, then you need to read these slides. First of all, lets start by having two events happening at the same time. You already have one rectangle and one animation path on your document, so now copy them and paste them a bit further down, making sure you can see that they are two separate objects. Now, go into Events, and delete the Animate command. Where it was, put Timeline and then in the timeline menu drag Animate into the time period you want. Fill in the Animate menu as you did before, making sure rectangle1 is with anipath1, and rectangle is with anipath. Now your new animation is ready to go, your Timeline should look something like the one in the picture. It will trigger when you preview the page, and click the mouse. Using this method you can make any number of events start any amount of time from the trigger, giving you a far greater amount of control over your document. Now lets do something more advanced. So far we have had a rectangle going from point 1 to point 2 along a straight path. Lets try and make a circle go on a path with no start or end. And, for variation, lets make it a path with curves, not just straight lines. First of all, make your circle. Once you have it, go into INSERT, and select Animation Path. Put your first four animation points like in the picture, and instead of putting a fifth, click on the first point. When faced with the decision box, click YES. Once you have done that, click on the Select tool, and select the first point. Now, with the first point selected click on the To Symmetric Bezier tool. This is explained on slides 18 - 19 Using the green handles, make the animation path into a rough circle. Once you have done that you can press CLOSE and return to the main document. Now you have your animation path, go into Events, set the trigger to Mouse Click and use the Animate command to tell the document to animate polygon with anipath. Once you have done That, review your document and your circle should follow the drawn path endlessly. Before we go any further, there is something we need to go over. The Bezier tool. This is a tool with a very specific purpose, that some people will probably never need, and that others will find invaluable. It is used to make curves. Both in animation paths and in polygons. As an example, lest make a polygon with no edges. First of all, make yourself a shape, like the one below. Now, click on a point, and then the To Bezier tool, and lets put in some curves. With the green handles around the point you can set how much the line that touches the handle curves. The length of the yellow line indicates the depth of the curve, while the positioning of the handle indicates the direction of the curve. Here you can see a zoom in of my curve, with the handles visible. This tool allows a great degree of customisability in your shapes, but is also very hard to get perfect, for example if you wanted a line to curve through a point with the curve symmetrical on both sides, it would be very difficult to get the handles the same length, and at equal positions from the point. The is where the Symmetric Bezier tool comes in. Symmetric Bezier. As the name suggests, this tool is for use when you want to two sides of a point to be identical, curving in exactly opposite directions, with an identical magnitude. Lets return to our original shape. Now choose the same point a last time, and select the Symmetric Bezier tool. Now you will notice that both handles move at the same time, and that the length of the yellow ‘bit’ is the same for both handles. This time you will notice that your curve is equal on both sides, and looks smoother. This tool is useful, but in a complex shape it would take a while to make all the lines curve. Here’s a little shortcut. Right-click on a point, and click on Select All. Now, click on Symmetric Bezier, and all the lines in your shape will be curved. This, of course, is not perfect, some of your lines will cross, but that is easily corrected. This DOES NOT WORK if you use the To Bezier tool, as the handles will be orientated parallel to the lines of your shape, and not so that they are symmetric, meaning that your shape would not form curves, but look as it already looked. Afterword I have to admit, I wasn’t really sure how to make this presentation flow. Mediator is not like other software I have written presentations for, in that it is not a steady progression of tools, that are easy to use but hard to master, but it is a collection of different tools for different jobs, some very simple on the outside but counter intuitive and hard to ‘get right’ on the inside. I want to stress that the methods I show here are not the only methods, or necessarily the easiest, they are the methods that I have discovered and had success using. This presentation is designed to give a groundwork for using the software, and so does not go into great detail on some of the more specialist functions of Mediator.
