Name:
Zafir Ahmed
Lab Number#8
ELET 245: Introduction to Microcontrollers
Motorized Pinwheel
Lab Summary:
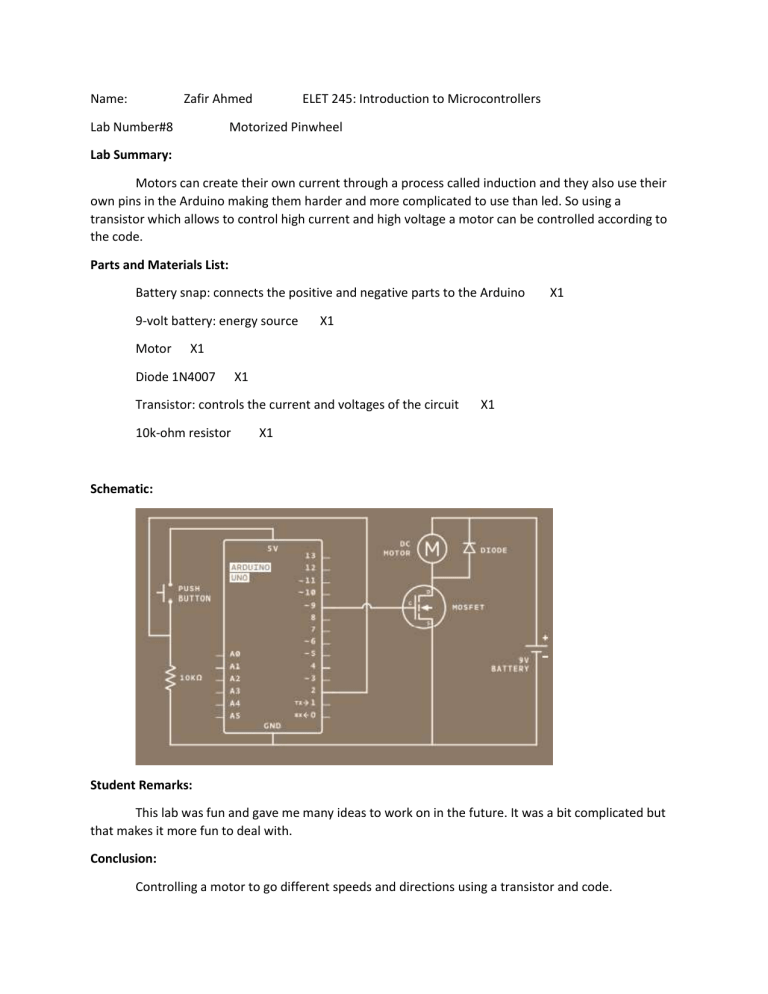
Motors can create their own current through a process called induction and they also use their
own pins in the Arduino making them harder and more complicated to use than led. So using a
transistor which allows to control high current and high voltage a motor can be controlled according to
the code.
Parts and Materials List:
Battery snap: connects the positive and negative parts to the Arduino
9-volt battery: energy source
Motor
X1
X1
X1
Diode 1N4007
X1
Transistor: controls the current and voltages of the circuit
10k-ohm resistor
X1
X1
Schematic:
Student Remarks:
This lab was fun and gave me many ideas to work on in the future. It was a bit complicated but
that makes it more fun to deal with.
Conclusion:
Controlling a motor to go different speeds and directions using a transistor and code.
Code:
const int switchPin = 2;
const int motorPin = 9;
int switchState = 0;
void setup()
{ pinMode(motorPin, OUTPUT);
pinMode(switchPin, INPUT);
}
void loop()
{ switchState = digitalRead(switchPin);
if (switchState == HIGH) { digitalWrite(motorPin, HIGH);
}
else { digitalWrite(motorPin, LOW); }
}
