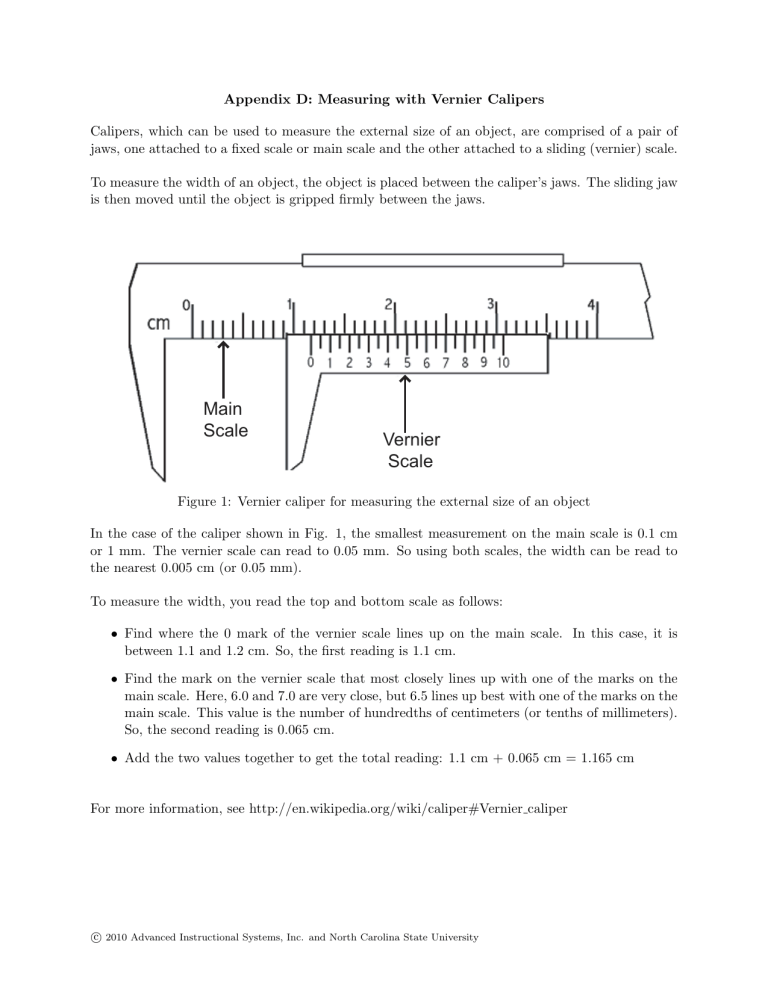
Appendix D: Measuring with Vernier Calipers Calipers, which can be used to measure the external size of an object, are comprised of a pair of jaws, one attached to a fixed scale or main scale and the other attached to a sliding (vernier) scale. To measure the width of an object, the object is placed between the caliper’s jaws. The sliding jaw is then moved until the object is gripped firmly between the jaws. Main Scale Vernier Scale Figure 1: Vernier caliper for measuring the external size of an object In the case of the caliper shown in Fig. 1, the smallest measurement on the main scale is 0.1 cm or 1 mm. The vernier scale can read to 0.05 mm. So using both scales, the width can be read to the nearest 0.005 cm (or 0.05 mm). To measure the width, you read the top and bottom scale as follows: • Find where the 0 mark of the vernier scale lines up on the main scale. In this case, it is between 1.1 and 1.2 cm. So, the first reading is 1.1 cm. • Find the mark on the vernier scale that most closely lines up with one of the marks on the main scale. Here, 6.0 and 7.0 are very close, but 6.5 lines up best with one of the marks on the main scale. This value is the number of hundredths of centimeters (or tenths of millimeters). So, the second reading is 0.065 cm. • Add the two values together to get the total reading: 1.1 cm + 0.065 cm = 1.165 cm For more information, see http://en.wikipedia.org/wiki/caliper#Vernier caliper c 2010 Advanced Instructional Systems, Inc. and North Carolina State University
