POP-UP_BOOK_STEP-BY-STEP_INSTRUCTIONS
advertisement
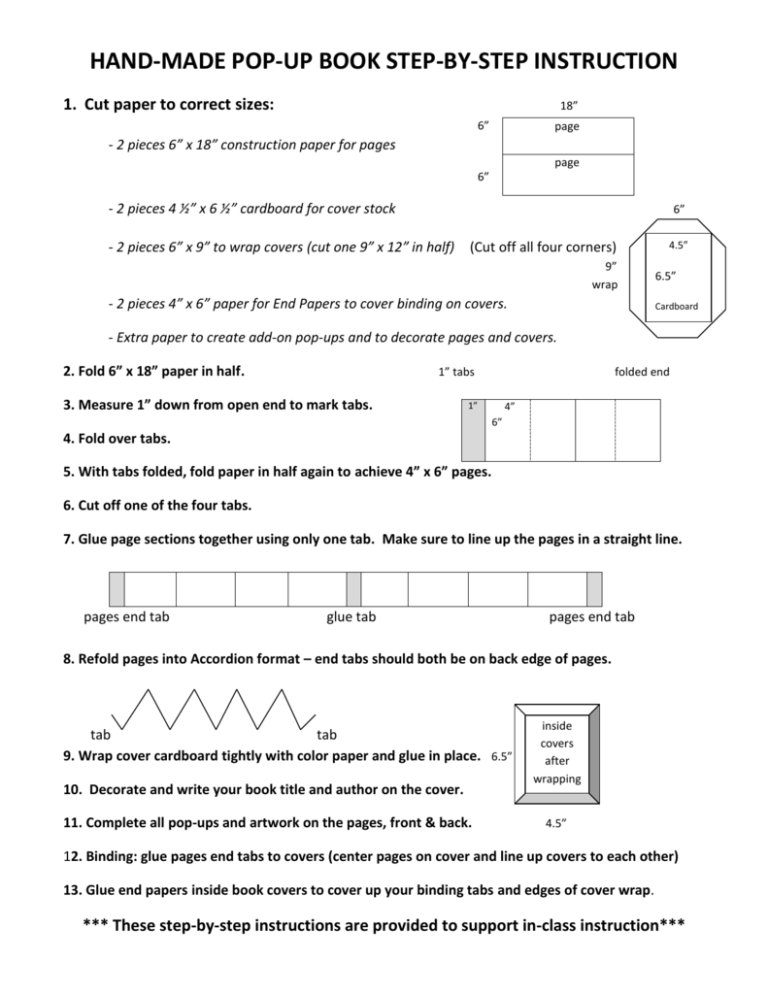
HAND-MADE POP-UP BOOK STEP-BY-STEP INSTRUCTION 1. Cut paper to correct sizes: 18” 6” page - 2 pieces 6” x 18” construction paper for pages page 6” - 2 pieces 4 ½” x 6 ½” cardboard for cover stock 6” - 2 pieces 6” x 9” to wrap covers (cut one 9” x 12” in half) (Cut off all four corners) 9” wrap - 2 pieces 4” x 6” paper for End Papers to cover binding on covers. 4.5” 6.5” Cardboard - Extra paper to create add-on pop-ups and to decorate pages and covers. 2. Fold 6” x 18” paper in half. 1” tabs 3. Measure 1” down from open end to mark tabs. folded end 1” 4” 6” 4. Fold over tabs. 5. With tabs folded, fold paper in half again to achieve 4” x 6” pages. 6. Cut off one of the four tabs. 7. Glue page sections together using only one tab. Make sure to line up the pages in a straight line. pages end tab glue tab pages end tab 8. Refold pages into Accordion format – end tabs should both be on back edge of pages. tab tab 9. Wrap cover cardboard tightly with color paper and glue in place. 6.5” 10. Decorate and write your book title and author on the cover. 11. Complete all pop-ups and artwork on the pages, front & back. inside covers after wrapping 4.5” 12. Binding: glue pages end tabs to covers (center pages on cover and line up covers to each other) 13. Glue end papers inside book covers to cover up your binding tabs and edges of cover wrap. *** These step-by-step instructions are provided to support in-class instruction***
