Envelope
advertisement
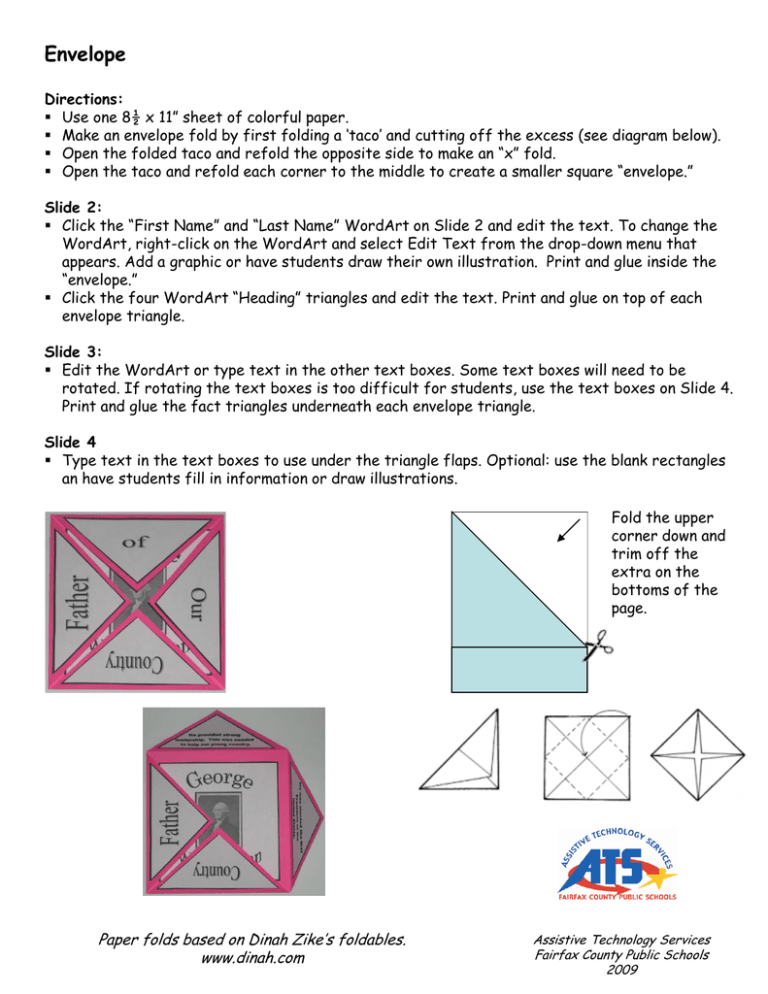
Envelope Directions: Use one 8½ x 11” sheet of colorful paper. Make an envelope fold by first folding a ‘taco’ and cutting off the excess (see diagram below). Open the folded taco and refold the opposite side to make an “x” fold. Open the taco and refold each corner to the middle to create a smaller square “envelope.” Slide 2: Click the “First Name” and “Last Name” WordArt on Slide 2 and edit the text. To change the WordArt, right-click on the WordArt and select Edit Text from the drop-down menu that appears. Add a graphic or have students draw their own illustration. Print and glue inside the “envelope.” Click the four WordArt “Heading” triangles and edit the text. Print and glue on top of each envelope triangle. Slide 3: Edit the WordArt or type text in the other text boxes. Some text boxes will need to be rotated. If rotating the text boxes is too difficult for students, use the text boxes on Slide 4. Print and glue the fact triangles underneath each envelope triangle. Slide 4 Type text in the text boxes to use under the triangle flaps. Optional: use the blank rectangles an have students fill in information or draw illustrations. Fold the upper corner down and trim off the extra on the bottoms of the page. Paper folds based on Dinah Zike’s foldables. www.dinah.com Assistive Technology Services Fairfax County Public Schools 2009 Type Text Type Text Type Text Type Text Type Text Type Text Type Text Type Text Type Text Type Text Type Text Type Text Type Text Type Text Type Text Type Text
