Document 13483601
advertisement
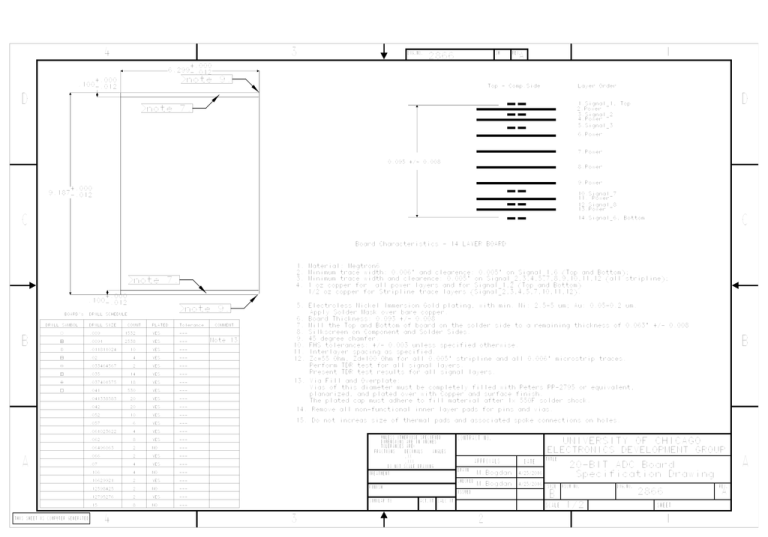
4 3 6.299 DWG.NO. SH 2866 D A +.000 -.012 note 9. +.000 .100-.012 1 REV. Top - Comp.Side Layer Order D 1.Signal_1, Top 2.Power note 7. 3.Signal_2 4.Power 5.Signal_3 6.Power 7.Power 0.095 +/- 0.008 2.550 -.012 +.000 8.Power 9.Power +.000 9.187-.012 10.Signal_7 11. Power 12.Signal_8 13.Power C C 14.Signal_6, Bottom Board Characteristics - 14 LAYER BOARD 1. Material: Megtron6 2. Minimum trace width: 0.006" and clearence: 0.005" on Signal_1,6 (Top and Bottom); 3. Minimum trace width and clearence: 0.005" on Signal_2,3,4,5,7,8,9,10,11,12 (all stripline); note 7. 4. 1 oz copper for 1/2 oz copper for Stripline trace layers (Signal_2,3,4,5,7,10,11,12). +.000 .100-.012 BOARD's all power layers and for Signal_1,2 (Top and Bottom) note 9. DRILL SCHEDULE 5. Electroless Nickel Immersion Gold plating, with min. Ni: 2.5-5 um; Au: 0.05-0.2 um. Apply Solder Mask over bare copper. 6. Board Thickness: 0.093 +/- 0.008 DRILL SYMBOL B DRILL SIZE COUNT PLATED Tolerance COMMENT 7. Mill the Top and Bottom of board on the solder side to a remaining thickness of 0.063" +/- 0.008 8. Silkscreen on Component and Solder Sides. .009 1532 YES --- .0091 2538 YES --- .011811024 10 YES --- .02 4 YES --- 12. Zc=55 Ohm, Zd=100 Ohm for all 0.005" stripline and all 0.006" microstrip traces. .033464567 2 YES --- Perform TDR test for all signal layers. .035 14 YES --- Present TDR test results for all signal layers. .037401575 18 YES --- 13. Via Fill and Overplate: .041 530 YES --- Note 13 10. FHS tolerances: +/- 0.003 unless specified otherwise. 11. Interlayer spacing as specified. Vias of this diameter must be completely filled with Peters PP-2795 or equivalent, planarized, and plated over with Copper and surface finish. .041338583 20 YES --- .042 20 YES --- .052 10 YES --- .057 6 YES --- .061023622 4 YES --- .062 8 YES --- UNLESS OTHERWISE SPECIFIED TOLERANCES ARE: .06496063 2 NO --- .066 2 YES --- The plated cap must adhere to fill material after 1x 550F solder shock. 14. Remove all non-functional inner layer pads for pins and vias. 15. Do not increas size of thermal pads and associated spoke connections on holes. .07 4 YES 4 NO --- .10629921 2 YES --- .12598425 2 NO DECIMALS ELECTRONICS DEVELOPMENT GROUP ANGLES APPROVALS .XXX 2 YES DRAWN M.Bogdan 4/25/2016 CHECKED M.Bogdan 4/25/2016 TREATMENT FINISH --- THIS SHEET IS COMPUTER GENERATED 8 4 NO ACT.WT CALC WT --- 20-BIT ADC Board Specification Drawing SIZE SCALE 3 2 A TITLE FSCM NO. DWG.NO. REV. 2866 B --SIMILAR TO .15 DATE DO NOT SCALE DRAWING ISSUED .12795276 UNIVERSITY OF CHICAGO .XX --- .106 CONTRACT NO. DIMENSIONS ARE IN INCHES FRACTIONS A B 9. 45 degree chamfer. 1/2 A SHEET 1

