CFlinchum.TechLP
advertisement
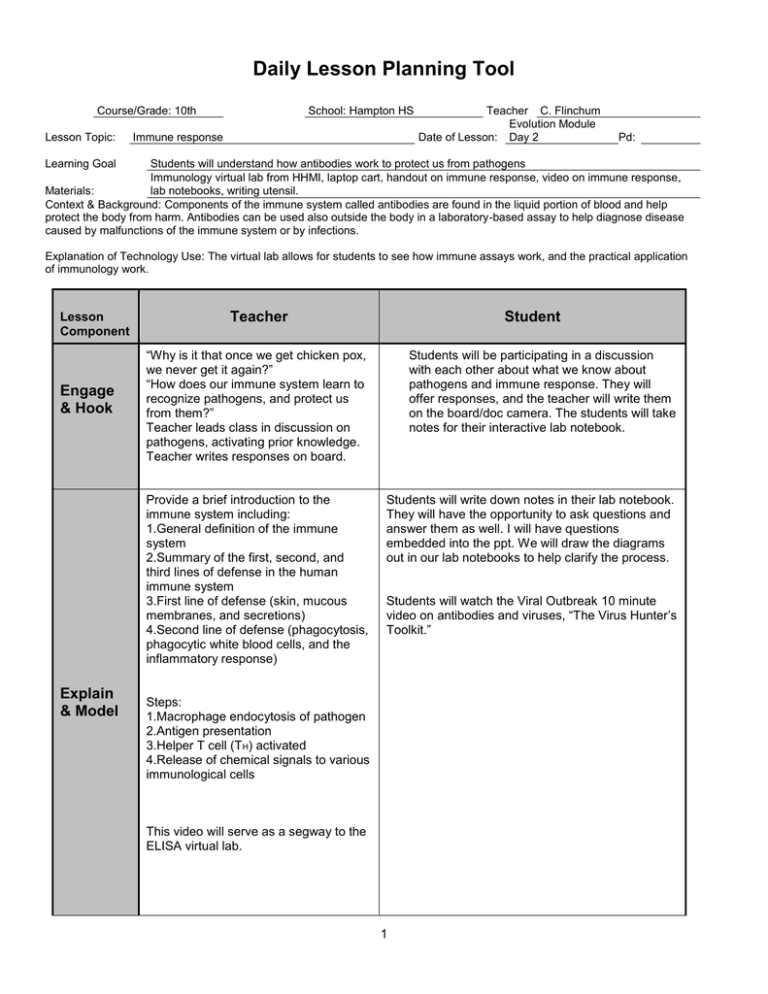
Daily Lesson Planning Tool Course/Grade: 10th Lesson Topic: School: Hampton HS Immune response Teacher C. Flinchum Evolution Module Date of Lesson: Day 2 Pd: Learning Goal Students will understand how antibodies work to protect us from pathogens Immunology virtual lab from HHMI, laptop cart, handout on immune response, video on immune response, Materials: lab notebooks, writing utensil. Context & Background: Components of the immune system called antibodies are found in the liquid portion of blood and help protect the body from harm. Antibodies can be used also outside the body in a laboratory-based assay to help diagnose disease caused by malfunctions of the immune system or by infections. Explanation of Technology Use: The virtual lab allows for students to see how immune assays work, and the practical application of immunology work. Lesson Component Engage & Hook Explain & Model Teacher Student “Why is it that once we get chicken pox, we never get it again?” “How does our immune system learn to recognize pathogens, and protect us from them?” Teacher leads class in discussion on pathogens, activating prior knowledge. Teacher writes responses on board. Students will be participating in a discussion with each other about what we know about pathogens and immune response. They will offer responses, and the teacher will write them on the board/doc camera. The students will take notes for their interactive lab notebook. Provide a brief introduction to the immune system including: 1.General definition of the immune system 2.Summary of the first, second, and third lines of defense in the human immune system 3.First line of defense (skin, mucous membranes, and secretions) 4.Second line of defense (phagocytosis, phagocytic white blood cells, and the inflammatory response) Students will write down notes in their lab notebook. They will have the opportunity to ask questions and answer them as well. I will have questions embedded into the ppt. We will draw the diagrams out in our lab notebooks to help clarify the process. Students will watch the Viral Outbreak 10 minute video on antibodies and viruses, “The Virus Hunter’s Toolkit.” Steps: 1.Macrophage endocytosis of pathogen 2.Antigen presentation 3.Helper T cell (TH) activated 4.Release of chemical signals to various immunological cells This video will serve as a segway to the ELISA virtual lab. 1 I will have all the students write down the steps in their interactive notebook as well, just as they would in a research lab. This will force them to pay attention instead of just clicking through. There is a worksheet as well, which they will paste into their notebook and fill out. Explore & Apply I will circulate and answer questions, as well as prompt discussions. Students will get out the laptops and use the HHMI Immunology Virtual lab to see how an ELISA assay is done. This will highlight how antibodies work, as well as give them a practical application of immunology work. Students will work in pairs to efficiently work through the lab and answer the questions on the worksheet, including drawing diagrams of what is happening. “How would you mix the serial dilutions?” “Why do we discard the tip each time?” “How would you make a 1:25 dilution?” Students will turn in their lab notebooks. Students will be graded mostly on completion of their worksheet. Evaluate & Close Students will discuss what worked and what didn’t for them. We will tie in Nature of Science as well. Students will fill out an exit ticket. We will close by talking about what they found difficult about the lab, and what they were surprised by. Exit Ticket: “Name two types of information an ELISA assay could be used to gain about a patient.” Sara Brandt July 2011
