Exchange 2010 Unified Messaging * Ringing to Other Telephony
advertisement
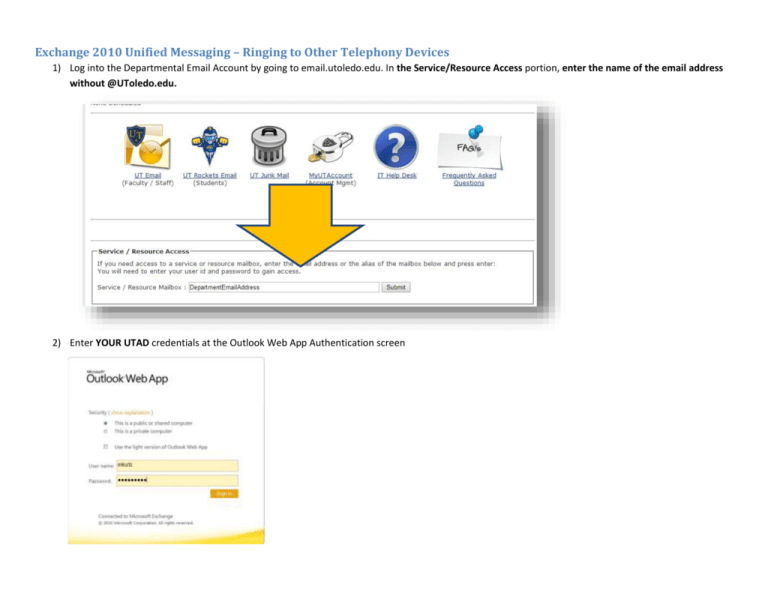
Exchange 2010 Unified Messaging – Ringing to Other Telephony Devices 1) Log into the Departmental Email Account by going to email.utoledo.edu. In the Service/Resource Access portion, enter the name of the email address without @UToledo.edu. 2) Enter YOUR UTAD credentials at the Outlook Web App Authentication screen 3) Once logged into the department email box, select options in the top right hand corner Options 4) In the Options menu, click See All Options… Click See All Options 5) On the left hand side, click Phone Click Phone ice Mail 6) Click the Voice Mail Icon Click Voice Mail 7) Once Voice Mail is selected, click New Rule 8) Name the rule “working – YOUR first Name” hours. *Note-working default is set to Monday-Friday from 8AM-5PM. Please see appendix A for information changing default working hours. 9) Under add conditions, click “If it is during this period”. Ensure Working Hours is selected. Click Apply. 10) Under Add Actions the Caller Can select, click on Find me at the following numbers. 11) In the first box, type “Immediate Assistance” and ensure 1 is selected from the drop down menu. Two phone numbers can be added. Be sure 9 is in front of your number you wish to forward out to. If the first number is not answered within 25 seconds, another phone number can be called. If needed, the number of seconds can be changed, if desired. After completed, click Apply. 12) Once Apply has been clicked, click Save and Close to lock the new rule in. 13) Now that you have a rule for working hours, you need to set a rule for non-working hours. In the Voice Mail settings page, click New Rule. 14) Name the rule “non-working – YOUR first Name” 15) Under add conditions, click “If it is during this period”. Ensure Non-Working Hours is selected. Click Apply. *Be advised when selecting Non-working hours, this will ring another phone outside of what your working hours is defined. Click Apply. 16) Under Add Actions the Caller can select, click on Find me at the following numbers. 17) In the first box, type “Immediate Assistance” and ensure 1 is selected from the drop down menu. Two phone numbers can be added. Be sure 9 is in front of your number you wish to forward out to. If the first number is not answered within 25 seconds, another phone number can be called. If needed, the number of seconds can be changed, if desired. After completed, click Apply. 18) Once Apply has been clicked, click Save and Close to lock the new rule in. Appendix Defining Working Hours in the Outlook Web App 1) Log into the specified mailbox in which you want to change the working hours. 2) Click Options > See All Options… 3) Click Settings (Left hand side) then click Calendar. At this point, define the working hours of your choice. When completed, click the Save button at the bottom of the page.
