as Word doc - The Virtual Observatory
advertisement

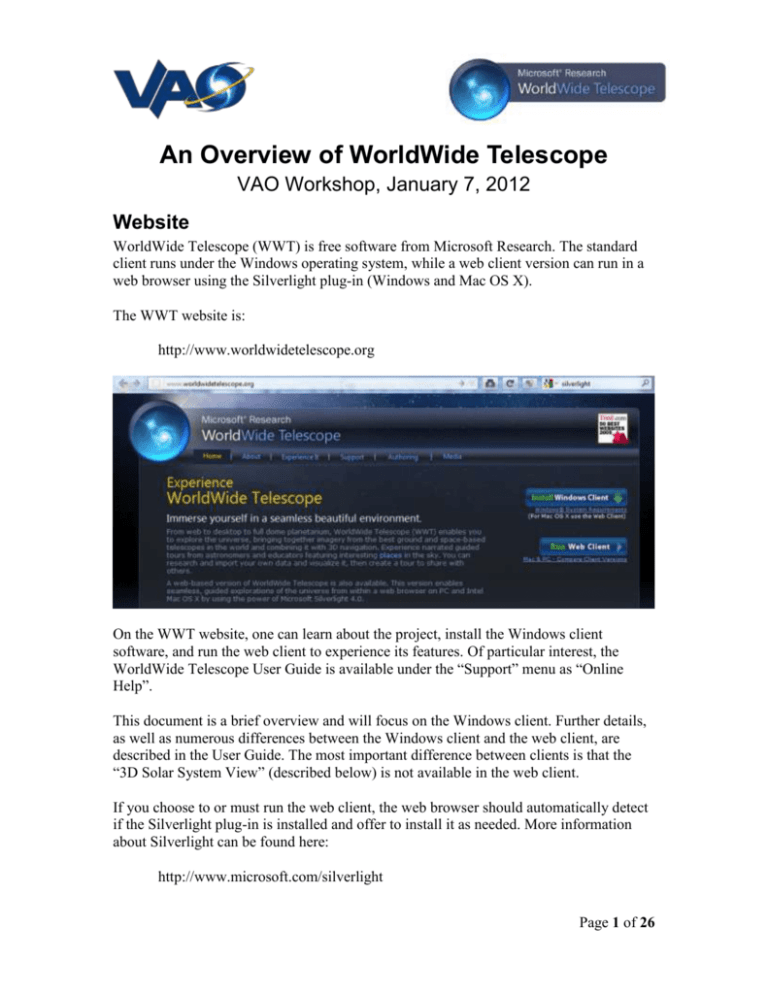
An Overview of WorldWide Telescope VAO Workshop, January 7, 2012 Website WorldWide Telescope (WWT) is free software from Microsoft Research. The standard client runs under the Windows operating system, while a web client version can run in a web browser using the Silverlight plug-in (Windows and Mac OS X). The WWT website is: http://www.worldwidetelescope.org On the WWT website, one can learn about the project, install the Windows client software, and run the web client to experience its features. Of particular interest, the WorldWide Telescope User Guide is available under the “Support” menu as “Online Help”. This document is a brief overview and will focus on the Windows client. Further details, as well as numerous differences between the Windows client and the web client, are described in the User Guide. The most important difference between clients is that the “3D Solar System View” (described below) is not available in the web client. If you choose to or must run the web client, the web browser should automatically detect if the Silverlight plug-in is installed and offer to install it as needed. More information about Silverlight can be found here: http://www.microsoft.com/silverlight Page 1 of 26 User Interface Essentials Upon starting the WWT Windows client, the screen will appear like this: Top Panel – Along the top are tab buttons (“Explore”, “Guided Tours”, …) that bring up sets of controls in the Top Panel. Controls in the Top and Lower Panels are the basic ways to select what is displayed in the View Panel. Each tab has a menu that can be accessed by clicking the small down arrow beneath the tab name. Most of these menu items are for advanced use. View Panel – The view of the sky (or planet or data or …) is presented here. Note that one often has to click in the View Panel to activate it before navigating around the sky. Lower Panel – More controls. Start with the viewing menus on the top left side of the Lower Panel. Page 2 of 26 The first menu, labeled “Look At”, determines the mode of display in the View Panel. The second one, labeled “Imagery”, chooses the subject imagery for the mode. For this overview, the selections should be “Sky” and “Digitized Sky Survey (Color)”. Click the down arrows to change selections if needed. Next, check out the navigation display on the right side of the Lower Panel: Listed at the top center is the constellation being viewed. When several constellations are onscreen, the constellation of the center point of the screen is displayed. The sky is divided into 88 constellations; many will be unfamiliar. Beneath the constellation name is a graphical depiction of the View Panel (blue rectangle) relative to the constellation (yellow outline). At the top right is the field of view (FOV) FOV is measured from the top of the screen to the bottom and is expressed in degrees, minutes, and seconds of arc DD:MM:SS. There are 360 degrees in a circle, 60 arc minutes in 1 degree, and 60 arc seconds in 1 arc minute. The maximum FOV is 60 degrees. In the bottom right is the download progress bar. WWT cannot store the vast amount imagery it displays and will dynamically load imagery from its servers as the user explores. This progress bar shows the status of those downloads. Downloaded imagery is cached to hard disk for later use. On the left of the navigation display is a graphical representation of the View Panel (yellow rectangle) on the Celestial Sphere (gray). Below the Celestial Sphere are the coordinates of the center point in Right Ascension (RA) and Declination (Dec). RA and Dec are similar to longitude and latitude on Earth, but utilizing the units of Astronomy. Other user interface elements will be introduced as needed during later parts of this document. Page 3 of 26 WWT Guided Tours WWT exploration of the universe is possible almost immediately upon starting the program. Simply click the “Guided Tours” tab in the Top Panel. WWT checks its servers for the current content, which can take a little while. Eventually, a list of “Tours” appears in the Top Panel. This list is scrollable using the arrows in the top right. Each of the icons represents a folder of Tours. One could start with the “Learning WWT” folder, but why not just jump right in? Click the “Nebula” collection. A list of tours about nebulae appears. The white “T” in the upper right indicates a tour. Place the mouse over any tour icon and information about that tour and its author drops down. Click the round blue play button in the drop down and the tour will start. NOTE: Images used in a tour may not download as quickly as the tour needs them. Playing a tour through once should cache all the necessary imagery to hard disk. The second play is often smoother and more complete than the first. Page 4 of 26 Tours can be paused by moving the mouse into the Top Panel area of the screen. A round blue pause button appears on the left side of the Top Panel. While paused, one can interactively use WWT to explore. Perhaps a longer look at the tour imagery is needed or maybe there is an interesting sight onscreen that is not discussed in the tour. Click the round blue play button to continue the tour. You will want to move the mouse off of the Top Panel to get back to full screen tour playback. To stop the tour entirely, hit the “Esc” escape key on the keyboard. There is now an extra tab in the Top Panel. Hit the “X” in the top right of the tab to remove it. In the “Guided Tours” tab, use the “Up Level” icon or click the word “Tours” in the upper left to return to the top level list of tour folders. Exploring the wide variety of topics and tours with folders can take quite some time. All of these tours are running within the WWT software and showcase the sights available using the software interactively. Don’t forget to peruse the “Learning WWT” tours. These tours are narrated and dynamic presentations of much of the information in this Overview, as well as other aspects of WWT not covered here. Page 5 of 26 Basic Sky Navigation Panning – The basic user interaction is simply “dragging the sky”. Click in the View Panel to make it active. [This instruction will not be repeated below, but may be required any time a click outside the View Panel has occurred.] Click and hold while moving the mouse to pan across the sky. On the keyboard, use the arrow keys to pan. Try to find a familiar constellation, checking the names in the navigation display. The constellation Leo (the lion). Pan to the North or South Celestial Pole. Notice that when a pole is reached, the pan motions become rotations around the poles. Panning is not relative to the screen, but is along longitude (RA) and latitude (Dec) lines of the Celestial Sphere. Zooming – The real power of WWT is the dynamic detail of zooming into the sky. If your mouse has a scroll wheel, scroll forward to zoom into a region of the sky. Scroll backward to zoom out. On the keyboard “Page Down” zooms in, “Page Up” zooms out. Note the detailed imagery that is loaded during zooms. Some patience is required while the imagery downloads. For the Digitized Sky Survey, the resolution of the images is about 1 arc minute (see the FOV indicator in the navigation display). Other imagery will have greater or lesser resolution. Page 6 of 26 A sequence of zooming into the Horsehead Nebula Rotation By default, the View Panel is oriented with Celestial North/South as up/down. To rotate the orientation click the middle mouse button (often the scroll wheel) and drag left/right. On the keyboard, use Alt+Left/Right Arrow. The Milky Way in default orientation (left) and rotated horizontal (right). Reset If lost, one can reset the sky view (RA = Dec = 0, 60 deg FOV, North up). Click on the down arrow below the “View” tab in the Top Panel. Select “Reset Camera”. Page 7 of 26 Searches & Highlights Searching Searches are easiest by example. Click the “Search” tab in the Top Panel. In the upper left text box, type “Orion”. An image-based menu of highlights will appear. These highlights may include constellations, bright stars, images, and tours. One can page through the list using the scroll arrows in the upper right. Click on the image for the constellation “Orion” as shown below. The program will pan and zoom to center the constellation in the View Panel. Move the mouse over any of the Highlights in the Search results, and its location will be marked by a white circle and its name. Click the checkbox next to “Plot Results” and all highlights will be marked with circles. Page 8 of 26 Highlights Highlights can be found using text searches as described above. However, text matches can miss highlights that use a different name for an object. For example, the Orion Nebula is also known as NGC 1976 and Messier 42. The search terms “Orion Nebula”, “NGC 1976”, and “M42” each produce different sets of results. A geographical search for Highlights is shown in the Lower Panel. These results show all highlights within the View Panel. This list of results can be very long, and scroll arrows are available again on the top right. Geographical search results in the Lower panel. Also note the up arrow above the left/right scroll arrows. This up arrow will expand the Lower Panel to show several rows of highlights. Click it again (now a down arrow) to compress back to one row. Expanded geographical search results in the Lower Panel. NOTE: The other down arrow works independently and compresses/expands the entire Lower Panel. Lower Panel compressed. As with text search results, mousing over any of these icons will show its location on screen. Clicking on any result will pan and zoom to the highlight. Double clicking on a result will jump directly without pan and zoom. Page 9 of 26 Highlight images are overlays on the background imagery. Click on one of the highlight images labeled “Orion Nebula”. To the right of the viewing menus is an “Image Crossfade” slider. Drag the slider to the left and the highlight image fades out. Orion Nebula image overlay (left) and faded out (right) Note that mousing over a highlight when zoomed in will show both the location and the image. This is an excellent way to compare two images. Especially striking are images taken in two different wavelengths (like visible versus infrared). Mousing over the Messier 42 highlight overlays that image on top. Page 10 of 26 Background Imagery So far, this discussion has only considered the Digitized Sky Survey as background imagery. Click the down arrow on the right of the Imagery menu to explore other possible backgrounds. Click the button with the letter “i” inside a circle to get a description of the imagery. See what the Orion Nebula looks like in infrared with the “2Mass: Imagery (Infrared)” and in x-rays with the “RASS: Rosat All Sky Survey” backgrounds. Be sure to fade out the highlight image to see the background. Orion Nebula region in infrared (left) and in x-rays (right). Some background imagery does not have data across the entire sky, so the region around the Orion Nebula will be an empty black. Other background imagery is relatively low resolution. Zoom back out to 60 degree FOV and try the “SFD Dust Map (Infrared)” and the “Hydrogen Alpha Full Sky Map”. Panning around the sky using different background imagery illustrates the new views available with multi-wavelength astronomy and demonstrates the need for astronomers to develop “virtual observatories” that can compare data from many different telescopes within one interface. Return to the “Digitized Sky Survey” background before proceeding. Page 11 of 26 Explore – Collections Click the “Explore” tab in the Top Panel. A list of “Collections” appears in the Top Panel. As with search results, this list is scrollable using arrows in the top right. Click the “Constellations” collection. It is an alphabetical list of all 88 astronomy constellations. How many do you recognize? The list of constellations as a single row is quite long. Click the down arrow at the bottom center of the Top Panel to expand the list to several rows. Click that same arrow (now an up arrow) to collapse the list back to one row. Expanded Top Panel. Click a constellation highlight as a quick way to navigate to that part of the sky. Note that the “Big Dipper” is not in this list. Though many people think it is a constellation, it is just a pattern within the constellation of “Ursa Major”. Likewise, the “Little Dipper” is a pattern within the constellation “Ursa Minor”. Use the “Up Level” highlight or click the word “Collections” in the upper left to go back to the top level Collections list. Next, try clicking the “Solar System (Sky)” collection. Page 12 of 26 As you may expect, the Sun, Moon, and planets are listed, along with Pluto and the Galilean moons of Jupiter. Not sure why Earth is listed, as it doesn’t appear in the sky as viewed from Earth. Click on the Moon and you will notice that it is displayed at the proper phase for the Observing Time (discussed below under “View”). Click on Jupiter and zoom out a bit. The Galilean moons will be in their correct orbital positions around the giant planet. Page 13 of 26 The Galilean moons of Jupiter (montage image). The “All-Sky Surveys” collection includes the background imagery discussed above, along with many other large area observation data sets. Other collections are sets of images from a telescope, an observer, or in a common wavelength band. Try clicking the “Hubble Studies” collection. The first several highlights are not individual images, but folders of images. Click on the “Nebulae” folder. Find and click on the image labeled “Giant Hubble Mosaic of the Crab Nebula”. This Hubble image contains over 30 million pixels. Zoom into the Crab Nebula image and the fine details of the image are dynamically loaded. Page 14 of 26 Full view (left) and fine detail (right) of the Crab Nebula from Hubble. All the pixels of Hubble’s highest resolution images are available in WWT. The last four collections are “Planets/Moons”, “Earth”, “Mars”, and “Panoramas”. These collections use alternate viewing modes of “Earth”, “Planet”, or “Panorama” as selected in the “Look At” menu (described below under “Viewing Earth, Planets, and More”). After exploring these collections, it will be necessary to re-select “Sky” from the “Look At” menu. Like the “Guided Tours”, the collections can take quite some time to explore. Page 15 of 26 View – Controlling Display Elements Click the “View” tab in the Top Panel. Four sets of controls appear. For this section, make sure that “Sky” is selected on the “Look At” menu. Zoom out to a 60 degree FOV. Or simply use the “Reset Camera” menu item. Constellation Lines + Overlays Using the left checkboxes, one can turn on/off the display of constellation stick figures and boundaries. Equatorial grid shows the Celestial Sphere with lines of Right Ascension (longitudinal) and Declination (latitudinal). The Reticle/Crosshairs marks the center of the View Panel. With overlays turned on, sky navigation is easier. The Field of View Indicator draws a shape (usually a rectangle) in the center of the View Panel as a visual indicator of zoom level. It can be customized to match the FOV of a telescope by clicking the “Setup” button. Page 16 of 26 The FOV Indicator for Hubble’s WFPC2 camera is shown atop Hubble’s image of the “Pillars of Creation” in the Eagle Nebula. The Ecliptic/Orbits shows the path of the Sun across the sky, known as the “ecliptic”. All of the planets will be found near the ecliptic. The Sun and five planets along the ecliptic on May 4, 2000 (montage image). Page 17 of 26 Observing Location and Time These controls show the view from the given place on Earth at the given time. Here’s an example of a solar eclipse. Use the Explore or Search tabs to find the Sun. Click the down arrow in the top right of the Observing Time controls. Set the time to July 22, 2009 at 1:12 AM. Check “UTC” and click “OK”. Next click the “Setup” button in the Observing Location controls. Choose “World Cities” as the Data Set. Scroll down to find China cities. Select “Shanghai, China” from the list and click “OK”. Page 18 of 26 The View Panel should now show a solar eclipse in progress, about 25 minutes before totality. In the Observing Time controls, click the play button (green right arrow) to make sure time is moving forward in “Real Time”. Instead of waiting 25 minutes, click the fast forward button twice and time will progress at “x10” and then “x100” – almost two minutes every second. As the eclipse approaches totality, click the play button twice to slow time to “x10” and then to “Real Time”. Watch what happens around 1:38:20 AM. Time can be paused, sped up, and reversed to minutes, hours, months, and years passing per second. Each fast forward click increases the speed of time, and each play click decreases it. Like an automobile, it generally works best if you slow down or stop before shifting into reverse. WARNING: It is easy to click an extra fast forward and have things go haywire on screen. It may take patience and practice to get the time sequence right. Pause can be your best friend. Page 19 of 26 Viewing Earth, Planets, and More To access other viewing modes, click on the down arrow next to the “Look At” selection in the Lower Panel. Select “Earth” from the “Look At” menu. The viewing mode here is very much like what is found in other programs like Microsoft’s Virtual Earth or Google Earth, so our discussion will be brief. Pan around the globe, zoom into your house, visit foreign cities, etc. A zoom into the Space Telescope Science Institute in Baltimore. Note that a 3D terrain map is employed. Press “Alt” while dragging up/down to tilt the view and see elevation. As with all 3D globes, surface elevation is greatly exaggerated compared to planet size. The Grand Canyon (left) and Mt Everest (right) in 3D. Page 20 of 26 Select “Planet” from the “Look At” menu. The Imagery selection here includes both planets and large moons. Visiting solar system highlights, such as those shown below, can be fun. The surfaces in the solar system shown includes rock, ice, and gaseous atmospheres. Olympus Mons on Mars (left) and the Great Red Spot on Jupiter (right). The last entry in the “Imagery” menu is “Mandelbrot”, a fractal that illustrates the repeating nature of its patterns upon zooming. Finally, select “panorama” from the “Look At” menu. The Imagery selection features a couple panoramas from the Moon and a large number from Mars missions. Apollo 12 landing site on the Moon (left) and a Pathfinder view of Mars (right). Pan and zoom around these high resolution wrap-around images. Page 21 of 26 3D Solar System View Select “Solar System” from the “Look At” menu. Note that his viewing mode is only available in the Windows client and not in the web client. This viewing mode and its navigation are a bit more complex than the others. The initial view shows the solar system centered on the Sun. Both navigational aids and 3D content can be switched on/off from the 3D Solar System controls of the “View” tab in the Top Panel. It is sometimes helpful to uncheck “Show Stars”, as background stars can distract from viewing faint/small objects in the solar system. The “Milky Way’ and “Cosmos” options are large scale 3D data sets of our galaxy and many thousands of other galaxies. The “Cosmos” data are taken from surveys of galaxies that cover particular regions of the sky. As such, they only fill out selected fan-shaped volumes. Page 22 of 26 NOTE: The view is always centered within the solar system, so one can only rotate the stars, Milky Way, and the Cosmos in 3D. One cannot fly to a particular star or galaxy and zoom in on it. Milky Way (left) and Cosmos (right) 3D data sets. “Planets” and “Orbits” should usually be checked to navigate the solar system. “Asteroids” is a very large 3D data set, but it demonstrates the wide distribution of asteroids across the solar system. It can significantly slow down the response time of the program. Use only when needed. “Minor Orbits” shows the orbits of the moons (though not the Moon). “Lighting” produces correct shadows that are required for examining phenomena like phases of the Moon. With Lighting off, planets and moons are uniformly lit. Lighting turned off (left) and turned on (right). Page 23 of 26 Navigation in the 3D Solar System view can be tricky. What was panning in Sky mode is now rotating about a central point. The center is given by the “Tracking” info in the middle of the Lower Panel. The right side of the Lower Panel in 3D Solar System viewing mode. The object being tracked is also shown in the navigation display. Instead of FOV information, the navigation display shows distance from the tracked object. The units of distance are kilometers (km), Astronomical Units (au), light-years (ly), megaparsecs (Mpc), and gigaparsecs (Gpc). Zooming speed is proportional to the object distance: going slower when closer and faster when farther from the tracked object. The navigation display also has a slider for “Planet Size”. When shown actual size, planets are miniscule on the scale of the solar system. NOTE: This slider also controls the scale of “Minor Orbits” (moons): such that large planet sizes can produce moon orbits larger than the solar system. Ideas for Exploring in 3D Use the highlights in the Lower Panel or the Solar System collection to navigate amongst the planets. Examine Pluto’s orbit relative to the orbits of the planets. Use the Observing Time settings to watch planets and moons progress through their orbits over months to years to centuries. Follow the Moon’s orbit with Lighting to understand its phases. Is there a “dark side” of the moon? Examine the moon systems around Jupiter and Saturn. Notice both the co-planar orbits of the regular moons (generally larger and closer) and the almost randomly oriented orbits of the irregular moons (generally smaller and more distant). Find a familiar constellation (like Orion) and watch how it distorts as the camera zooms out farther from the Sun. Page 24 of 26 Orion seen from the solar system (left) and about 100 light-years away (right). Page 25 of 26 Page 26 of 26


