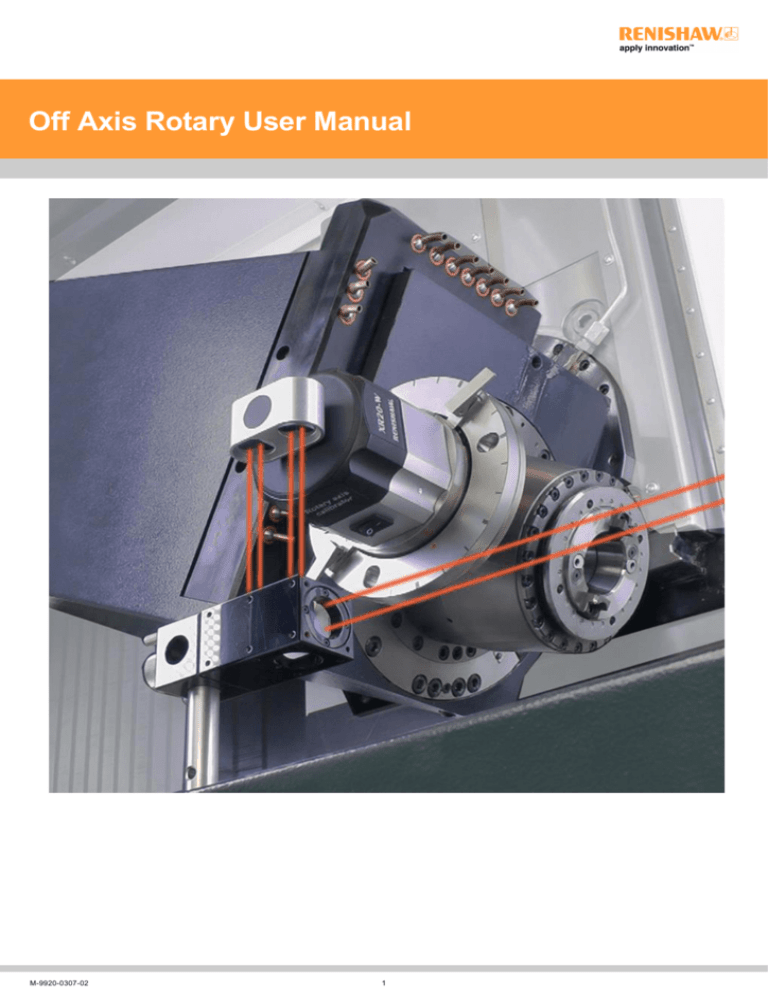
Off Axis Rotary User Manual
Off Axis Rotary User Manual
M-9920-0307-02
1
Document information
Disclaimer
RENISHAW HAS MADE CONSIDERABLE EFFORTS TO ENSURE THE CONTENT OF THIS MANUAL IS CORRECT AT THE DATE
OF PUBLICATION BUT MAKES NO WARRANTIES OR REPRESENTATIONS REGARDING THE CONTENT. RENISHAW EXCLUDE
LIABILITY, HOWSOEVER ARISING, FOR ANY INACCURACIES IN THIS DOCUMENT.
Renishaw reserve the right to make changes to this manual and to the product described herein without obligation to notify any person of
such changes.
Copyright
Copyright ©2013­2014 Renishaw. All rights reserved.
This help manual may not be copied or reproduced in whole or in part, or transferred to any other media or language, by any means
without the written prior permission of Renishaw.
The publication of material within this document does not imply freedom from the patent rights of Renishaw plc.
Registered trademarks
RENISHAW® and the probe emblem used in the RENISHAW logo are registered trademarks of Renishaw plc in the UK and other
countries.
apply innovation™ is a trademark of Renishaw plc.
Microsoft, Windows, Windows XP, Vista, Windows 7, Word, DirectX, and Internet Explorer are either registered trademarks or
trademarks of Microsoft Corporation.
IBM is a registered trademark of International Business Machines Corporation.
The Bluetooth® word mark and logos are registered trademarks owned by Bluetooth SIG, Inc and any use of such marks by Renishaw® is
under license.
All other brand names and product names used in this manual are trade names, service marks, trademarks, or registered trademarks of
their respective owners.
M-9920-0307-02
2
Introduction
About off axis rotary
Traditionally, rotary axis calibration has required that the XR20-W is mounted on the centre of the machine's rotational axis. This can lead
to difficulties on machines where access to the Centre Of Rotation (C.O.R.) is limited, resulting in complex brackets and alignment
procedures being required to calibrate the axis. This problem is often encountered on machine configurations such as trunnion and swivel
head. A solution to this is to mount the XR20­W ‘Off axis' (so that it is not mounted on the C.O.R) and perform a test which synchronises
linear and rotary moves so that the laser beam alignment is maintained throughout a test. This can significantly simplify the mounting
hardware and set-up requirements.
This manual explains the use of 'Off axis rotary software' to enable this solution to be used.
Off axis rotary software allows the user to:
Easily calculate the offset distance between the C.O.R. of the XR20-W and the C.O.R.of the rotary axis
(required to generate a test part program)
Generate a test part program (which synchronises rotary axis and linear axis moves to maintain laser beam alignment)
Remove any contributory, linear axis angular error from the observed rotary axis results (to give 'clean' results for the rotary axis).
RotaryXL software is used to capture the angular positioning error of the rotary axis and is covered in the RotaryXL manual.
LaserXL software is used to capture the angular error of the linear axis and is covered in the LaserXL manual.
Principles of operation
The principle of operation is to use synchronised moves of machine linear and rotary axes. As shown above, for each rotary axis move
there is a corresponding linear axis movement. Note that even for identical angular axis movements the linear axis movement intervals will
be unequal to ensure that the interferometer and the XR20-W maintain alignment.
M-9920-0307-02
3
Because one of the optics is fixed to the moving linear axis the observed angular axis data will also include error terms from the linear
axis, for example the angular error shown below.
For this reason, additional and separate angular measurements should also be taken along the linear axis at the same stop positions as
used during the initial synchronised moves. The two error files can then be combined to remove the effect of the linear axis angular errors
and leave a true representation of the rotary axis rotational accuracy.
In order to create a program with synchronised moves it is necessary to know the distance between the C.O.R. of the XR20-W and the
C.O.R. of the rotary axis. This is required so that the machine control knows how far to move the linear axis for any given rotational move,
to avoid laser beam break.
This distance is automatically generated by the software from data collected using the setup procedure explained in the Offset
calculation section.
M-9920-0307-02
4
System components
Off axis rotary software utilises standard XR20-W hardware and standard XL-80 hardware. For details please consult the RotaryXL and
LaserXL help.
To complete an Off-axis rotary calibration the following equipment will be required:
XL-80 laser system and LaserXL software
XR20-W rotary axis calibrator and RotaryXL software
Angular optics kit
Off axis rotary software
In addition the XR20-W's axis of rotation must be mounted parallel to the axis of rotation under measurement. Renishaw can provide the
XR20­W 90° bracket to achieve this requirement or the user can design their own fixturing. Design suggestions and specifications can be
found in the mounting hardware section.
Safety
Warning: This software generates CNC part programs that could cause a machine to collide or malfunction. Generated part
programs must be checked by experienced machine tool programmers before use. All programs should be checked before running
and performed at a low feed for the first time.
The XR20-W rotary axis calibrator system is designed to be used for testing machine tools. As such, the user will need to prepare and run
a part program which moves the machine as required. DO NOT ROTATE THE SPINDLE. It is assumed therefore that the user is
thoroughly familiar with the operation of the machine tool and its controller and knows the location of all emergency stop switches. Also, if it
is necessary to operate the machine with the guards or any safety feature removed or disabled, it is the responsibility of the operator to
ensure that alternative safety measures are taken in line with the machine manufacturer's operating instructions or relevant codes of
practice. Safety procedures should be in accordance with the user's risk assessment.
The XR20-W device works in conjunction with a Renishaw Laser System. Before using the laser system, please read the safety section of
the Laser Measurement System Manual.
The XR20-W can reflect the laser beam from the laser around the room as it rotates. Consideration should be given to other users working
in the area.
If this equipment is used in a manner not specified by the manufacturer, the protection provided by the equipment may be impaired.
M-9920-0307-02
5
Getting started
To complete a calibration of the rotary axis 'off axis' it is necessary to perform a number of steps in sequence. These can be summarised
as follows:
1
Setting up
the hardware
Set up hardware
Identify the rotary and linear axes to be moved then mount and align the hardware.
2
Setting up
the software
Measure 'set up' parameters
Take measurements using the XR20-W and the laser to calculate the offset between the C.O.R. for the
rotary axis and C.O.R. for the XR20-W.
3
Setting up
the software
Generate NC program
Use Off axis rotary to generate a part program for the machine.
4
Setting up
the software
Capture rotary data
Use RotaryXL and the XR20-W to measure the performance of the rotary axis.
5
Setting up
the software
Capture angular data
Use LaserXL and the XL-80 to measure the performance of the linear axis.
6
Setting up
the software
Produce axis analysis
Use Off axis software to remove any angular error in the linear axis (Step 5) from the observed rotary axis
results (Step 4). This will give 'clean' results for the rotary axis.
M-9920-0307-02
6
Software installation
This section explains how to install Off axis rotary software on your PC.
Before installing please check that the PC meets the minimum specification, including the operating system.
To install the Off axis rotary software
1. Switch on your computer, wait for it to boot up into Windows, then insert the CD-ROM disk into the CD drive. The index should
now run automatically. If the index fails to autorun, select Start > Run from your computer's task bar to access the Run dialog box.
Click the Browse button and use Browse dialog box to access the Index.htm file on the installation CD-ROM disk. Double click
Index.htm.
2. Select Install Off axis software to start the software installation process.
3. This wizard is a set of dialogues which automatically leads you step-by-step through the installation process. Follow the
instructions on each screen and click Next to go to the next stage. Click Cancel to exit the installer.
To access the Off axis rotary software
1. To access Off axis rotary software select Start > All Programs and then browse for the software.
M-9920-0307-02
7
Setting up the hardware
Warning: Before fixing XR20-W or the interferometer, move the machine to the position at which the components will be closest
together. All setup and alignment should be performed at this position to avoid the potential for collisions when running the tests.
Mounting the XR20-W
Details of optical configurations for different machine types can be found in the optical setup section. It is important to ensure the axis
under test is parallel with the axis of the XR20-W.
Parallelism of the axis under test and the XR20-W axis is controlled by two factors:
1. The design and tolerance of any mounting bracket for the XR20­W. A bespoke XR20­W 90° bracket is available to assist with
mounting requirements associated with this type of measurement.
2. The alignment of the bracket with respect to the axis under test.
XR20‐W 90° bracket installation (Renishaw accessory)
A Renishaw solution to the mounting requirements during off axis testing is available. It features a precision machined 90° bracket held to
manufacturing tolerances suitable for 'off axis' use. Mounting to the machine can be achieved by the magnetic mounting system included
with the kit or via direct mounting to the machine through fixturing holes in the bracket.
The bracket is also useful for solving 'on axis' mounting difficulties on trunion type machines as shown below.
M-9920-0307-02
8
1. Determine the most suitable method of attaching the bracket
to the machine under test. Attach the three off magnet
assemblies to the base of the bracket or source required
fasteners and T-nuts to suit the machine (if required).
2. Locate bracket only onto the machine. With the bracket
secured to the machine, align the red ball on the outer
diameter of the XR20-W with the matching red ball on the
bracket.
3. To ensure alignment of the bracket is correct it is best to use
a 'dial-type indicator' (DTI) to measure and minimise the run
out of the mounting face against the linear axis as shown
below.
To minimise the test errors relating to the misalignment ensure
that the DTI reading is less than 60µm across the bracket (from
A - B) and down the face of the bracket (B - C).
4. Attach the XR20-W to the bracket using the fasteners and
tooling supplied, ensuring it is evenly seated and flush to the
mating face.
NOTE: The outer face of the bracket is also suitable for
mounting the product, however, longer fasteners will be
required in order to achieve this which are not supplied.
M-9920-0307-02
9
For occasions when the mounting bracket is not appropriate, requirements for bracket design and manufacturer are available in Appendix
A: Mounting hardware design. In some cases it may not be possible to achieve the mounting tolerance specified due to geometry
inaccuracies in the bracket design or in the mounting setups. As error between the parallelism of the measurement axis and XR20-W axis
increases, the induced error in the XR20-W measurement also increases. The chart below shows the error from the XR20-W
measurement that will be induced for a given parallelism tolerance. Note: depending upon the sign of this error, the measurement may
make an axis appear worse or better than in reality.
Mount the interferometer
Details of optical configurations for different machine types can be found in the optical setup section.
Mount the magnetic base / pillar / interferometer onto the spindle / machine bed as required for the type of machine under test. For best
measurement accuracy ensure that the interferometer is mounted as rigidly as possible with the minimum number of extension bars.
M-9920-0307-02
10
Optical alignment
1. Nominally position the XL-80, XR20-W and interferometer as described in the previous section.
2. Place the bubble level onto the laser and adjust the tripod to ensure it is level.
3. Move the rotary and linear axes to the position where the XR20-W comes closest to the interferometer.
4. If necessary adjust the positions of the components and the axes to ensure a collision cannot occur.
5. Align the laser to the linear axis across the full range of travel for the test setup.
6. Hold a plane mirror against the face of the interferometer and rotate the interferometer so the beam returns into the output aperture
of the laser. Note: the laser may go unstable at this point.
7. Re check the alignment across the linear axis and translate the XL-80 or interferometer to correct any misalignment caused during
the previous step.
8. Position the rotary axis at one extreme of rotary travel for the test to be run.
9. Move the linear axis so the interferometer is inline with the XR20-W and check full signal strength is achieved.
10. Move the machine to the opposite extreme of travel for the test setup and repeat the two steps above.
This completes the optical alignment procedure.
M-9920-0307-02
11
Setting up the software
Off axis rotary software allows the user to generate the part programs for both rotary and linear tests needed to complete the off axis
testing process. The rotary test part program will synchronise the rotary and linear position moves so that the beam is not broken in
between moves.
The steps to produce a part program are as follows:
1.
2.
3.
4.
5.
6.
Produce an RTA file to describe the test setup using RotaryXL
Define the CNC control parameters
Calculate the offset between the XR20-W and the rotary axis centre's of rotation
Generate the program
Capture data
Produce axis analysis
1. Produce test setup
Using RotaryXL define the test setup and trigger settings for the axis under test and save the .RTA file. Full details of how to acheive this
are given in the RotaryXL help file.
1. In the 'test setup' tab of Off axis rotary software use 'Load RTA file from RotaryXL'
button to import the file. All the test settings should now appear in 'RotaryXL test
settings' window.
2. Select the rotary axis to be tested and the linear axis to be synchronised. Note:
these values will be automatically populated by the software based on the values
stored in the RTA file, but should be checked before generating the part program.
3. Enter a suitable dwell and move time. Note: the move time is the time taken in
seconds for each angular step to be completed. (It may be necessary to consider a
move of 90° to determine a practical value for the move time.)
2. Define the CNC parameters
On the 'CNC control' tab in the software:
1. Select the appropriate CNC control.
2. Select the appropriate measurement mode.
3. Offset calculation
The ‘offset is the distance between the centre of rotation (C.O.R.) for the rotary axis and the C.O.R. of the XR20­W. It is essential this is
calculated correctly so that the machine program correctly synchronises moves of the rotary and linear axes.
Warning: Incorrect offset calculation could result in a machine crash.
M-9920-0307-02
12
The process of calculating the offset relies on moving the machine to three positions and ensuring laser-optics alignment at each of these.
Where possible, the most accurate calculation of offset is achieved using the two positions parallel to the linear axis travel and a third
approximately at mid travel between these. The order of the positions is not important for the following process, but it is essential to
capture data at all three positions. Take care when recording positions from the machine control to ensure all values are taken with the
same work offset applied as will be used when the program is run.
The following table shows an ideal set up for the offset calculation.
1. Move the machine to the position where the interferometer and XR20-W are
nominally closest. (Shown in the image below.)
2. Translate the linear axis so to maximise the signal strength.
3. Manually record the machine rotary axis and linear axis positions and input
them into 'Position 1' in the 'Calculate offset' tab.
4. Move the machine rotary axis to the other two positions*, re-establish laser
alignment and maximise the signal strength before recording the linear and
rotary axis positions at each of them. Then, input the linear and rotary axis
positions in the 'Offset calculation' tab (Positions 2 and 3).
*Note: for the most accurate calculation of offset, the two additonal positions
should be as close to 180° apart as possible.
5. Use the 'Calculate offset' button to complete the offset calculation.
6. Check the value produced is feasible for the hardware as set up (an
approximate check using a measuring tape and 'line of eye' should be
sufficient to highlight any gross errors).
Note: If you are repeating a standard test with a known and standardised hardware setup then previously measured linear and angular
positions can be inputted (or recalled) to calculate the offset.
M-9920-0307-02
13
4. Generate the program
On the 'Part program' tab:
1. Insert the program number in the 'Program ID' field. Note: different program ID's
should be used between rotary and linear programs.
2. Select the appropriate program options.
Check 'exclude comments' to produce a G-code only progam without comments
3. Click the 'Generate CNC Part Program' button.
4. Once the program has been checked, click the 'Save CNC Part Program' to save
the part program to disc.
Generation of the 'linear axis only' program follows the same procedure as above but the user should ensure the 'exclude rotary axis' tick
box is checked at Step 2.
5. Capture data
1. Use RotaryXL to perform the rotary axis measurement.
2. Save the data from the rotary axis measurement with a descriptive title.
3. Use Off axis rotary software to produce a .RTA file for the linear axis measurment.
Note: these targets must be used for the linear axis measurement.
4. Run LaserXL to capture the linear axis, using angular optics and the .RTA file
generated in the previous step as follows:
Click File > Open. Browse to the .RTA file then click Capture > Start
5. Save the data from the linear axis measurement with a descriptive title.
M-9920-0307-02
14
6. Produce axis analysis
In Off axis rotary software select the error correction tab.
1. Select the Rotary button and browse to the location of the rotary axis
measurement data file.
2. Select the Linear button and browse to the location of the linear axis
measurement data file.
3. Select the Create error corrected file button. Note: A third RTA file will be
produced with the name of the original rotary measurement file but with
'_CLEANED!' as a suffix.
4. Select Analyse error corrected file to open the analysis of the cleaned data file
for the rotary axis.
M-9920-0307-02
15
General information
This sections includes additional information regarding off axis rotary measurement.
M-9920-0307-02
16
Optical set-ups
The optical setup will depend upon the machine type being tested. The following table shows the optical configurations for the most
common machine applications.
M-9920-0307-02
17
Sign convention
The user does not need to provide any input for sign convention on the rotary aspect for the process. RotaryXL automatically sets the sign
convention during the over-run move. However the user must manually set the sign convention during the angular measurement on the
linear axis. The sign of the angular error will depend upon the configuration of the angular optics. For the angular measurement setup the
retroreflector should always be mounted to the moving linear axis with the interferometer mounted to the stationary component.
If the XR20-W is replaced by the retroreflector, then the rule is straightforward.
Move the rotary axis in the positive direction
Set sign of angular error positive.
If the XR20-W is replaced by the interferometer the rule is reversed. In the example below the interferometer has replaced the XR20-W
which was mounted to the machine spindle
Move the rotary axis in the positive direction
M-9920-0307-02
Set the angular error negative.
18
Appendix A: Mounting hardware design
To ensure accurate measurement it is essential that the XR20-W is mounted to the machine so that the axis of the device and rotary axis
are parallel. The requirements for off axis rotary measurement are the same as for a traditional 'on-centre' measurement in that the
objectives are:
For an induced error to be less than ± 1 arcsecond. Ensure that angular misalignment E < 0.025° (or the TIR is < 0.04 mm at a radius of
50 mm from the centre of rotation of the machine under test).
For an induced error to be less than ± 10 arcseconds, ensure E < 0.23° (or the TIR is < 0.4 mm at a radius of 50 mm from the centre of
rotation of the machine under test).
The following drawing specifies the tolerance as a perpenidicularity (which is more practical for hardware design) required to achieve
measurements within ±1 arc second accuracy.*
*Note: this does not consider any mathematical errors caused by the removal of the angular error in the linear axis, only the result from the
rotary axis part of the test.
M-9920-0307-02
19
It is equally important to consider the perpendicularity in both orientations as shown by the drawing below:
In some cases it may not be possible to achieve the mounting tolerance specified due to bracket geometry inaccuracies in bracket design
or mounting setups. As the error increases, the induced error in the XR20-W measurement also increases. The chart below shows the
error from the XR20-W measurement that will be induced for a given parallelism tolerance. Note: depending upon the sign of this error, the
measurement may make an axis appear worse or better than in reality.
M-9920-0307-02
20
Design details of any bracket will depend upon the machine installation. However, as a design aid the basic features required by a
bracket are provided in the drawing below:
M-9920-0307-02
21
Appendix B: Creating custom machine programs
Machine tool builders often use specific code unique to enable functions for driving the axes. Off axis rotary software uses a configurable
.XML file to define the codes generated for a given test setup. The user is able to modify or create new controllers to suit their machine.
Warning: Editing the CNC controls in off axis rotary could cause unexpected machine movements. Only experienced machine tool
programmers should attempt such changes. All programs should be checked before running and performed at a low feed for the first
time.
From the toolbar select Tools > Edit CNC Controls
Warning:Editing the file CNCcontrols incorrectly could damage the file structure and prevent off axis rotary from running. Please use
extreme caution when editing the file. It is recommended the user saves a copy of the original file before making edits.
The file CNCcontrols.xml will be opened in Notepad and should appear as shown below. This file contains definitions for all of the
controls supported by off axis rotary.
The .XML is divided into a number of sections; one for each of the controls. For
example the highlighted section shown on the image to the right indicates the
section used to define Fanuc controls.
To produce an additional control definition or to customise an existing control it
is best practice to copy and paste an existing section and then make
modifications. This way the original definition can always be reverted back to if
required.
M-9920-0307-02
22
Appendix C: XML file structure
The XML file consists of a number of user defined parameters that allow the
user to generate additional controllers or modify existing ones. An example of
a control definition is given in the image on the right.
>
The following table describes the entries in the control definition and their purpose.
<name>
Name displayed in drop down menu in off axis rotary software
<header>
Used to define file headers required by the control
<extras>
Allows the user to define addtionalG or M code required to allow the machine to run
<extras2>
Allows the user to define addtionalG or M code required to allow the machine to run
<offset>
Used to call/specify the active work offset
<comment_l>
Defines the opening delimiter for a comment
<comment_r>
Defines the closing delimiter for a comment
<eob>
Defines notation for end of block
<footer>
Used to define file footers required by the control
<dwell>
Specifies the notation for a dwell
<inch>
Specifies notation to call operation in imperial
<metric>
Specifies notation to call operation in metric
<line_numbers enabled>
Flag set to produce line numbers on part program output
<inverse_time>
Flag to define feedrate mode
<End_program>
Defines to notation for the end of program
<ProgramID_Prefix>
Defines notation applied before the program ID
<ProgramID_Suffix>
Defines notation applied after the program ID
<Program_File_Ext>
Defines the file extension for saved programs
M-9920-0307-02
23
Appendix D: Enabling 0-360 rollover function
Some controllers cannot handle negative targets. Their range of positions is 0­360°. An example highlighting the requirement for this
function is shown below.
Partial arc range: 0­120°
Over run: 5°
On this type of machine the software will output an initial over run position of ­5° when for certain types of machine this over run position
should be 355°. There is no method of determining this requirement from the .RTA test file. An additional control field has been added to the CncControls.xml file that will allow the part program generator to cater for machines with
the above requirement.
Method
1. The recommended method to enable the 0-360 rollover function is by creating a custom CNC control by following the Creating
custom machine programs section.
2. At the bottom of the new 'custom' CNC control the following line will be present
<!--<RotaryAxisRollover>true</RotaryAxisRollover>-->
3. Remove <!--< from the beginning and >--> from the end of the line leaving you with a line that will look like this
RotaryAxisRollover>true>/RotaryAxisRollover
4. Save the file and close the software for changes to take effect. After restarting the software when the new 'custom' controller is
selected it will be in the 0-360 program generation format and no negative values will appear in targets or in the part programs.
M-9920-0307-02
24
About Renishaw
Renishaw is an established world leader in engineering technologies, with a strong history of innovation in product development and
manufacturing. Since its formation in 1973, the company has supplied leading-edge products that increase process productivity, improve
product quality and deliver cost-effective automation solutions. A worldwide network of subsidiary companies and distributors provides
exceptional service and support for its customers.
Products include:
Additive manufacturing, vacuum casting, and injection moulding technologies for design, prototyping, and production applications
Advanced material technologies with a variety of applications in multiple fields
Dental CAD/CAM scanning and milling systems and supply of dental structures
Encoder systems for high accuracy linear, angle and rotary position feedback
Fixturing for CMMs (co-ordinate measuring machines) and gauging systems
Gauging systems for comparative measurement of machined parts
High speed laser measurement and surveying systems for use in extreme environments
Laser and ballbar systems for performance measurement and calibration of machines
Medical devices for neurosurgical applications
Probe systems and software for job set-up, tool setting and inspection on CNC machine tools
Raman spectroscopy systems for non-destructive material analysis
Sensor systems and software for measurement on CMMs
Styli for CMM and machine tool probe applications
For worldwide contact details, please visit our main website at www.renishaw.com/contact
RENISHAW HAS MADE CONSIDERABLE EFFORTS TO ENSURE THE CONTENT OF THIS DOCUMENT IS CORRECT AT THE DATE OF PUBLICATION BUT MAKES NO
WARRANTIES OR REPRESENTATIONS REGARDING THE CONTENT. RENISHAW EXCLUDES LIABILITY, HOWSOEVER ARISING, FOR ANY INACCURACIES IN THIS
DOCUMENT.
©2013­2014 Renishaw plc. All rights reserved.
Renishaw reserves the right to change specifications without notice
RENISHAW and the probe symbol used in the RENISHAW logo are registered trade marks of Renishaw plc in the United Kingdom and other countries.
apply innovation and names and designations of other Renishaw products and technologies are trade marks of Renishaw plc or its subsidiaries.
All other brand names and product names used in this document are trade names, trade marks or registered trade marks of their respective owners.
M-9920-0307-02
25
