OUR BODY
advertisement
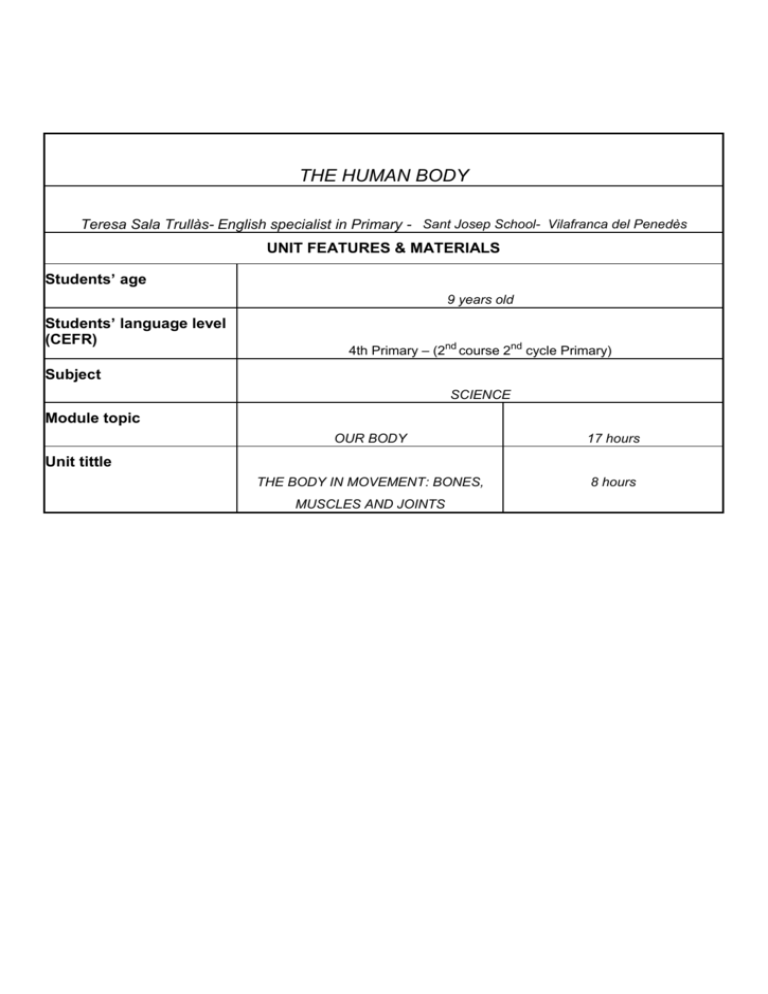
THE HUMAN BODY Teresa Sala Trullàs- English specialist in Primary - Sant Josep School- Vilafranca del Penedès UNIT FEATURES & MATERIALS Students’ age 9 years old Students’ language level (CEFR) 4th Primary – (2nd course 2nd cycle Primary) Subject SCIENCE Module topic OUR BODY 17 hours THE BODY IN MOVEMENT: BONES, 8 hours Unit tittle MUSCLES AND JOINTS Comments I present only few flashcards joined to the unit as an example as well as some games worked with them. Unit description Working in this unit we try students learn easily providing opportunities to use English as a communicative instrument and enforcing strategies for learning. From the first session kinestesic and interactive activities are relevant to achieve the content’s knowledge. Also visual activities take an important part in most learning sessions. Goals 1.. To recognise that the human body is made in such a way as to allow us different types of activities and movements. 2. To identify the parts of the body (bones, muscles and joints). Objectives 1. To identify the parts of the body that move and carry out different actions. 2. To understand the function of the bones, muscles and joints. 3. To locate the main bones, joints and muscles. 4. To study bones and joints through the assembly of a skeleton. 1. Movement of the body: voluntary/ involuntary. Contents 2. The skeleton and the muscles. 3. How do we use our muscles. Student workload 1. Doing role-plays, playing games, dancing, singing... 2. Watching a video. 3. Speaking English. 4. Making arts and crafts. 5. Reading activities. 6. Doing different kind of activities (matching, labeling, filling gaps...) 7. Designing a poster. Resources and materials Teacher resources Teacher-produced or -distributed materials 1. Science Workbooks. 2. Body Flashcards (picture and words cards) 3. Handouts and worksheets with pictures and activities. 4. A camera 5. The Video “My body” (Magic English Collection) 6. Objects (pencil, teddy bear, elastic band) Student resources Student-processed or –produced materials 1. Handouts and worksheets with pictures and activities. 2. Poster. 3. Art and craft. Learning environments Classroom, Audio-visual room, Gym, Science lab. 1. Worksheets, individually or in groups. 2. Designs of posters and arts and crafts. Assessment __________________ 3. Students’ drawings 4. Discussion and observation. ________________________________________________________ Session 1:Warming up Lesson plan 1. The teacher starts with a rhyme to introduce some vocabulary related to the unit. (also at the beginning other sessions). 2. The teacher gives to the students a picture where children are doing different activities (jumping, running, climbing, playing...) and discuss it. 3. The teacher takes some photos to class of people doing different kinds of physical activity and they describe and relate the movements to the different parts of the body. (In the 5th session students will make a poster with them to consolidate movement and joints). 4. Revision of human body’s vocabulary (head, neck, arm, foot, leg, hand, mouth...) learned in previous courses, miming them and watching the video “My body” Magic English collection. Session 2 1. Introducing the new vocabulary through F.C (picture and word cards) : (bone, muscle, trunk, limbs, hip, shoulder, elbow, wrist, knee, ankle) and doing different role-plays to internalise it. 2. Locating and labelling in a picture the different parts of the body. Session 3 1. 2. 3. Introducing the meaning of ”hard, rigid, soft and elastic”, taking to the classroom some objects to exemplify it (a pencil, a teddy bear and an elastic band). Reading the text about movement(voluntary and involuntary) doing pre- while and post- reading activities. Performing the two types of movement. Session 4 1. 2. 3. 4. Learning about the skeleton: reading the text (function and parts) following the same way that in the previous session. The teacher gives a worksheet of the skeleton and students, by resemblance to the L1 (they learnt this topic in the 3 rd level), label the different names of the bones. The teacher presents a model and students check their answers. Reviewing the content in a text filling the gaps. Session 5 1. Introducing the meaning of “joint” with a physical activity. Students must mime some actions. The teacher helps them by asking some questions. 2. The teacher showing the students an articulated figure (the wooden figures used for painting and drawing) and pointing to the main joints, they name them. 3. Designing a poster and sticking the photos taken in session 1, writing the names of the joints. Session 6 1. 2. Students making an articulated skeleton to study bones and joints. Hanging some articulated skeletons on a notice board an writing some sentences in order to summarise the main features. Session 7 1. The teacher giving a worksheet with two bodies (front and back part) and the students writing the name of the muscles by similarity with their L1. 2. Checking the answers with the model given by the teacher and correcting them. 3. Recognising the different muscles looking at the body’s picture through some questions. 4. Classifying the name of the muscles on a grid according to the place where they are. 5. Doing comprehension and matching activities about bones and muscles. Session 8 : Multidisciplinary link. Gym 1. 2. Through a practical lesson in the gym the P,E ‘s teacher encourages the students to find certain muscles in their bodies and to think how they work. Working in pairs students learn the function of the main involuntary muscle “the heart” that move by themselves, timing each other the pulses after doing different moving activities. Session 1: 1. Students listen and join the rhyme miming it: Hip-hip hip-hip put your finger on your lips. Be quiet, please! 2. Learning activities 3. 4. Students look at the picture about different movement exercises and through the following questions they are enabled to discuss it: - What are the children doing? - Are the children having fun? - Look at the girl climbing up the rope. Which parts of her body is she using? - Look at the boy climbing up the slide. Which parts of his body is he using? Students in small groups do different kinds of physical activity and focus the attention in the parts of the body they take part, describing them. They touch the different parts of the body ( head, neck, arm, foot, leg, hand, mouth...) and watch the video “My body” in order to revise the vocabulary. In the video they sing a song (“Move body move, my body, our body, your body, every body moves...) and do some roleplays (dance, tape their feet, clap their hands...) Session 2 1. Students learn the new vocabulary (bone, muscle, trunk, limbs, hip, shoulder, elbow, wrist, knee, ankle) through some games and role-plays with the flashcards: - - - 2. What’s missing?: The F.C are holding on the board and after naming them several times, children close their eyes and the teacher takes one of them and they have to guess which one is missing. I can see...!: A child holds a F.C covered by a book and little by little he discovers it and the first who says “I see the ...” wins the card. Memory game: The picture cards in one side of the board facing at it and the word cards in another side. A child turn over one of each group and if they go together he wins then, otherwise they put them in the same place. The winner is who has more pairs. Simon says Bingo Students locate and label a picture of the different parts of the body. Session 3 1. 2. 3. Students touch and try out the difference between “hard, rigid,soft and elastic” in different objects (a pencil, a teddy bear, elastic band). They preview the content of a text about movement (voluntary / involuntary) where bones and muscles take part, looking at the title, subheadings, illustrations, the words in bold type...Students read the text guessing the new words’ meaning using the context. Students perform the two types of movement: - voluntary: we pick up a glass, we write a word... - involuntary: we touch something hot and then we take our hand away quickly... Session 4 1. They preview the content of a text about the skeleton following the pre-, while and post- reading activities worked in the previous session. The students by resemblance to the L1 label the different names of the bones in a skeleton. They check and correct their answers according to the model. Fill in the gaps with the name of the main important bones. 2. 3. 4. Session 5 1. Students mime the following actions in order to understand the meaning of “joint”: - ride a bike - swim - run - sit down / stand up - walk - throw and catch the ball... Teacher helps them by asking the following questions: - 2. 3. Can we bend our arms? Can we bend our feet? Can we bend our legs? Can we bend our neck?... They point and name the different “joints” in an articulated figure. Students design a poster with the photos taken in session 1 and write the joints’ names. Session 6 1. Students make an articulated skeleton and label the name of the main bones in it. 2. They hang some of the articulated skeletons on a board and write the following sentences in order to summarise their main features: . - It holds the body up. - It gives it shape. - It protects the most delicate parts of the body (brain, heart and lungs). Session 7 1. Students label the name of the muscles (the front and the back part of the body) by resemblance to L1. 2. They check their answers with a model. 3. Pupils looking at these pictures recognise the different muscles answering the following questions: 4. 5. Do we use the trapezius muscle when we walk? Do we use the quadriceps muscle when we walk? Do we use the masseter muscle when we eat? Do we use the quadriceps muscle when we swim?... They classify the name of the muscles on a grid according to the place where they are. Pupils complete and match different activities about bones and muscles. Session 8 1. Students go to the gym and through a practical lesson they are able to find certain muscles in their body ant to think how they work: - Bending our arms observe how the biceps work - Bending our legs how the muscles in our gemellus work. - The muscles get harder and then relax. - ... 2. They, in pairs, time each other the pulses and write the results in a worksheet after doing different moving activities ( skipping, running, stepping stairs, jumping, hand walking...) Materials provided I present them at the end of the unit (pictures, handouts, art and craft, F.C(picture and word cards), assessment sheet... Assessment materials At the end of the unit there’s an assessment sheet. Sitography Bibiography Essential Science 3 Ed. Richmond New Science 2 Ed.Richmond Video “My body” – Magic English Collection
