Egpyt_Theme
advertisement
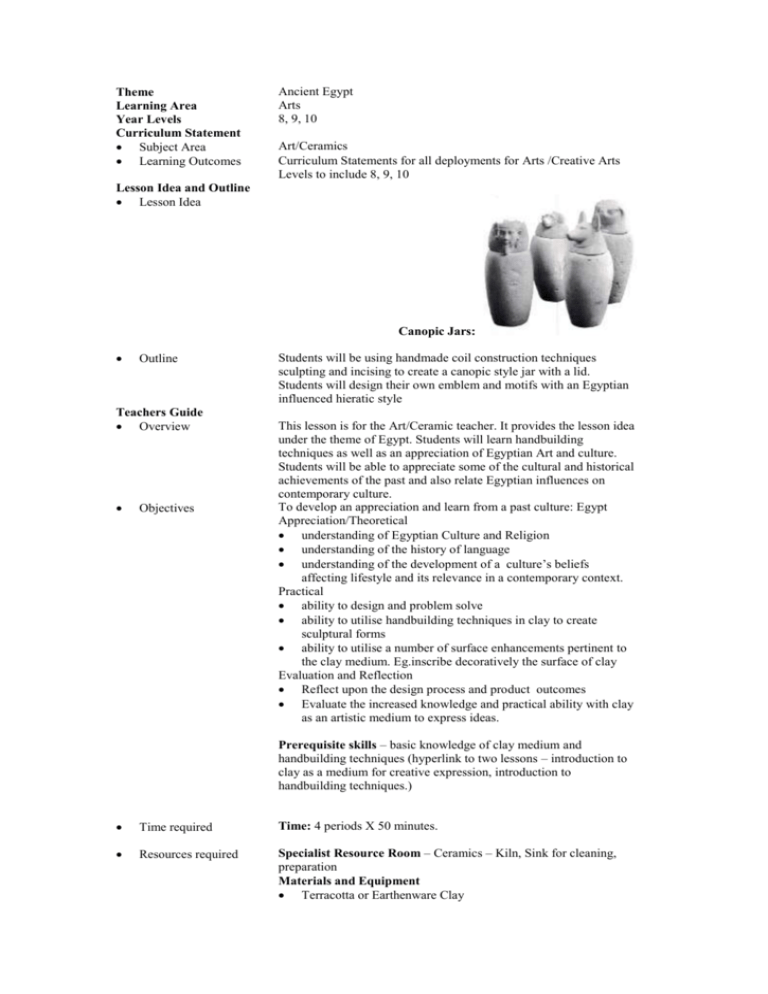
Theme Learning Area Year Levels Curriculum Statement Subject Area Learning Outcomes Ancient Egypt Arts 8, 9, 10 Art/Ceramics Curriculum Statements for all deployments for Arts /Creative Arts Levels to include 8, 9, 10 Lesson Idea and Outline Lesson Idea Canopic Jars: Outline Teachers Guide Overview Objectives Students will be using handmade coil construction techniques sculpting and incising to create a canopic style jar with a lid. Students will design their own emblem and motifs with an Egyptian influenced hieratic style This lesson is for the Art/Ceramic teacher. It provides the lesson idea under the theme of Egypt. Students will learn handbuilding techniques as well as an appreciation of Egyptian Art and culture. Students will be able to appreciate some of the cultural and historical achievements of the past and also relate Egyptian influences on contemporary culture. To develop an appreciation and learn from a past culture: Egypt Appreciation/Theoretical understanding of Egyptian Culture and Religion understanding of the history of language understanding of the development of a culture’s beliefs affecting lifestyle and its relevance in a contemporary context. Practical ability to design and problem solve ability to utilise handbuilding techniques in clay to create sculptural forms ability to utilise a number of surface enhancements pertinent to the clay medium. Eg.inscribe decoratively the surface of clay Evaluation and Reflection Reflect upon the design process and product outcomes Evaluate the increased knowledge and practical ability with clay as an artistic medium to express ideas. Prerequisite skills – basic knowledge of clay medium and handbuilding techniques (hyperlink to two lessons – introduction to clay as a medium for creative expression, introduction to handbuilding techniques.) Time required Time: 4 periods X 50 minutes. Resources required Specialist Resource Room – Ceramics – Kiln, Sink for cleaning, preparation Materials and Equipment Terracotta or Earthenware Clay Procedures (with images which demonstrate stages) Banding Wheel Wood modelling tools Slip – liquid clay Protective clothing Wood batton Newspaper Towelling Super wipes Appreciation: Visual Diary for student designing and notes Slides, Reference Books CD Rom Teacher Aids: examples,student work, or images of canopic jars Construction and Decorative Methods: construction Coiling Joining Sculpting decorative Incising Colouring slip A) Making coils: 1. Take ¼ pug of clay from a fresh pug 2. If clay does not come out of fresh pug – 3. Prepare clay by kneading and wedging clay to make sure that 4. there are no air bubbles and also the clay particles are 5. distributed evenly. 6. Clay must have at least 20% moisture. 7. HINTS: Students must have cold hands. Some students who have high body temperatures should place hands under cold water for at least 2 minutes to get hands cools. Coils will not be successful unless they have enough moisture content. Hot hands can cause premature cracking and drying out of the clay. 8. Squeeze a quantity of clay in the hands until a rough cylindrical shape. 9. TIP: Do not use too much clay just enough that the hands can manipulate. Obviously the size of the students hands make a difference in terms of the amounts that they can handle. 10. Roll the clay with the hand span open. The motion of rolling should also require the students to roll across the clay to ensure even coils. 11. Make 20 coils about 2cm in diameter. B) Base of Pot 1. Students will roll a ball – making sure that air bubbles have been removed. 2. Pat clay with palm of hand with even pressure until flat turning over until base is about 3 cm thick and at least 10-15 cm in diameter. 3. Place base of pot on banding wheel. HINT: It may be best to place a piece of towelling on the banding wheel so that you can take the finished pot off the banding wheel more easily. C) Body of Pot 1. 2. 3. 4. 5. 6. Place coil on base and using finger and/or modelling tool squeeze moist clay coil onto the base and attach on the inside of coil to the pot. Continue to attach coils to the previous layer of coils using finger and/or modelling tools to smooth and attach the inside wall. You may not need to utilise all 20 coils. Take the wooden batton and pat the pot on the outside until the coils merge and blend into a clean smooth surface. You should use your left hand to support the opposite side of the pot to be patted so the shape of the pot is not distorted. You may take a piece of towelling, wet it and squeeze all the water out and carefully smooth the surface of the pot. Too much water in the towelling will affect the composition of the clay and weaken the walls. Take some towelling or super wipes. Put under tap and then squeeze all the water out. Wrap the finished areas of the pot. TIP: If you wish to have a shiny surface without glazing you can burnish the surface area with a spoon to harden the surface of the body of the pot. Burnishing is rubbing the side of the pot until the clay becomes denser and takes on a polish. HINT: the spoon can become very hot from friction between the warmed clay and metal spoon. HINT: If you wish the pot to decrease in circumference you need to place the coil off-centred towards the inside of the pot and vice versa if you wish to increase the circumference you need to place the coils on the outside of the previous coils increasing the offset gradually. Again you need to support the pot with newspaper. HINT: The paper will burn out into ash when fired so if it is difficult to remove paper you can leave it inside. HINT: Make sure you take enough clay to attach to base and ensuing coils so that the wall of the pot is strong enough to hold its own weight. HINT: If students are having difficulty with coils slumping, use crushed newspaper to support the inside of the pot. As the body of the pot grows, add more newspaper. D) Lid of Canopic Jar 1. Model up the lid making the god character that represents your kingdom eg. Turtle: Pharoah Jason Turtle: the student would model the turtle head and place into the horizontally striped headdress as seen in the example. 2. Model the base of the lid so that it sits inside the pot. 3. Smooth all surfaces with modelling tools. In tricky detailed areas you could use a needle tool, brush or fine modelling tool. 4. You need to allow the lid to dry on the body of the pot in place to assist even drying time. E) Decoration: Incising details on Clay slip can be made by adding water to the clay and mixing until it is of a creamy and thick consistency. 1. 2. 3. Inscribing needs to be done when the pot has dried to greenware and is leather hard. Student can inscribe their appropriate heiroglyphs or symbols – the message to the gods as they pass through the underworld from the Terrestial Nile to the Celestial Nile (Heaven) After the inscriptions are completed, the pot can be left without towelling or super wipes. 4. 5. Mix up coloured oxides into slip ( liquid clay) and feed into incised areas until it fills to meet the surface. Smooth off any excess coloured slip until by wiping with superwipe or scraping horizontally across incised line. F) Finishing: 1. Pot should be allowed to dry evenly until all moisture has evaporated. 2. Fire pot at earthenware temperatures – bisque ware. 3. Pot is completed. Student Presentation Options Students could present a range of jars– small Wheelwork: the body of the jar could be made on the wheel with hand built lid Scraffito replacing incising with coloured slip Sculpture: Lid of the Canopic jar could be enlarged into a large sculpture Extensions Cross-curricular Options Glossary: Visual Communication/Graphics – use of symbols, lettering exercise – year 7 or 8 – students use papyrus paper, banana palm or vellum like natural paper to inscribe name or message. LOTE – Asian language – pictographic scripts – students look at Egyptian hieroglyphics and compare with Asian . Students Arts: Art: Canopic jars could be designed and drawn in coloured pencil, ink, or any other 2d media. Drama: student play based on the hour of death and the “Book of the Dead.” Science: forensic science, carbon dating, mummification of humans and pets. Music – listen and analyse Egyptian music styles – making similes and comparison with another style. Visual Communication/Graphics – use of symbols, lettering exercise – year 7 or 8 – students use papyrus paper, banana palm or vellum like natural paper to inscribe name or message. SOSE – Study of Ancient Egypt life of the common man, slave and Pharoah Maths: students use the Egyptian accounting methods to solve mathematical problems or geometry of the Pyramids. LOTE – Asian language – pictographic scripts – students look at Egyptian hieroglyphics and compare with Asian . Students Egyptian Hieroglyphs – rosetta stone – handout – students would translate their name and divinity from English to heiroglyphs Egyptian Symbols – handout would explore different cultures use of colour as important symbols. Students would translate universal symbols from Egypt, Western Culture and Asian Culture – could be past or present. <egypt.html> there is a brief outline of URL and the value of URLs are rated. Eg. Unwrap a Mummy 5**** Student Guide Associated Web Links
