Parachute Gore Pattern and Assembly Instructions
advertisement
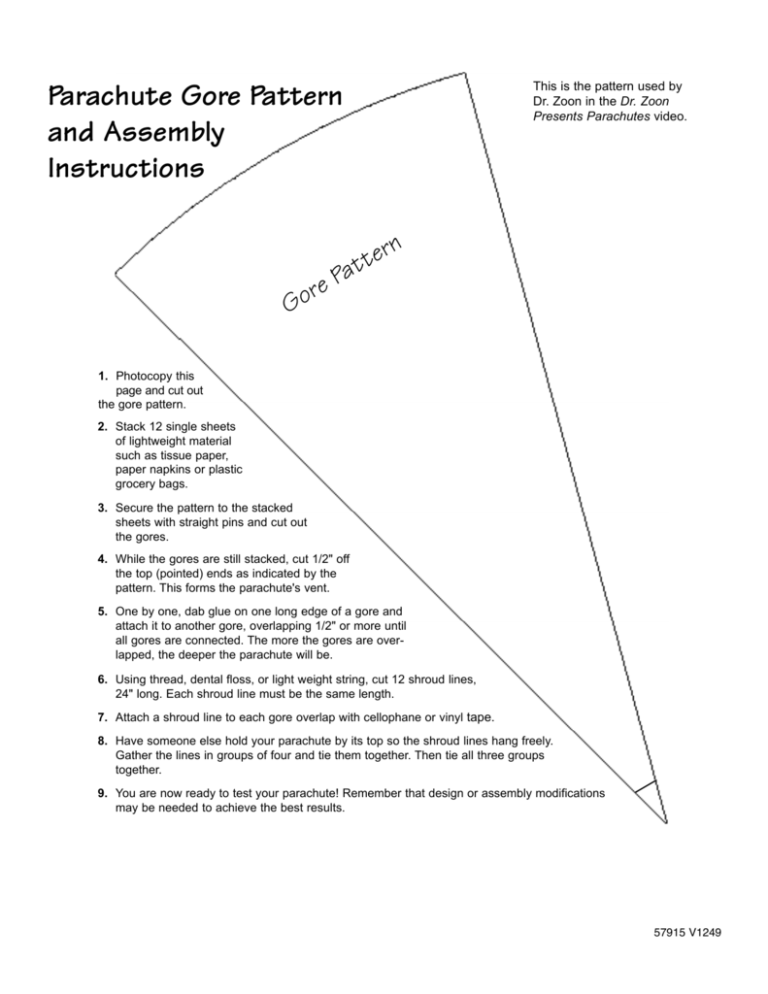
Parachute Gore Pattern and Assembly Instructions This is the pattern used by Dr. Zoon in the Dr. Zoon Presents Parachutes video. n er t t Pa e or G 1. Photocopy this page and cut out the gore pattern. 2. Stack 12 single sheets of lightweight material such as tissue paper, paper napkins or plastic grocery bags. 3. Secure the pattern to the stacked sheets with straight pins and cut out the gores. 4. While the gores are still stacked, cut 1/2" off the top (pointed) ends as indicated by the pattern. This forms the parachute's vent. 5. One by one, dab glue on one long edge of a gore and attach it to another gore, overlapping 1/2" or more until all gores are connected. The more the gores are over- lapped, the deeper the parachute will be. 6. Using thread, dental floss, or light weight string, cut 12 shroud lines, 24" long. Each shroud line must be the same length. 7. Attach a shroud line to each gore overlap with cellophane or vinyl tape. 8. Have someone else hold your parachute by its top so the shroud lines hang freely. Gather the lines in groups of four and tie them together. Then tie all three groups together. 9. You are now ready to test your parachute! Remember that design or assembly modifications may be needed to achieve the best results. 57915 V1249
