Solidworks - Adding Parting Lines
advertisement
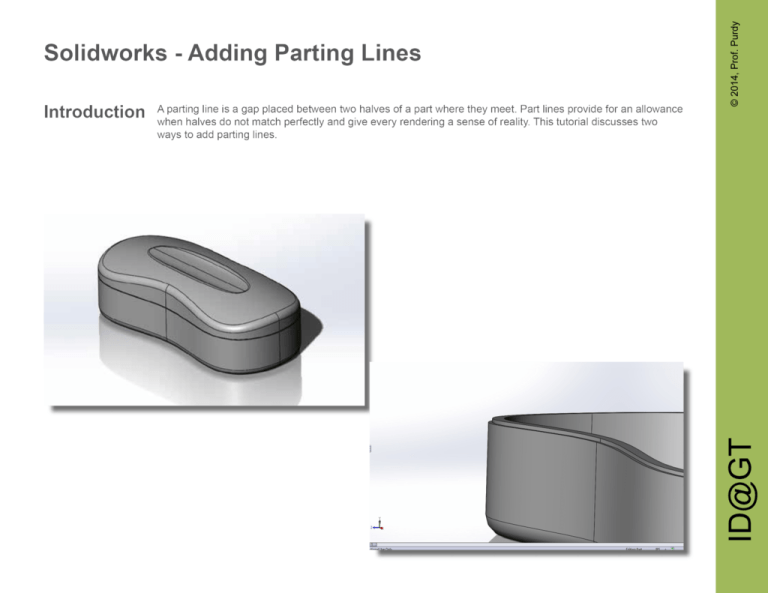
The first way is to manually add parting lines. This can only be done if you have made a straight split. Start by hiding the top or bottom part in the feature tree. © 2014, Prof. Purdy Step 1 ID@GT Solidworks - Adding Parting Lines Select the flat surface of the bottom part (See picture) and create a sketch on it. © 2014, Prof. Purdy Step 2 ID@GT Solidworks - Adding Parting Lines Right click on the outer edge and click select loop. © 2014, Prof. Purdy Step 3 ID@GT Solidworks - Adding Parting Lines While the loop is selected, click on ‘Offset Entities’. © 2014, Prof. Purdy Step 4 ID@GT Solidworks - Adding Parting Lines Select reverse in the ‘Offset Entities’ options to make sure the yellow line is inside the blue line. Set the value such that the yellow line is just a little offset from the blue line. After this hit the green check mark to confirm. Then confirm the sketch. © 2014, Prof. Purdy Step 5 ID@GT Solidworks - Adding Parting Lines Next, select the sketch you created, go to the ‘Features’ tab and select ‘Extruded Cut’. © 2014, Prof. Purdy Step 6 ID@GT Solidworks - Adding Parting Lines In the ‘Cut-Extrude’ options enter the value for the gap you want, preferably 0.03 inches for a handheld device. After that check ‘Flip side to cut’. Hit confirm and you will have your parting line. © 2014, Prof. Purdy Step 7 ID@GT Solidworks - Adding Parting Lines Unhide or show the part you decided to hide in the first step. © 2014, Prof. Purdy Step 8 ID@GT Solidworks - Adding Parting Lines Another way to add parting lines is by using ‘Lip/Grove’ Tool. Go to Insert > Fastening Feature > Lip/Grove. © 2014, Prof. Purdy Step 9 ID@GT Solidworks - Adding Parting Lines Another way to add parting lines is by using ‘Lip/Grove’ Tool. Go to Insert > Fastening Feature > Lip/Grove. Select the body/component on which to create a grove. (A) A ID@GT Step 10 © 2014, Prof. Purdy Solidworks - Adding Parting Lines Next, select the a straight edge (B) to define the direction of the grove. A ID@GT Step 11 © 2014, Prof. Purdy Solidworks - Adding Parting Lines Select the face (A) on which to create the grove. A ID@GT Step 12 © 2014, Prof. Purdy Solidworks - Adding Parting Lines Select the outer edge to greate a grove on.(A) Decide on the dimensions of the grove.(B) A A B ID@GT Step 13 © 2014, Prof. Purdy Solidworks - Adding Parting Lines Hit confirm and you will have the parting line. © 2014, Prof. Purdy Step 14 ID@GT Solidworks - Adding Parting Lines


