Pneumatic Racer Dragster - 7thengineeringwinter2009
advertisement
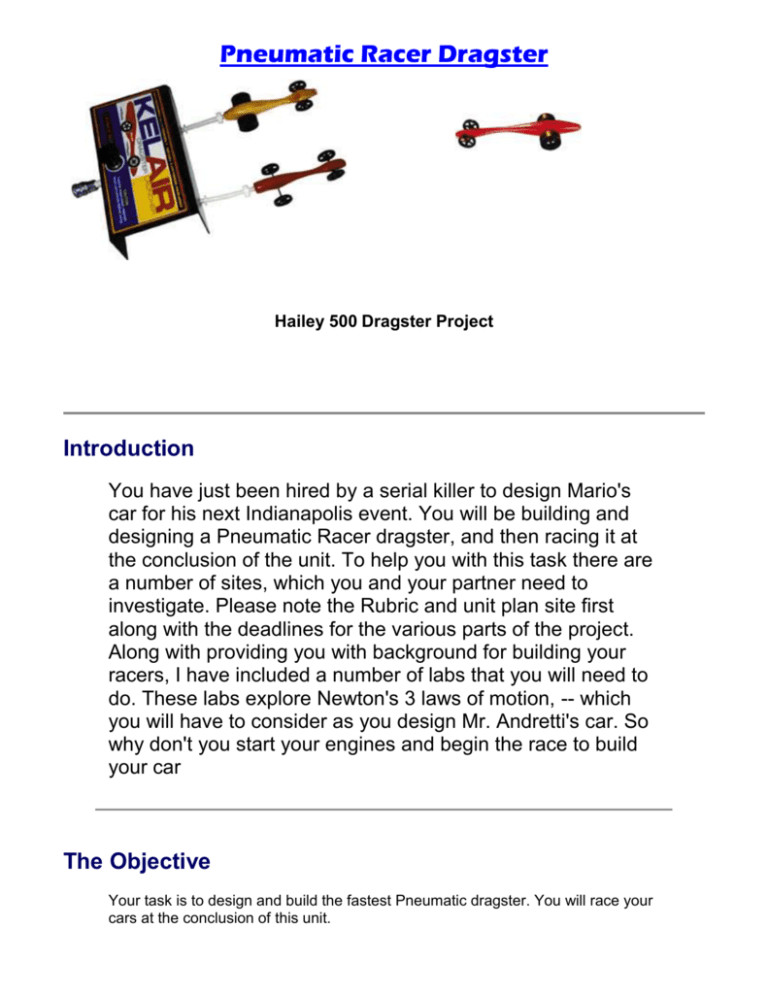
Pneumatic Racer Dragster Hailey 500 Dragster Project Introduction You have just been hired by a serial killer to design Mario's car for his next Indianapolis event. You will be building and designing a Pneumatic Racer dragster, and then racing it at the conclusion of the unit. To help you with this task there are a number of sites, which you and your partner need to investigate. Please note the Rubric and unit plan site first along with the deadlines for the various parts of the project. Along with providing you with background for building your racers, I have included a number of labs that you will need to do. These labs explore Newton's 3 laws of motion, -- which you will have to consider as you design Mr. Andretti's car. So why don't you start your engines and begin the race to build your car The Objective Your task is to design and build the fastest Pneumatic dragster. You will race your cars at the conclusion of this unit. The Process and Resources You will design build and race a Non CO2 dragster. You'll begin with getting some background before designing and building your cars. Phase 1 – Background Reading: Something for Everyone Use the information linked below to gather information about Pneumatic racing. Learn what you need to consider when designing your car. You will do labs, which examine Newton’s Laws of Motion. It is these laws you will need to think about as you design your cars. There is even a site for you to design your car on line and test it. You will then build your cars and race them in our classroom Indianapolis 500 Phase 2 - Looking Deeper from Different Perspectives – Answer 7 Questions Pneumatic racing information Some of the information will be able to be obtained by using the Links Below to answer these questions specifically related to pneumatic racing information. For some of the questions you may need to use Internet resources or you may know the answer. Name:. 1. What are drag, mass, friction, and acceleration? They are all contributing factors to movement. 2. What design features are in a real dragster that should not be in your C02 dragster and why? Rockets and fancy stuff like that would be stupid to put on your racer. 3. What are thumbnail sketches? Why do them? Thumbnail sketches are small drawings to get an idea for the design of your project. 4. What is a prototype? Why do one? A prototype is a rough draft to help work out the problems of the project. 5. What is a design envelope? Why should I use one? Design envelopes are the limitations of your design. 6. How should you design your car so that it will be the fastest? It should be as aerodynamic as possible. 7. Where should the weight of your car be, in the back or front?________ Please expalin The weight should be in the back. 8. List Newton's 3 laws of motion: List each below 1 2 3 I. Every object in a state of uniform motion tends to remain in that state of motion unless an external force is applied to it. II. The relationship between an object's mass m, its acceleration a, and the applied force F is F = ma. Acceleration and force are vectors (as indicated by their symbols being displayed in slant bold font); in this law the direction of the force vector is the same as the direction of the acceleration vector. III. For every action there is an equal and opposite reaction FAQ’s What is the Best Design: The best design is the one that wins. I know that's not what people want to hear, but it's true. There is no "one design" that is best. I've seen all styles win in my class. Generally though, the two best indicators of a good car are clean aerodynamics and high craftsmanship. I've had really good designs built poorly loose to so-so designs built well. Design Tips o o o 1. Everyone wants to design a car that will scream down the track and leave his or her classmates in the dust, right? Well, designing a car is like any other design challenge. In order to do well, you have to know what you are doing, and this requires some homework. Before you start whining "why can't he just tell my what to do," remember: It's your car. If you don't care about any of this, then you just won't do very well, giving your classmates the power to crush your car come race day. Can you say embarrassment, boys and girls? Making a super fast car involves learning about the principles behind CO2 cars, the engineering factors involved, and the envelope the project must remain within. Read, learn, and crush the opposition! Most people will refer to pneumatic racer cars as dragsters. This invites the comparison to top fuel dragsters the likes of which are often seen (and heard) screaming down a drag strip at incredible speeds. And yes it's true that CO2 cars are run two at a time in a race down a track just as those big thunderous top fuel dragsters are. But that's where the comparison ends. CO2 powered cars run on the same principle that propels rocket or jet powered land speed record vehicles. One of these vehicles, Thrust SSC of the Thrust SSC team from England, recently broke the land-speed record as well as the sound barrier (over 760 MPH). The driving principle behind these cars is that of Newton's Third Law: "For every action, there is an equal and opposite reaction." You see, it works like this: when the CO2 car is shot out of the the starting gate, the air escapes with a great deal of force towards the rear of the car. And just as good Sir Newton would have predicted, the CO2 car reacts in the opposite direction with equal force rocketing down the track. Unlike a dragster engine that converts fuel into energy to drive a set of wheels, our pneumatic race car is basically pushed by the AIR Many of the features of a dragster will actually work against a CO2 race car. For example, spoilers are used to force a dragster's wheels into the ground in an effort to increase traction so that all the engine's energy can be transformed into forward motion. Thanks to Newton's Third Law, the air cartridge pushing our cars takes care of forward motion for us; spoilers, although cool looking, just add drag. Dragster engines burn enormous amounts of fuel which requires large air intakes and exhaust pipes to suck air into the engine and shoot hot exhaust gasses out of the engine. Our pneumatic race cars have no engine and burn no fuel, so air intakes and exhaust pipes only act like parachutes to slow them down. Moral of the story: When one looks at the similarities between a CO2 race car and a land speed record vehicles (LSRVs), then throw in knowledge of Newton's Third Law, it becomes clear that designs for CO2 race cars should be styled after an LSRV, not as a dragster. 2. I always tell my students that engineering is like a balancing act. When you do one thing to overcome a problem, often you create another totally different problem (hopefully, only one). Many times a solution is the midpoint between the two problems, never solving either entirely. It's a game of give and take. And in CO2 design, it is no different. Engineering a CO2 car can be broken into four main principles. I've also added a story and a moral for your entertainment. Engineering Principle No. 1: Mass CO2 cars are a great deal lighter than barbells, but they still have weight; what scientifically we call Mass. This comes into play when students choose their body block from which to construct their cars. When doing so, they will be faced with blocks that weigh as little as 40 grams and ones that weigh upwards of 130 grams. Once again, it should be obvious that it takes less force to push 40 grams than it does to push 130. So why on earth would someone want to choose a 130 gram body block? Because it's much stronger wood. That's why. If a car is designed to be hollow, or have a narrow body, a lighter piece of wood, such as a 40 gram block, may destroy itself in the normal course of racing. And if your car is in three pieces, it generally doesn't run very well. I've had classes where much slower cars have won their tournaments only because their faster counterparts disintegrated after half a dozen races. The Balancing Act: Advantages: Cars with less mass go much faster. Disadvantages: Cars with less mass are less stable and less durable. Engineering Principle No. 2: Drag Take a piece of balsa wood, slap wheels on it, shoot it down a track at 80 MPH and the air rushing over the body and wheels will try to slow it down. Scientifically this is called drag: the resistance of wind moving over an object. So how do you overcome drag? Start by making the body as aerodynamically "clean" as possible. Think of vehicles designed for high speed such as rockets and jet fighters and go from there. But don't forget the other parts of the car. Lola Cars, who make Indie style race car bodies, attribute as much as 50% of a car's drag to the wheels. So it's a good thing to try to get them out of the airstream as much as possible. But again, to do this will require more time and skill than just an ordinary car. The Balancing Act: Advantages: Aerodynamically shaped cars are less "draggy," so they go faster. Disadvantages: Aerodynamically "clean" cars are more difficult to build. Engineering Principle No. 3: Friction Thanks to our friend gravity, everything has friction. On a CO2 car, friction occurs primarily in three places: between the wheels and the ground, between the axles and the car body, and between the eyehook and the fish line track. So how do you eliminate friction? You can't. You can only reduce friction. First, make sure the tires are free from any defects by carefully sanding or cutting them away. Make sure they are not rubbing on the car body! Next, add a dry lubricant such as powdered graphite between the axles and the straw used as a wheel bearing. Next, sand away any imperfections on the axles. Finally, be sure to install your eye-hooks properly. Poorly aligned eye-hooks are often the cause of a slow car. The Balancing Act: Advantages: A friction filled car is easy to build. A friction filled car is slow, so it tends to be more durable. Disadvantages: Reducing friction takes a lot of extra effort, time and patience Engineering Principle No. 4: A Design Envelope In the real world most everything has a limit. That limit could be technology available, labor available, materials, or cost. For example, oil tankers are designed to be just wide enough that they will fit through the Panama Canal. Our CO2 cars also have a set of minimum and maximum dimensions, called a Design Envelope. Many students will automatically assume that if they make their car to the minimum specifications that it will be faster. Other students will keep their car at maximum length in hopes of having an advantage. Who's right? I've seen both approaches work. But one thing is sure: if your car doesn't meet the minimum or maximum dimensions, it won't be racing at all. Without a design envelope competition would be unfair and unsafe. The Balancing Act: Advantages: Cars that follow a design envelope can compete equally and safely. Disadvantages: Cars may go faster if a design envelope is not followed, but will be disqualified Phase 3 - Design Your Car and Conclusion Debating, Discussing, and Reaching Consensus You have learned about a different parts of a racecars design. Now you need to return to the task at hand to build the fastest racecar. The task, remember is to build the fastest car. I have listed below step by step on how to build your car. If you follow the instructions you will have a great car and a great grade. If not the risk is yours. GOOD LUCK!!! Conclusion This has been an exciting unit exploring the concepts of motion. Although only one car will be the fastest—You will all learn a great deal about motion, forces, and the design process. Good luck to all of the race participants. Mr. Andretti will be proud to have any of you on his payroll as a racecar designer! Step-by-Step Directions Step No. 1: Thumbnail Sketches Thumbnails are small, quick, sketchy, doodles drawn on just about anything (for the sake of grading, use the sheet of paper provided in class). They need not be artistically perfect, or even have much detail. But that doesn't mean they should be a mess either. The entire purpose of this step is to capture your ideas on paper. Don't think while doing these. Just daydream about what a fast car would be like, and doodle. As the old saying goes "the best way to have a good idea, is to have lots of ideas". With this in mind, complete at least three thumbnail sketches. Step No. 2: Rough Sketches CONSTRAINTS: MIN LENGTH = 8INCHES MIN WIDTH = .375 INCHES WIDTH BETWEEN AXLE’S = FULL WIDTH OF BLOCK MIN HEIGHT = .375 INCHES You should have completed 3 thumbnails before you start this step. Rough Sketches are more detailed drawings than Thumbnails. To do this, use the worksheet provided in class. Each view is exactly the size of the actual block of wood. Complete a top and side view for both of your chosen Thumbnails Step No. 3: Working Drawings First the hard part: pick your favorite Rough Sketch to use as your CO2 race car. Do this by showing your rough sketches to your classmates, teachers and parents. Discuss your ideas with them, and listen to their reactions. Remember, your favorite design may have a fatal flaw you may overlook, but a classmate might notice right away! After discussing your design, using your best drafting skills, you must accurately draw a full-scale top and side view of your car. Remember to double-check the design envelope as you draw to be certain your car will meet minimum and maximum specifications. Failure to do so will result in a low grade and possibly a car that is disqualified. Also, remember these plans will be used exactly to cut out your final car. If you draw it poorly, you will cut out a poor looking car. Once finished with this step, you are ready for production! Step No. 4: Drilling Axle Holes First, you will be given the choice of balsa wood body blocks from which to make your car. Remember, the advantages and disadvantages of lighter/heavier woods! After you have chosen your body block, follow the steps below to begin shaping your balsa block into a CO2 race car: 1. Template: Using scissors, cut out the photocopy of your final top and side drawings along the outline of the balsa wood block. Using drafting tape (or rubber cement), attach the side view to the wood body block. Not all balsa blocks are exactly the same size, so if your plan doesn't quite fit your block, then align the bottom and the back of the plan to the bottom and back of the block. The most important alignment is that the CO2 hole on the plan aligns with the actual CO2 hole in the block. 2. Axle Holes: Using a 3/16” drill bit, drill front and rear axle holes where indicated on your plan. Take care to make sure these holes line up evenly and are drilled accurately. Crooked holes mean a slow car! Use a drill press and take your time! Once finished, you are ready to cut! Step No. 5: Cutting 1. Cutting/Side: Using a Scrollsaw, carefully cut out the outline of the side view. Remember that any miss-cuts will change the shape of your final dragster and could disqualify it! If there are any places where your cuts are critically close to vital car parts (for example, the CO2 hole), then cut them a little big and sand the car down to size later. Balsa wood will sand easily, which is a better alternative to accidentally cutting into a CO2 hole or axle hole. SAVE ALL THE PIECES of wood cut off in this step for use in the next step. 2. Reassembly: Reassemble the body block by taping all the pieces of wood cut off in step 1 back together (this is done so that your top view will sit correctly on top of the body block for cutting). Once reassembled, tape the photocopy of your top view to the body block. Be certain that the axle lines match up to the axle holes drilled earlier! 3. Cutting/Top: Use the scroll saw to cut out the top view. Again, be careful not to cut too close to any vital areas of the car. You can discard all the wood pieces cut off this time. Once finished, you can now see the rough shape of your racecar and you are ready to do shaping. Step No. 6: Shaping Carefully use a rasp, wood file and sandpaper to round and smooth your dragster. This is one of the most important steps -- take your time! Small files are great for getting into little places and making intricate shapes. Sand paper goes through balsa wood like butter. Hollowing out the body can be done a number of ways. A drill can be used to drill various sized holes from the bottom of the car. A hobby knife can be used to cut away wood that is unwanted. Finally, a Dremil tool does wonders with the soft balsa wood (I don't allow the use of this in class due to lack of safety features on most Dremil units, but do allow students to use them at home with their parents permission) . These techniques work equally well for insetting front or rear wheels as well. Begin by working the rough spots with rasps and files gently, then smooth with sandpaper. Balsa wood will never sand perfectly smooth, but is should not be noticeably rough in any places or it will look terrible when painted. Take your time and remember that craftsmanship here will pay big dividends in the race. Once the racecar is the shape you want and all defects are smoothed away, you are ready for paint. Step No. 7: Painting Place a 3/4" dowel rod, 12-18" long, into the CO2 hole to use as a handle. Now you can now begin to paint following the steps below without painting your hand! 1. Priming: Prime the car using a good quality wood primer. Take time to put on a thin coat instead of a thick messy coat. Remember to wash your brush out when finished! Allow the primer to dry overnight, then lightly sand away the imperfections with 400 grit sandpaper. The object here is to sand the primer smooth, not sand the primer off! Once the primer is smooth, you are ready for painting. 2. Painting: I recommend using a water-based spray paint that is VOC compliant for environmental and health reasons. To achieve a quality paint job, remember to always keep the spray nozzle at least 8" away from your car body, use short bursts of paint, and always keep the spray paint can in motion. Doing these three things will avoid most runs and drips. Start with an overall color, then add accent colors. Remember, four light coats are better than one heavy coat, and will dry much faster. With care and thin coats, you should be able to achieve a high gloss, low drag finish of 8-10 coats in a couple of class periods. While the coats of paint dry, you can prepare for assembly. Step No. 8: Axles: Use a hack saw to cut steel axles to the needed length. The length should be the same dimension as your car body at the axle hole, plus enough extra for the wheels to attach to the axle (usually an extra 0.5"). Use caution not to bend the axle by applying to much pressure to the hack saw during cutting. Even a small bend in an axle with slow your car tremendously. Use long, easy strokes with the hack saw, and allow it to do the cutting rather than forcing it through the axle. After cutting the axle, the cut end is quite hot, so don't touch it right away! After giving it a moment to cool, lightly sand the axle with 400 grit sandpaper to remove any imperfections or pitting. Step No. 9: Axle Bearings Once the paint is dry enough to touch, insert a straw used as an axle bearing into each axle hole. You may have to clear away some paint with a hobby knife or awl to get them to fit easily into the axle holes (this is normal). Mark the width of the car body on the straw with a pencil or maker, then cut to length with scissors. The straw bearing should be exactly the width of the car body, and not stick out of the axle hole at all. Once cut to the width of your car body, glue the axle bearing in place with a small amount of wood glue applied to the outside of the straw. Be careful not to get glue on the inside the straw bearing, as this will slow down your car. Finally, wipe away any excess glue that may have made its way to the car body with a wet paper towel Step No. 10: Assembly Attach one front wheel to an axle. The wheel should fit quite tightly on the axle. This is normal, so don't use a hammer or try to widen the axle openings at all, as this will result in your wheel falling off during races. Instead, gently push the wheel straight down onto the axle, with even pressure across the wheel. Repeat for one back wheel. Next, add powdered graphite to the axle bearing (straw) to reduce friction. Be especially careful not to get graphite on the inside of the wheels or on the ends of the axle, as this may result in a wheel falling off during a race! Remember, a little goes a long way. Too much can create problems. Finally, add a brass washer (used to reduce friction between the wheel and the car body) to the axle, and insert the axle through your car body. Add another brass washer to the other side, then carefully push the other wheel on. Step No. 12: Details Once the paint is completely dry, apply any final details such as decals, pin stripes or hub painting to complete your car’s paint job. Rub off decals seem to be a favorite of my students. Painting the stock wheel hubs with silver or gold model paint is another favorite. Finally, for that ultra high gloss finish, a spray lacquer can be used, but be careful that the paint finish is completely dry and compatible with lacquer. I have had many students turn smooth paint jobs into alligator skin from incompatible paint/lacquer combinations (blue seems to be an especially susceptible color). Once finished, you are ready for the final step: testing! Step No. 13: Testing Roll your car gently along the floor or down a test ramp. Check that the wheels spin freely, but are not too loose. Make any adjustments needed. If the wheels wobble, gently bend them in the opposite direction of the wobble until they run true. This step takes time, but will pay dividends during the race. Place your car on a table or desk and look under the car body at the eye-hooks. Are they in line, or is one higher or lower than the other? Make any adjustments needed so that they are directly in line with one another. Do a final check of the wheels. Are they smooth and free of any manufacturing defects? If not, cut away or sand away and defects. Once satisfied with your car, you are ready to race. Good Luck! NO CO2 Dragster – Day 1 Assignment For this exercise you will use MS Word and the NO Co2 Dragster file. You will not be on the Internet or utilizing any other program. Follow the directions. This is an independent assignment, if you are talking your paper will taken and you will receive a ZERO. Good Luck. Open up the NO C02 Dragster File under the Student Drive/Tech Ed/problem Solving/CO2 Cars – you will get all the information from this document. Name: 1. Summarize in your words the project and introduction on page one. 2. Save this Word Document NOW Name it: Last Name First Name in your ENGINEERING FOLDER. Answer each of the following in your own words. You will read the section, not copy and paste, but put it in your words!!! Copying and pasting will result in a Zero. a. What are drag, mass, friction, and acceleration? b. What design features are in a real dragster that should not be in your C02 dragster and why? c. What are thumbnail sketches? Why do them? d. What is a prototype? Why do one? e. What is a design envelope? Why should I use one? f. How should you design your car so that it will be the fastest? g. Test a design idea at the rockets on wheels site. i. How did you do? h. Analyze the steps in your handout on how you will create your dragster. List the three most important ones and tell me why you think they are?
