Enzyme Activity and Substrate Specificity
advertisement
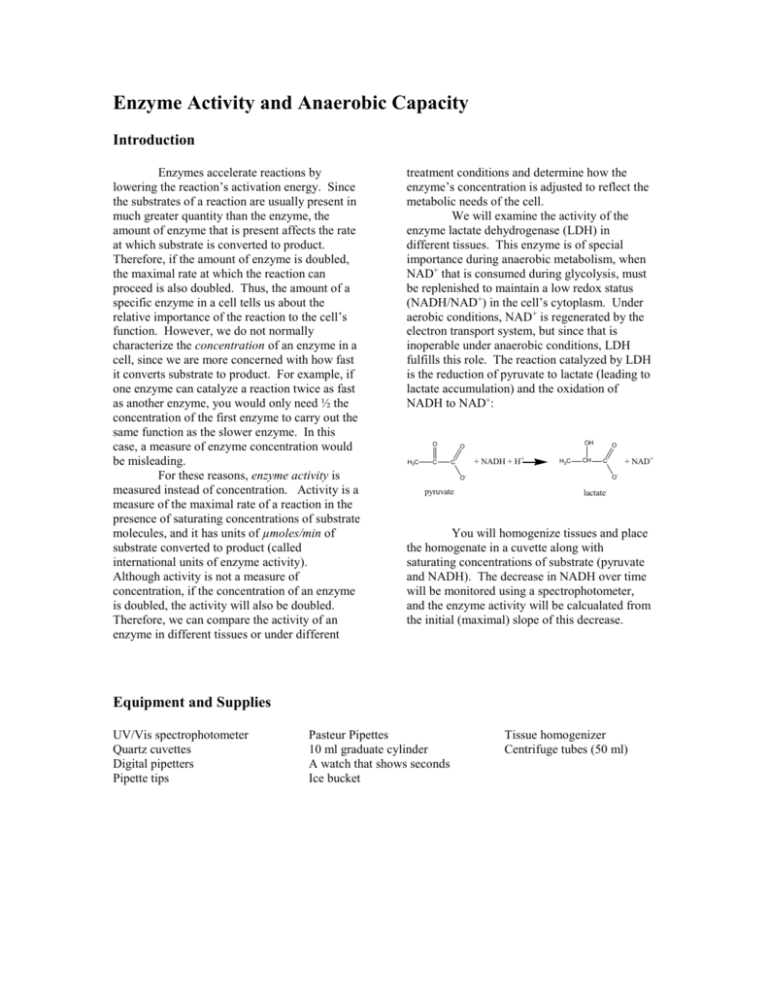
Enzyme Activity and Anaerobic Capacity Introduction Enzymes accelerate reactions by lowering the reaction’s activation energy. Since the substrates of a reaction are usually present in much greater quantity than the enzyme, the amount of enzyme that is present affects the rate at which substrate is converted to product. Therefore, if the amount of enzyme is doubled, the maximal rate at which the reaction can proceed is also doubled. Thus, the amount of a specific enzyme in a cell tells us about the relative importance of the reaction to the cell’s function. However, we do not normally characterize the concentration of an enzyme in a cell, since we are more concerned with how fast it converts substrate to product. For example, if one enzyme can catalyze a reaction twice as fast as another enzyme, you would only need ½ the concentration of the first enzyme to carry out the same function as the slower enzyme. In this case, a measure of enzyme concentration would be misleading. For these reasons, enzyme activity is measured instead of concentration. Activity is a measure of the maximal rate of a reaction in the presence of saturating concentrations of substrate molecules, and it has units of µmoles/min of substrate converted to product (called international units of enzyme activity). Although activity is not a measure of concentration, if the concentration of an enzyme is doubled, the activity will also be doubled. Therefore, we can compare the activity of an enzyme in different tissues or under different treatment conditions and determine how the enzyme’s concentration is adjusted to reflect the metabolic needs of the cell. We will examine the activity of the enzyme lactate dehydrogenase (LDH) in different tissues. This enzyme is of special importance during anaerobic metabolism, when NAD+ that is consumed during glycolysis, must be replenished to maintain a low redox status (NADH/NAD+) in the cell’s cytoplasm. Under aerobic conditions, NAD+ is regenerated by the electron transport system, but since that is inoperable under anaerobic conditions, LDH fulfills this role. The reaction catalyzed by LDH is the reduction of pyruvate to lactate (leading to lactate accumulation) and the oxidation of NADH to NAD+: O H3C C OH O + + NADH + H C H3C CH O - O- pyruvate + NAD+ C O lactate You will homogenize tissues and place the homogenate in a cuvette along with saturating concentrations of substrate (pyruvate and NADH). The decrease in NADH over time will be monitored using a spectrophotometer, and the enzyme activity will be calcualated from the initial (maximal) slope of this decrease. Equipment and Supplies UV/Vis spectrophotometer Quartz cuvettes Digital pipetters Pipette tips Pasteur Pipettes 10 ml graduate cylinder A watch that shows seconds Ice bucket Tissue homogenizer Centrifuge tubes (50 ml) Solutions and Chemicals 1. Extraction Buffer: 25 mM HEPES (pH 7.5), 1 mM EDTA, 1 mM DTT (the EDTA and DTT should be added the day of the experiment). Keep on ice (30 ml/group). 2. Assay Buffer: 100 mM imidazole/HCl (pH 7.0) at room temperature (30 ml per group). 3. 10 mM NADH: (dissolve in 100 mM Tris/HCl pH 8.0). Keep on ice (1 ml per group). 4. 250 mM sodium-pyruvate: (prepared in assay buffer). Keep on ice! (2 ml per group). Procedures Part 1 - Tissue Extraction 1. Each lab group will extract one tissue. You will get the other tissues from other lab groups. Place tissue on weigh paper; weigh on analytical balance and record weight! This is your tissue wet weight. Transfer tissue to 50 ml centrifugation tube and put tube on ice. 2. Add 9 volumes of Extraction Buffer to centrifuge tube: if your wet weight is 1.5 g tissue, add 1.5 x 9 = 13.5 ml of extraction buffer (record volume added). This makes a 10% homogenate. 3. Homogenize tissue/extract buffer with PowerGen tissue homogenizer for a few seconds until your tissue is completely homogenized. Wash the homogenizer blades by running PowerGen for a few seconds in a 500 ml beaker of DI water, dump dirty water and repeat until all debris is removed from homogenizer blades and rinse water is no longer cloudy. 4. Make a centrifuge tube counterbalance for the centrifugation step: Fill an empty centrifuge tube with water until it has exactly the same weight as your sample tube. This counterbalance tube will be placed on the opposite side of the centrifuge rotor to prevent uneven distribution of weight on the rotor. 5. Centrifuge your sample at 10.5 x g (9500 rpm) for 15 minutes. The supernatant contains soluble enzymes - which is what you are interested in. The pellet contains cytoskeletal material, organelles and cell membranes - which you don’t want. The supernatant will be your sample for the spectrophotometric assay. Procedures Part 2 - Spectrophotometric Assays 1. Turn on the spectrophotometer and allow it to warm up for at least 15 minutes. 2. Set the wavelength scale to 340 nm with the Wavelength Control Knob (Make sure filter lever is set to the correct range!). 3. Set the display mode to Transmittance by pressing the Mode Control Key. 4. With the sample chamber empty and lid closed, adjust the display to 0% T with the Zero Control Knob (This is the knob on the left/front of the spectrophotometer). 5. Use 5 ml of Assay Buffer as your “blank” for all assays. Place the “blank” cuvette in sample chamber and align the guide marks. 6. Close the sample lid, and set %T to 100% using the Transmittance/Absorbance Control knob (knob on right/front of the spectrophotometer). Your spectrophotometer is now ready. Set the mode to Absorbance (the reading should be zero in this mode). 7. In your sample cuvette, add 4.8 ml Assay Buffer, 0.1 ml NADH, 0.1 ml Sodium-Pyruvate. Make one of these solutions for each tissue type (1 per lab group – you will get ). 8. When you are ready to begin the assay, add 50 l of supernatant and mix by a single quick inversion of the cuvette (cover the top of the cuvette with parafilm when you mix it). As soon as the cuvette is inverted, begin recording the time. 9. Quickly place the “sample” cuvette into the spectrophotometer and record the absorbance immediately and note what time you recorded the first value. Thereafter, record absorbance every 30 s for 3-5 min or until you have enough data to estimate the initial slope (if the absorbance change is very rapid, record more frequently than every 30 s). 10. Repeat steps 8-9 for each tissue sample (obtain the other tissues from other lab groups). 11. Label your test tube and freeze the remaining sample extract for later use. Homework (show all work) 1. Plot the absorbance vs time and calculate the initial slope (Abs/min). The slope will be negative because you are measuring NADH disappearance – just convert it to positive. Calculate the activity for each tissue using the example below as a guide. The millimolar extinction coefficient () for NADH at 340 nm is 6.22 ml/mole. activity for each tissue. 3. Would you expect a higher LDH activity in white muscle that is used for burst-type exercise (like sprinting) or red muscle that is used for endurance exercise (like jogging)? Explain your reasoning. 2. Create a table (in MS Word) with the slopes from your regression lines and the enzyme Example for calculating enzyme activity (carry this out for each tissue): Assay Conditions (if your conditions differ, use the appropriate values): 5.05 ml total assay volume 50 l of 10% homogenate added = 6.22 ml/mole Sample Data (this is an example only - you will get a different slope value than this for each assay!): A/min = -0.118 (make this number positive) The overall calculation is as follows: A/ = cl = 0.118/6.22 x 5.05/0.05 x 10 = 19.2 moles min-1 g wet weight-1 Calculations: 0.1181 6.22 = 0.0190 moles ml-1 min-1 (this is from the Lambert-Beer law: A = cl, or A/ = cl) 0.0190 molesml-1min-1 5.05 ml assay volume/0.05 ml homogenate = 1.92 moles min-1 ml-1 Since 1 ml = 1 g of wet weight, we have only to correct for the dilution of the homogenate when we extracted the tissue to get the activity: 1.92 moles min-1 ml-1 10 (10% homogenate) = 19.2 moles min-1 g wet weight-1. Spectronic 20D Spectrophotometer Since spectrophotometry is a principle means by which we measure the concentration of biochemical compounds in solution, it is important that you become proficient in the use of this instrument. Here are some tips: 1. Every time that you change the wavelength that you will be measuring, you must first insert a sample “blank” and set either the absorbance to zero or the transmittance to 100%. This ensures that the sample “background absorbance” does not interfere with the absorbance of your compound of interest. This means that for measuring absorption spectra, where the wavelength is changing with every measurement, you have to run a sample blank for each measurement. For experiments where we measure at a single absorbance all day, you only need to calibrate the spectrophotometer with a blank once. 2. Always make sure you remove bubbles, smudges, etc. from the walls of your cuvettes. Your cuvettes must be clean to ensure that the there is no interference in the light path. Also, make sure the indicator mark on the cuvettes line up with the mark on the spectrophotometer. 3. Always make sure your filter lever is in the correct position for the wavelength(s) you intend to measure. Spectronic 20D 1. 2. 3. 4. 5. 6. 7. 8. 9. Sample compartment Digital readout Mode indicators Mode selection Decrease Increase Print Wavelength control Transmittance/Absorbance control (100%T/0A) 10. Power switch/Zero Control 11. Filter lever
