Centrifuge
advertisement
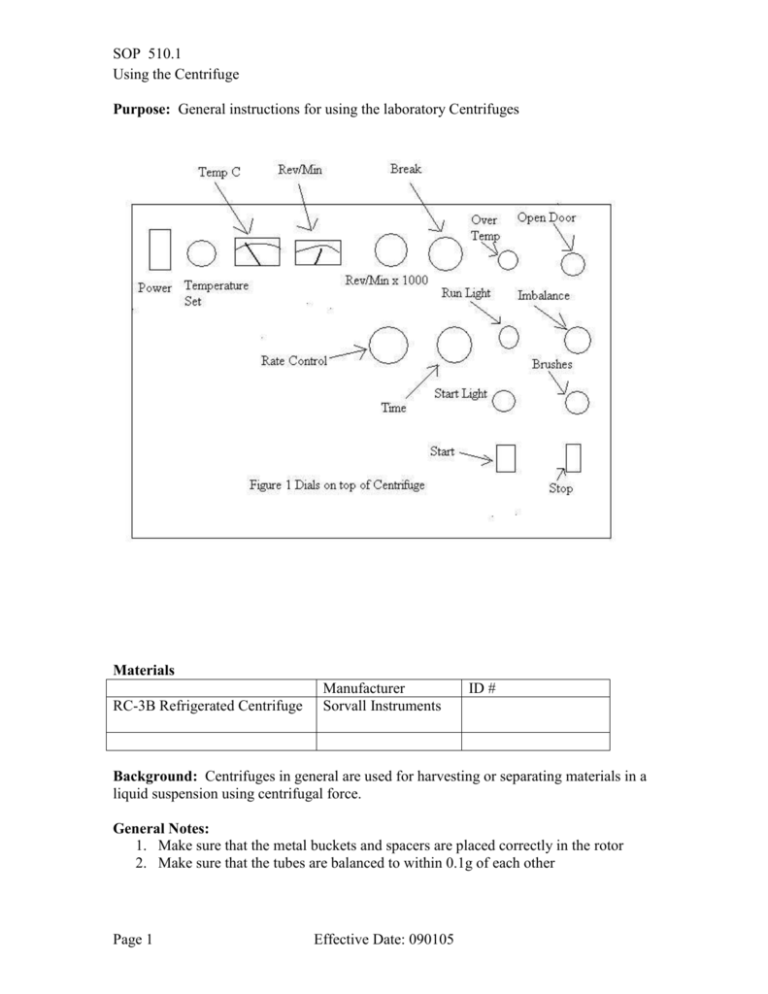
SOP 510.1 Using the Centrifuge Purpose: General instructions for using the laboratory Centrifuges Materials RC-3B Refrigerated Centrifuge Manufacturer Sorvall Instruments ID # Background: Centrifuges in general are used for harvesting or separating materials in a liquid suspension using centrifugal force. General Notes: 1. Make sure that the metal buckets and spacers are placed correctly in the rotor 2. Make sure that the tubes are balanced to within 0.1g of each other Page 1 Effective Date: 090105 SOP 510.1 Using the Centrifuge 3. Before and after using the Centrifuge performs a FFU inspection, wipe out any liquids that form from storage or that was left over from the last use. The Centrifuges should be left clean. 4. Make sure that you wipe all materials and the inside of the centrifuge down after each use. Salts from the media are very corrosive and can damage the centrifuge quickly. Procedures 1. Turn the centrifuge on 1.01 Set the Temperature, this particular unit will not run if the temperature is off by more than 5’. 1.02 Set the speed using the proper rheostat 1.03 Set the break to max or 10 1.04 Set the rate to 0 2 Make sure that the centrifuge has stopped completely by checking the speed of the rotor on the tachometer, or viewing the rotor in the view port. If the unit is still running then see that operator. 3 Open the centrifuge hatch using the latch on the right side. 3.01 Remove the rotor cover, by placing your fingers on either side of the cap and pulling up. 3.02 Check the swing buckets for corrosion and salt build up. If either are present wipe the buckets off with 70% alcohol, then do a second wipe with distilled water. 3.03 If the corrosion causes pitting notify your supervisor. 4 Place your materials in the swing bucket rotors. The materials should be balanced on the rotor and be no more than 0.1g in weight difference. This balance includes everything that goes in the bucket, not just the samples, and will include tubes or bags. 5 Replace the rotor lid and close the centrifuge hatch. 6 Label the hatch with an “IN Process” sticker detailing the contents of the centrifuge, time, time completed and Operators and date. 7 Set the Time. 8 Press and hold the start switch for 5 seconds, then release. 9 The Centrifuge should then go up to roughly 200rmp in speed. The machine will perform self diagnostics. If the unit is not balance correctly it will stop automatically and give an alarm. Do not restart the machine, until you have reinspeced the rotor and made sure that all of the buckets are balanced. 10 Do not leave the unit until it has attained the required speed. 11 Shutting down the Centrifuge. 11.01 Once the unit has come to a complete stop open the hatch and remove the lid. 11.02 Remove your samples 11.03 Remember to clean with 70% alcohol and rinse with distilled water the insides of the rotors and the unit. 11.04 Leave the unit open until it has completely defrosted and has dried. Page 2 Effective Date: 090105 SOP 510.1 Using the Centrifuge 11.05 Close the hatch and remove the In process ticket Created by Nick Kapp Page 3 Effective Date: 090105
