After installing Pipette Tracker, if the databases are not connected
advertisement

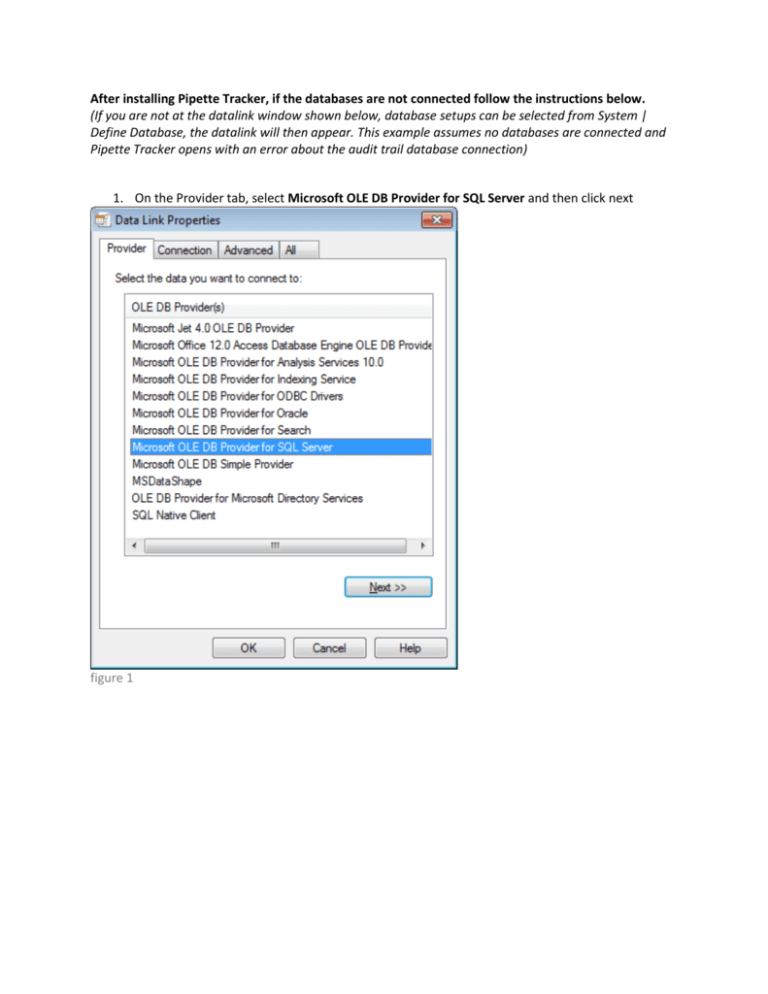
After installing Pipette Tracker, if the databases are not connected follow the instructions below. (If you are not at the datalink window shown below, database setups can be selected from System | Define Database, the datalink will then appear. This example assumes no databases are connected and Pipette Tracker opens with an error about the audit trail database connection) 1. On the Provider tab, select Microsoft OLE DB Provider for SQL Server and then click next figure 1 2. Enter your server name, username and password for the database. Server name:(local)\Labtronics Login: sa Password: Labtronics Check the allow saving password checkbox. On the select database on the server choose: “PTAudit” and finally click “OK” Ex. figure 2 3. Repeat Steps 1 and 2 but choosing the other databases on the server in the following order: “PTSecurity”, “LabInstr”, “UserInstr” 4. Pipette Tracker will now open, on the top menu, go to “System”, “Define Databases” and finally click on “Method…” figure 3 5. Use the same credentials that you used on step 2 and choose “PTMethod” as the database on the server. figure 4 6. On the top menu, go to “System”, “Define Databases” and finally click on “Device…” figure 5 7. Click Add… figure 6 Enter the name that you want to give to your Data Base and click on the “…” button. figure 7 Repeat steps 1 and 2, but this time choose “PTPipette” as the database on the server figure8 Click “OK” for Pipette Tracker 3.3 to start loading your database.


