Concentration and Dilution Lab
advertisement
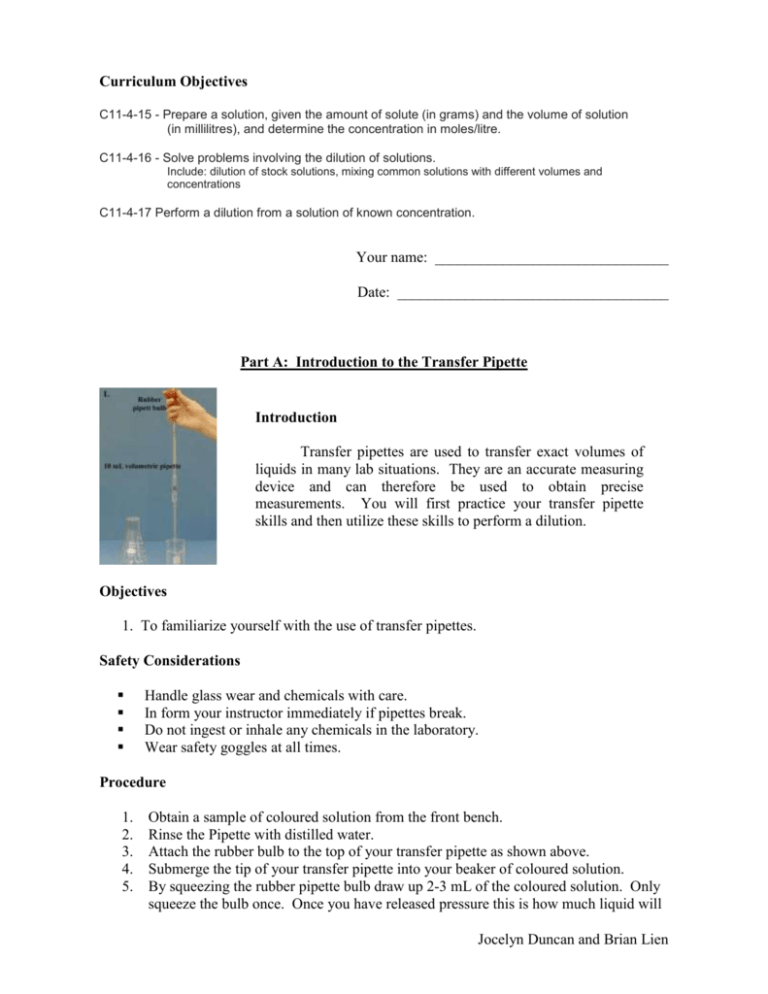
Curriculum Objectives C11-4-15 - Prepare a solution, given the amount of solute (in grams) and the volume of solution (in millilitres), and determine the concentration in moles/litre. C11-4-16 - Solve problems involving the dilution of solutions. Include: dilution of stock solutions, mixing common solutions with different volumes and concentrations C11-4-17 Perform a dilution from a solution of known concentration. Your name: _______________________________ Date: ____________________________________ Part A: Introduction to the Transfer Pipette Introduction Transfer pipettes are used to transfer exact volumes of liquids in many lab situations. They are an accurate measuring device and can therefore be used to obtain precise measurements. You will first practice your transfer pipette skills and then utilize these skills to perform a dilution. Objectives 1. To familiarize yourself with the use of transfer pipettes. Safety Considerations Handle glass wear and chemicals with care. In form your instructor immediately if pipettes break. Do not ingest or inhale any chemicals in the laboratory. Wear safety goggles at all times. Procedure 1. 2. 3. 4. 5. Obtain a sample of coloured solution from the front bench. Rinse the Pipette with distilled water. Attach the rubber bulb to the top of your transfer pipette as shown above. Submerge the tip of your transfer pipette into your beaker of coloured solution. By squeezing the rubber pipette bulb draw up 2-3 mL of the coloured solution. Only squeeze the bulb once. Once you have released pressure this is how much liquid will Jocelyn Duncan and Brian Lien 6. 7. 8. 9. 10. 11. 12. 13. be in your transfer pipette. If you release and then reapply pressure you will form bubbles and the transfer pipette will no longer be accurate. Invert the pipette to a horizontal position. Turn and tip the pipette so all inside surfaces have come into contact with the solution. This is to insure no contamination. Drain the pipette and discard this solution. Re-submerge the tip of your transfer pipette into your beaker of coloured solution. Apply pressure to the bulb until the solution rises above the calibration mark on the pipette, quickly remove the bulb and press down on the end of the pipette with your thumb. Release pressure from your thumb very slightly so that the liquid level slowly drops (this is what will take some practice) so that the meniscus rests on the calibration line. Once the bottom of the meniscus has reached the calibration mark on the pipette, press down firmly with your finger to stop the pipette from draining any further. Transfer the pipette to a clean Erlenmeyer flask and remove your thumb from the pipette. The solution will drain out at its own rate. Do not attempt to blow out any remaining solution. The pipette has been calibrated to account for the last drop left inside. Part B: Concentration and Dilution Lab Objectives 1. To mix a solution and determine its concentration. 2. To perform three dilutions with your prepared solution. Concentration Procedure 1. 2. 3. 4. Obtain a sample of CuSO4 from the front bench. Using your scale weigh out 18g of CuSO4. Dissolve the 18g of CuSO4 in 100ml of distilled water. Stir until you have reached a homogeneous solution with all the solute dissolved in the solvent. 5. Calculate the concentration of your solution. M = mol CuSO4 / L Show your work in the space provided below. (3 marks) Jocelyn Duncan and Brian Lien 6. Compare your solution with the stock solution at the front of the class. Comment on the colour of your solution compared to the colour of the stock solution. (1 mark) Dilution Procedure 7. Using a 20 ml transfer pipette transfer 20ml of your original solution into a clean flask. 8. Using the equation C1V1=C2V2 calculate the volume of the total solution (V2) required to have a 0.8 M solution. C1 is the concentration of your initial solution. Show your work. (2 marks) 9. Add enough water to your 20ml of original solution to reach the new volume (V2). The volume of water (Vw) that needs to be added to dilute the solution is Vw=V2-V1. What is Vw? (1 mark) 10. Using a 10ml transfer pipette transfer 10ml of your 0.8 M solution into a large test tube and put it aside. Make sure you remember which test tube contains which concentration. At the end of the lab you will have 3 different concentrations in 3 different test tubes. 11. Repeat steps 7-10 to obtain a 0.5 M solution. Solve for V2 and Vw. Show your work. (3 marks) Jocelyn Duncan and Brian Lien 12. Repeat steps 7-10 to obtain a 0.2 M solution. Solve for V2 and Vw. Show your work. (3 marks) 13. Bring your 3 test tubes to the front of the room to compare their colours to previously prepared diluted solutions. Have Miss Duncan check your dilution. (3 marks) 14. Fill in the blanks (2 marks). We diluted our solutions by adding water. The more water we added the ____________ the concentration was and the __________ dilute the solution was. 15. How close were your results to the dilutions at the front of the room? What sources of error could have caused variations in your dilutions? (2 marks) 16. Please clean up and complete your lab hand in. References http://www.sfu.ca/chemistry/students/courses/chem126/Techniques/pipeting.htm Jocelyn Duncan and Brian Lien
