Intermediate Banner Techniques - University of Minnesota Duluth
advertisement
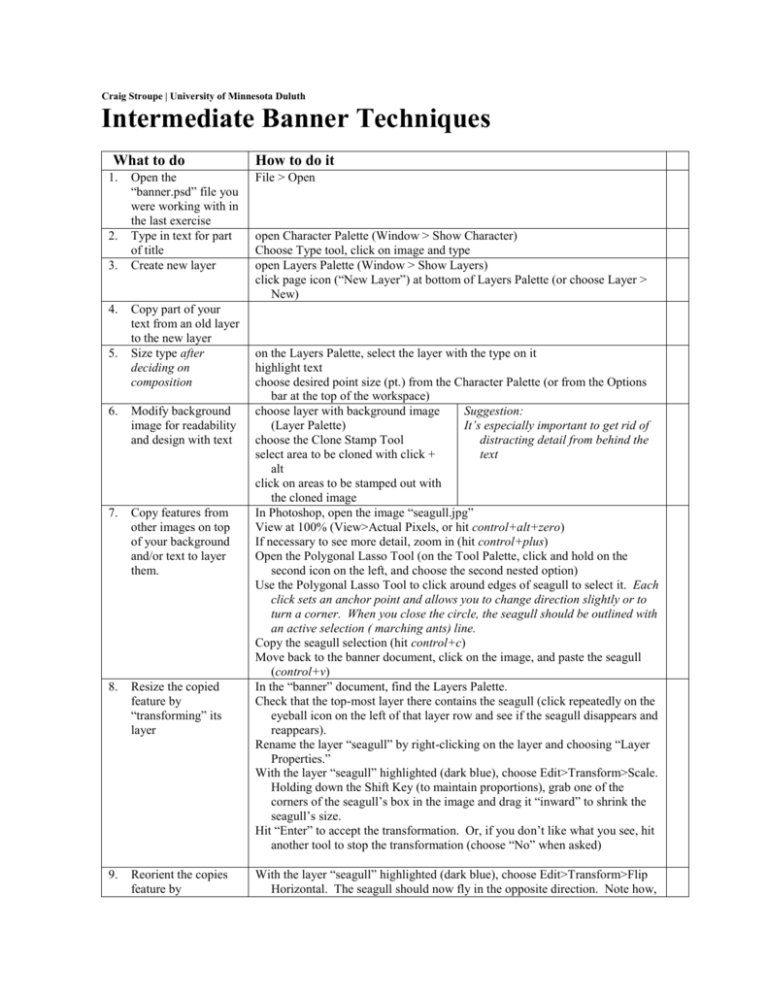
Craig Stroupe | University of Minnesota Duluth Intermediate Banner Techniques What to do 1. 2. 3. 4. 5. Open the “banner.psd” file you were working with in the last exercise Type in text for part of title Create new layer Copy part of your text from an old layer to the new layer Size type after deciding on composition 6. Modify background image for readability and design with text 7. Copy features from other images on top of your background and/or text to layer them. 8. Resize the copied feature by “transforming” its layer 9. Reorient the copies feature by How to do it File > Open open Character Palette (Window > Show Character) Choose Type tool, click on image and type open Layers Palette (Window > Show Layers) click page icon (“New Layer”) at bottom of Layers Palette (or choose Layer > New) on the Layers Palette, select the layer with the type on it highlight text choose desired point size (pt.) from the Character Palette (or from the Options bar at the top of the workspace) choose layer with background image Suggestion: (Layer Palette) It’s especially important to get rid of choose the Clone Stamp Tool distracting detail from behind the select area to be cloned with click + text alt click on areas to be stamped out with the cloned image In Photoshop, open the image “seagull.jpg” View at 100% (View>Actual Pixels, or hit control+alt+zero) If necessary to see more detail, zoom in (hit control+plus) Open the Polygonal Lasso Tool (on the Tool Palette, click and hold on the second icon on the left, and choose the second nested option) Use the Polygonal Lasso Tool to click around edges of seagull to select it. Each click sets an anchor point and allows you to change direction slightly or to turn a corner. When you close the circle, the seagull should be outlined with an active selection ( marching ants) line. Copy the seagull selection (hit control+c) Move back to the banner document, click on the image, and paste the seagull (control+v) In the “banner” document, find the Layers Palette. Check that the top-most layer there contains the seagull (click repeatedly on the eyeball icon on the left of that layer row and see if the seagull disappears and reappears). Rename the layer “seagull” by right-clicking on the layer and choosing “Layer Properties.” With the layer “seagull” highlighted (dark blue), choose Edit>Transform>Scale. Holding down the Shift Key (to maintain proportions), grab one of the corners of the seagull’s box in the image and drag it “inward” to shrink the seagull’s size. Hit “Enter” to accept the transformation. Or, if you don’t like what you see, hit another tool to stop the transformation (choose “No” when asked) With the layer “seagull” highlighted (dark blue), choose Edit>Transform>Flip Horizontal. The seagull should now fly in the opposite direction. Note how, “transforming” its layer again 10. Color the type by choosing other transform options you can make the seagull fly upside down, etc. etc. Choose background layer (Layer Trick: Palette) try picking up colors in the photo Choose Eyedropper Tool itself, or from combinations that Click desired colors on background appear together in nature image Choose layer with type on it Choose Type button Highlight text to be colored 11. Create drop shadow or other effects on the type layer In Layers Palette, double-click layer with type on it Check Drop Shadow in Layers dialogue box Double-click Drop Shadow in left-hand of dialogue box Experiment with changing values for the drop shadow Magic Wand tool Paint bucket tool (shares a button in the Toolbar with the Gradient Tool!) 12. Modify colors of features in the background image if necessary 13. Save your work 14. Follow your manual’s directions of inserting images into a page using Dreamweaver control + s See your manual OR 15. Save a .jpg version of the revised for the Web Try different formats and qualities to find the best settings for your final product. Choose File > Save for the Web. At the top, choose the “4-Up Tab” to see four versions of the image in four panes. From the “Preset” menu on the right, choose “JPEG Medium” and see the visual result in the selected pane on the left (outlined blue) Note the file size in the lower right of that pane (a number followed by “K” or “bytes”). Select another pane on the left, and, from the “Preset” menu on the right, choose “JPEG High.” Compare the file size and visual quality to the mediumquality version Note: The smaller the number the better—but only if you don’t lose too much visual quality in the image itself Select another pane on the left, and, from the “Preset” menu on the right, choose “GIF 128 Dithered.” Compare the file size and visual quality to the “JPEG High” version. Select the pane with the best combination of visual quality and file size Click the “Save” button at the top right Save “banner.jpg” to your folder “www/5230/exercises/banner.”
