www.beadsbaublesandjewels.com
1410-2
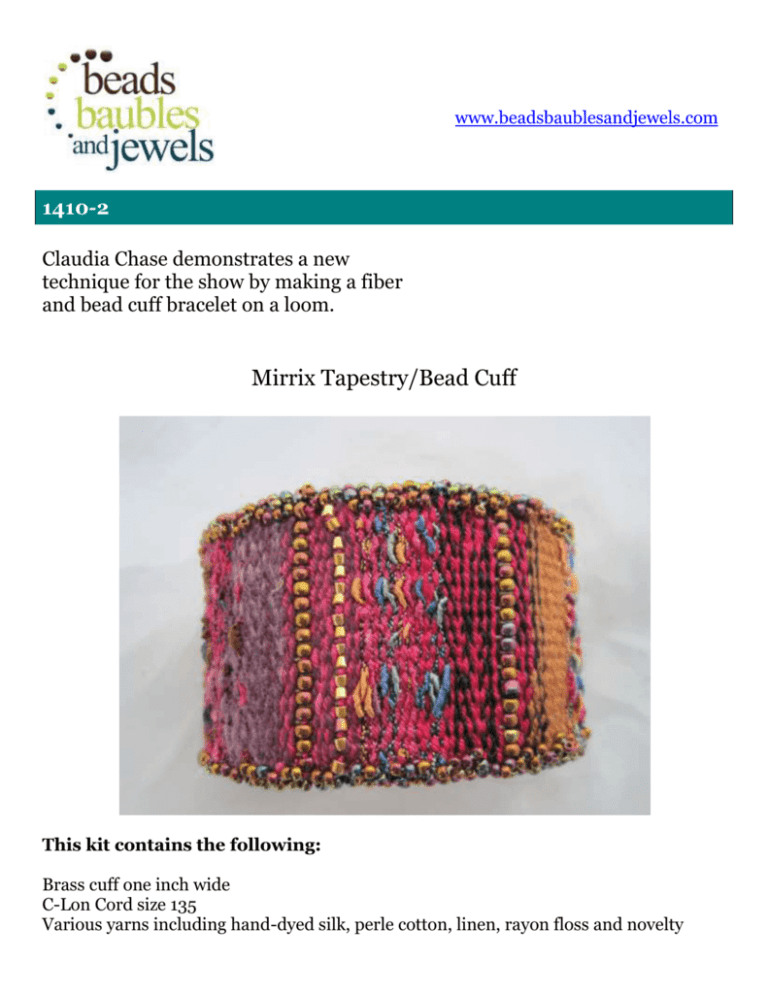
Claudia Chase demonstrates a new
technique for the show by making a fiber
and bead cuff bracelet on a loom.
Mirrix Tapestry/Bead Cuff
This kit contains the following:
Brass cuff one inch wide
C-Lon Cord size 135
Various yarns including hand-dyed silk, perle cotton, linen, rayon floss and novelty
yarns
8/0 and 11/0 seed beads
ultra-suede
Necessary tools not included in the kit:
A Mirrix Loom with shedding device and a ten dent warp coil
A piece of cloth for holding beads
A size 10 beading needle
A tapestry needle
A tube of E-6000 glue
Scissor
Measuring tape
Warping your Mirrix Loom:
Warping method: for tapestry, one thread of C-Lon cord per dent
Warp Coil size: 10 dents
Number of warps: 15
Finished length of piece: 7 inches
You can use any of the Mirrix Looms with shedding devices to create this lovely bracelet.
If you don’t own a ten dent coil, you can use the twelve dent. Once you’ve warped your
loom, spread out the coil on top so there are ten dents per inch.
Reduce your loom’s height to minimize the amount of warp you will use. If you have a
larger Mirrix Loom, this can be accomplished by using the extra warping bar. I like to
weave a piece on both the left and right side of the loom at the same time.
Weaving
Weave a header about a quarter inch long using the C-Lon cord.
You will be weaving straight lines of thread and beads. You decide the order. The
threads in this kit all look beautiful together. In the below piece I am using two threads
at a time for a more interesting color effect. Make sure that you do not pull too tightly
when you wrap around the edges so that your edges remain straight.
(Note: it is helpful to buy one of the tapestry books on our site if you are not familiar
with weaving yarn or want to learn a variety of tapestry techniques.)
To weave the beads, thread a ten inch length of beading thread into a beading needle.
Tie an overhand knot. You will be using this needle with a loop of beading thread to
thread the 8/0 beads onto your yarn. Loop the end of the last piece of yarn you’ve
woven through thread on the needle. Pick up 14 beads with your needle and slide those
beads down the beading thread and onto one of the yarns. (Remember, I was using two
pieces of yarn for the tapestry part but only threaded the beads onto one of the threads.)
Weave the yarn with the beads, placing one bead between each thread.
Weave the empty thread above the beads. In this case I then join that thread with the
second and thread and continue weaving.
When you’ve almost reached seven inches, weave about a quarter inch of the C-Lon
bead cord. Put some glue on the edge of the header and footer so that the weaving does
not ravel when you remove it from the loom. Let the glue set.
To remove the weaving from the loom, loosen the tension on the loom and remove the
warp bar. Lay your piece flat and trim the ends so that you have at least four inches left
to work with (the longer the better). Tie overhand knots with warp pairs. When you’ve
tied all the knots, trim the warp to about an inch in length.
Assembly:
Ultrasuede: Lay the beadwork on the Ultrasuede and trace the outline of the tapestry onto the Ultrasuede.
Trim the Ultrasuede to match the size of the beadwork.
Gluing: Use a toothpick to spread a thin, even layer of adhesive over the back of the tapestry and to one side of
the Ultrasuede. Place the brass cuff blank between the two and sandwich them together. Smooth both pieces to
remove any gaps and make sure they two pieces are aligned.
Edging: Cut a yard length of C-Lon thread. Bury the end between a corner of the beadwork and the
Ultrasuede. You will begin a pico stitch by entering the back of the tapestry, picking up three 11/0 beads and
sewing through the ultrasuede. Continue sewing the back and front together with three beads per stitch.
Tips:
-Make sure that you do not pull too tightly when you wrap around the edges so that your edges remain straight.
Measure the width of your piece frequently to make sure you are not pulling in on the sides.
-The woven beads will help keep your piece at an even width so (at least for your first piece) weave in a row of
beads at least every ½ to 3/4 inches.
-Make sure that your yarn is fine enough that it completely covers the warp threads.
-Push down the weft threads with your fingers after you’ve woven a few rows to create as dense a piece as
possible.
-You always want your ends to be on the back of your piece. End a color by sticking your thread through to the
back (somewhere in the middle) and start a new thread where that thread ended as if it was a continuation of
that same thread. This way, your ends will be neatly hidden away when you finish your piece.
-You can use any tapestry techniques in this cuff but we suggest beginners start with simple lines and weft
blending.
Guest:
Claudia Chase
Copyright © 2011 Beads Baubles and Jewels, All Rights Reserved

