XC-Guide - Leading Edge Flying Club
advertisement
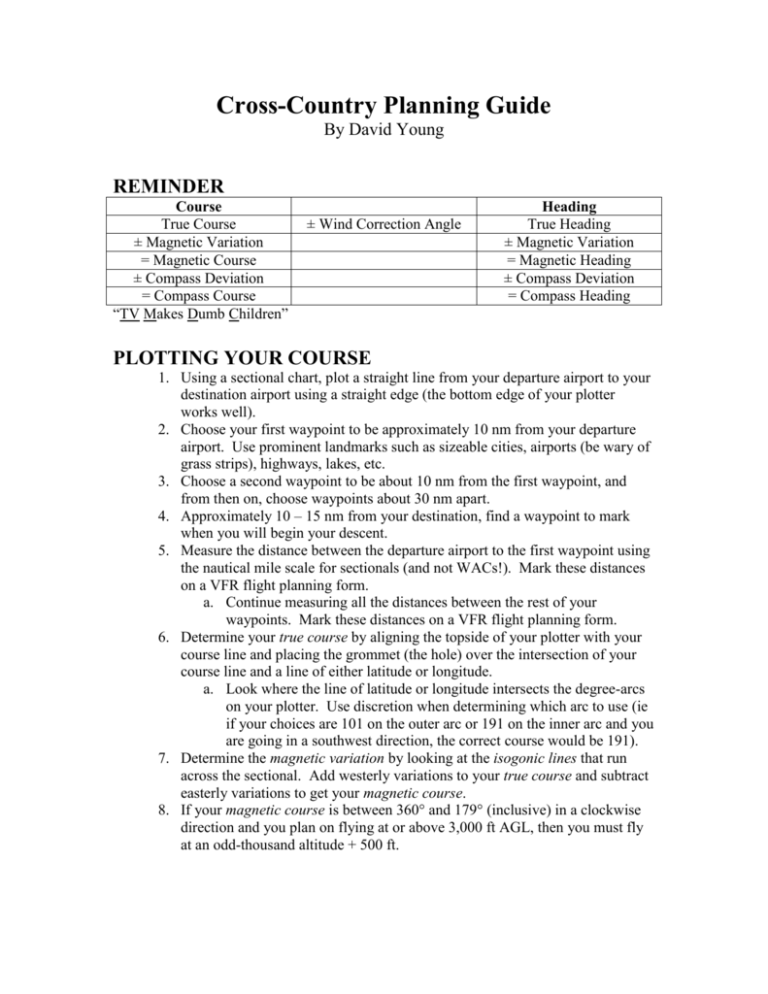
Cross-Country Planning Guide By David Young REMINDER Course True Course ± Magnetic Variation = Magnetic Course ± Compass Deviation = Compass Course “TV Makes Dumb Children” ± Wind Correction Angle Heading True Heading ± Magnetic Variation = Magnetic Heading ± Compass Deviation = Compass Heading PLOTTING YOUR COURSE 1. Using a sectional chart, plot a straight line from your departure airport to your destination airport using a straight edge (the bottom edge of your plotter works well). 2. Choose your first waypoint to be approximately 10 nm from your departure airport. Use prominent landmarks such as sizeable cities, airports (be wary of grass strips), highways, lakes, etc. 3. Choose a second waypoint to be about 10 nm from the first waypoint, and from then on, choose waypoints about 30 nm apart. 4. Approximately 10 – 15 nm from your destination, find a waypoint to mark when you will begin your descent. 5. Measure the distance between the departure airport to the first waypoint using the nautical mile scale for sectionals (and not WACs!). Mark these distances on a VFR flight planning form. a. Continue measuring all the distances between the rest of your waypoints. Mark these distances on a VFR flight planning form. 6. Determine your true course by aligning the topside of your plotter with your course line and placing the grommet (the hole) over the intersection of your course line and a line of either latitude or longitude. a. Look where the line of latitude or longitude intersects the degree-arcs on your plotter. Use discretion when determining which arc to use (ie if your choices are 101 on the outer arc or 191 on the inner arc and you are going in a southwest direction, the correct course would be 191). 7. Determine the magnetic variation by looking at the isogonic lines that run across the sectional. Add westerly variations to your true course and subtract easterly variations to get your magnetic course. 8. If your magnetic course is between 360° and 179° (inclusive) in a clockwise direction and you plan on flying at or above 3,000 ft AGL, then you must fly at an odd-thousand altitude + 500 ft. XC Planning Guide, 2 a. If your magnetic course is between 180° and 359° (inclusive) in a clockwise direction and you plan on flying at or above 3,000 ft AGL, then you must fly at an even-thousand altitude + 500 ft. b. NOTE: Remember “west is best, east is least.” 9. Look at the winds aloft in the area where you will be flying and interpolate between two different altitudes, if necessary. a. Take note of the temperature at altitude. If none is given, then use the standard lapse rate of 2° C per 1,000 ft. i. Example: If the ground temperature is 20° C, and you want to figure out the temperature at 4,500 ft, subtract 2° from 20° for each thousand feet AGL of altitude. The AGL altitude is 4,500 ft – 750 ft = 3,750 ft. Your calculation would be 20° - (2° x 3.75) = 20° - 7.5 ° ≈ 12° C. This is the approximate temperature at altitude. 10. Determine your true airspeed (TAS) by going to the performance section of your aircraft’s operating handbook. a. Determine which power setting you are going to use (55%, 65%, or 75%). b. Find the temperature closest to your at-altitude temperature, and note the power setting in RPM given. c. Interpolate between the given true airspeeds listed to best approximate your aircraft’s true airspeed. DETERMINING YOUR HEADING 11. Determine your wind correction angle (WCA) and groundspeed by using the back of your E6B flight computer. a. Slide the grommet directly over 100. b. Place the winds aloft direction under the true index (the top of the rotatable card). c. Mark the wind speed up from the grommet. i. Example: If the wind is 15 kts, you would make a mark on 115. d. Place the true course under the true index. e. Slide the mark you made up to your calculated TAS. f. The wind correction angle is read between the bold vertical line and your mark. Subtract right WCA and add left WCA to your true course to get your true heading. g. The groundspeed is read under the grommet. FIGURING OUT HOW LONG IT WILL TAKE 12. Now we will figure out how long it will take us to fly our route. Use the front wheel on your E6B. a. Point the “Rate” arrow at your calculated groundspeed on the outer edge of numbers. b. To calculate how long it will take to fly a particular leg of your flight, find the distance (ie 15 nm) along the outer edge of numbers, and read the number on the middle ring. This is the amount of time, in minutes, it will take to fly that far. XC Planning Guide, 3 i. Example: At a groundspeed of 100 kts, it will take 9 minutes to fly 15 nm. c. Repeat this for each leg of your flight. d. Add the times up to determine your flight time. Add at least 10 minutes to your total flight time to account for any delays. Write the estimated time enroute (ETE) only between your departure airport and your first waypoint. We will fill out the rest of the ETEs during the flight. 13. When flying the cross-country, it is important to note the takeoff time on your flight planning form. a. Add your ETE to your departure time to determine your estimated time of arrival (ETA). b. Use a timer to time how long it took to fly from waypoint to waypoint. c. If your actual time of arrival (ATA) differs from your ETA, then your calculated groundspeed was not accurate, and you should recalculate it to better approximate your ETE to your next waypoint. i. To do this, match the distance between your departure airport and the first waypoint. ii. Line up the time it took you to get to your waypoint (which will be on the middle row of numbers on the wheel) with the distance between the departure airport and the waypoint (which will be on the outer ring). Wherever the “Rate” arrow is pointing is our new groundspeed. iii. Use this new groundspeed to calculate the time it will take to reach your second waypoint. iv. Repeat the above steps after reaching every waypoint. DESCENT PLANNING 1. To calculate how many miles out you need to begin your descent, take your current altitude minus the traffic pattern altitude. Divide this number by 300, and you have the number of miles from your destination you should begin your standard 3º descent. Note it is a good idea to add another mile or 2 to this figure so that you are at TPA before you reach the airport. a. Example: current altitude = 5,000 ft, TPA = 1,400 ft. So 5,000-1,400 = 3,600. 3,600 / 300 = 12. Add 1 or 2 to this number and we get 13 or 14. This is the number of miles from your destination you should begin your descent. 2. To determine which descent rate you should use to obtain your 3º glidepath, divide your groundspeed (obtained from the GPS, otherwise use your indicated airspeed) by 2, then multiply that number by 10. This is a good approximation for the descent rate you need to maintain your glidepath. a. Example: current groundspeed = 100. 100/2 = 50. 50 x 10 = 500. To maintain our 3º glidepath, we need to maintain a 500 fpm descent. FINAL WORDS XC Planning Guide, 4 Always ask yourself if your calculations make sense. If your E6B is telling you it will take 50 minutes to travel 9 miles, you probably made a mistake or you have misinterpreted the E6B. When in doubt, ask your instructor or consult any directions on the E6B itself.


