SIOP_Lesson_Plan_Rachel_M_Mims
advertisement
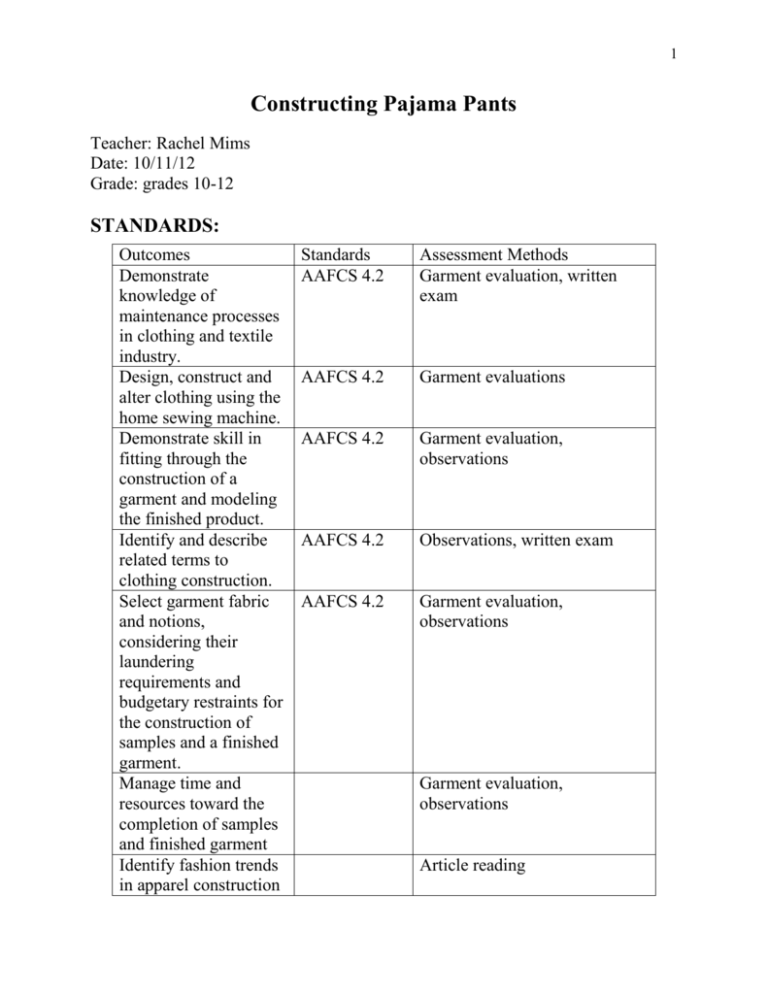
1 Constructing Pajama Pants Teacher: Rachel Mims Date: 10/11/12 Grade: grades 10-12 STANDARDS: Outcomes Demonstrate knowledge of maintenance processes in clothing and textile industry. Design, construct and alter clothing using the home sewing machine. Demonstrate skill in fitting through the construction of a garment and modeling the finished product. Identify and describe related terms to clothing construction. Select garment fabric and notions, considering their laundering requirements and budgetary restraints for the construction of samples and a finished garment. Manage time and resources toward the completion of samples and finished garment Identify fashion trends in apparel construction Standards AAFCS 4.2 Assessment Methods Garment evaluation, written exam AAFCS 4.2 Garment evaluations AAFCS 4.2 Garment evaluation, observations AAFCS 4.2 Observations, written exam AAFCS 4.2 Garment evaluation, observations Garment evaluation, observations Article reading 2 THEME: Create a one of a kind pair of pajama pants for homecoming week LESSON TOPIC: Constructing a pair of pajama pants in class for the student or for a loved one to the best of the students ability OBJECTIVES: The students are required to purchase a specific pattern in order to construct a pair of pajama pants for themselves or a loved one The students will learn to measure themselves, cut a pattern and sew on a sewing machine The students will learn how to hem a pair of pants on a sewing machine The students will learn to hand stitch and different hems Language Objective: Provide graphic organizers, test and classwork in English and other languages as needed Content Objective: Bring in materials, fabric and pattern envelope to begin understanding how to construct a garment by hand and on a sewing machine LEARNING STRATEGIES: Vocabulary Bingo Working on the sewing machine Group work on figuring out the machine and its parts Worksheet on naming the parts of the machine C:\Users\Rae\Desktop\Sewing Machine Graphic Organizer_English.docx C:\Users\Rae\Desktop\Sewing Machine Graphic Organizer_Spanish.docx 3 KEY VOCABULARY: Seam gauge Seam Ripper Presser foot Presser foot release Face/Throat plate Hand wheel Needle Bobbin Bobbin winder Stitch regulator Measuring tape Notions Fabric Selvage Hem Basting stitch Hand stitch Regulation stitch Iron Press MATERIALS: Pattern envelope Material (required amount and type based on pattern envelope) Straight pins with heads Seam gauge Scissors Thread (that matches material purchased) Seam ripper 4 Elastic (amount indicated on pattern envelope) Measuring tape Sewing machine (provided) PICTURES: PRESENTATION: Graphic organizers Hands on activity with the sewing machine Introduction to the sewing machine Modeling pajama pants PRACTICE AND APPLICATION: Teach the students the different parts of the sewing machine. Have the students practice threading the machine and winding a bobbin. 5 Have students practice sewing on the machine on a scrap of fabric with different stitches. Teach the students how to use seam ripper and seam gauge. Provide a lesson the first three classes on how to operate the sewing machine. Provide samples of fabric for the students to practice stitches (zig-zag, straight stitch, basting). Introduce the pattern envelope and go over pattern terminology. Instruct students on how to correctly measure themselves and then cut out the pattern according to the students measurements. Instruct students on the proper way to pin their pattern to their fabric and help them cut out their pattern. Instruct students how to pin fabric together (right and wrong side of fabric). Help the students start to sew their garment together. Teach the student the difference between pressing and ironing. Show students how to insert elastic, close the waistband and hem their pants. REVIEW AND ASSESSMENT: Review vocabulary before exam Review parts of the sewing machine before exam Review hand stitches and hems Review machine stitches (zig-zag, straight stitch, basting) Review pressing and ironing

