Alignment of the camera
TEP
5.5.06
-00
Related topics
Detector Alignment, Rotation axis, tilt,
Principle
Alignment of the detector and the rotation stage is very important to get optimal quality images of a CT
scan. In this experiment, the different possible misalignments and their correction are studied and described.
Equipment
1
1
XRE 4.0 X-ray expert set
XRCT 4.0 X-ray Computed Tomography upgrade set
09110-88
09180-88
Additional equipment
PC, Windows® 7 or higher
Sample for CT-Scan e.g. 09057-44
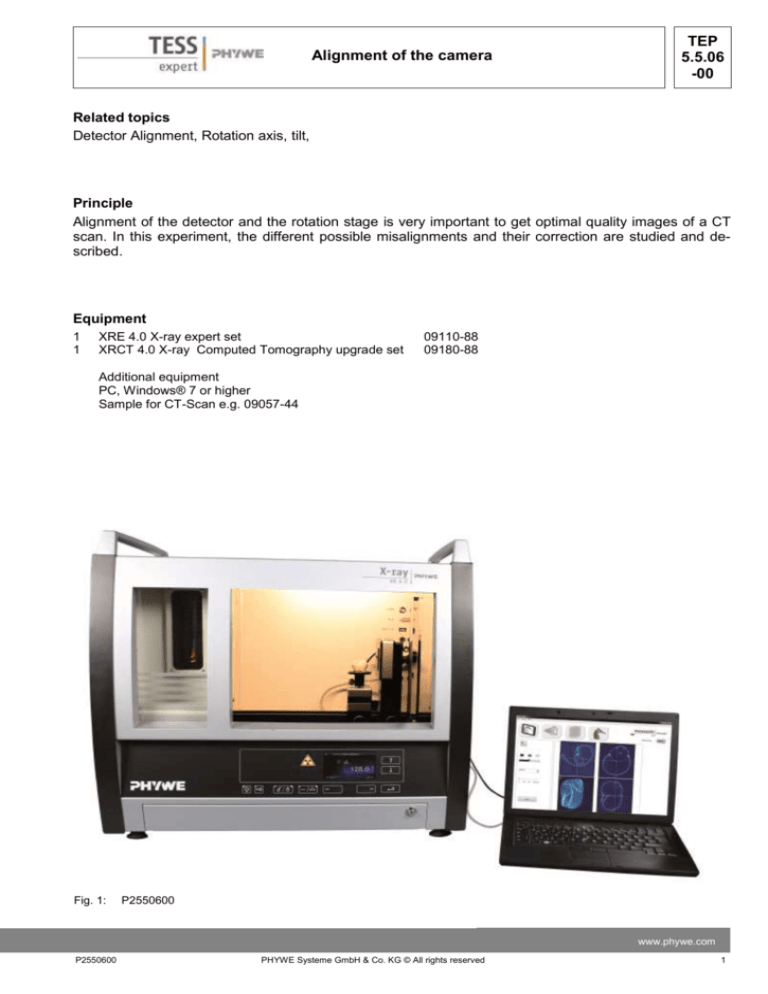
Fig. 1:
P2550600
www.phywe.com
P2550600
PHYWE Systeme GmbH & Co. KG © All rights reserved
1
TEP
5.5.06
-00
Alignment of the camera
Set-up
Attach the XRIS to its stage.
Place the Digital X-ray detector XRIS on the rail at position 30 cm. The back side of the XRIS stage corresponds to its position on the rail. This position is called the 'source to detector distance' SDD (mm).
Connect the usb cable between the detector and the computer
Fig. 2: Set-up of the XRIS
Place the rotation stage XRstage on the rail at position 25 cm. The back side of the XRstage corresponds to its position on the rail. This position is called the 'source to object distance' SOD (mm).
Connect the XRstage cable with the 'Motor' connection block in the experiment chamber. Attach the
sample table to the XRstage with the fastening screw.
Fig. 3: Set-up of the XRstage
2
PHYWE Systeme GmbH & Co. KG © All rights reserved
P2550600
TEP
5.5.06
-00
Alignment of the camera
Connect the X-ray unit via USB cable to the USB port of your computer (the correct port of the X-ray
unit is marked in Fig. 3).
Fig. 4: Connection of the computer
Procedure
-
-
-
-
-
-
Start the “measureCT” program. A virtual Xray unit , rotation stage and Detector will be
displayed on the screen. The green indication
LED on the left of each components indicates
that its presence has been detected (Fig. 5)
You can change the High Voltage and current
of the X-ray tube in the corresponding input
windows or manually on the unit. (Fig.5)
When clicking on the unit pictogram additional
information concerning the unit can be retrieved( Fig.5)
The status pictogram indicate the status of the
unit and can also be used to control the unit
such as switching on and off the light or the Xrays (Fig5.)
The position of the XRIS and XRstage can be
adjusted to its real position either by moving
the XRIS pictogram or by filling in the correct
value in the input window. (Fig.5)
The settings of the XRIS can be adjusted using the input windows. The exposure time
controls the time between two frames are retrieved from the detector, the number of
frames defines how many frames are averaged and with the binning mode the charge of
neighbouring pixels is averaged to reduce the
total amount of pixels in one frame.
Fig. 5: Part of the user interface of the software
www.phywe.com
P2550600
PHYWE Systeme GmbH & Co. KG © All rights reserved
3
TEP
5.5.06
-00
Alignment of the camera
Tasks
1. Optimise the COR and correction
2. Optimise the tilt and correction
Experiment execution
1. Optimise the COR and correction
-
Adjust the XRIS settings and X-ray unit settings according to fig 6 or load the configuration from the
predefined CTO file 'Experiment 6' (see Fig 6).
Overview of the settings of the XRIS and Xray unit:
- 35kV, 1.00mA
- exposure time 0.5 sec
- Number of frames: 1
- Binning mode 500x500
- SDD= 300, SOD= 250
Fig. 6: The settings for this experiment (left panel) and the method load and adjust the settings (right panel)
-
Start a new experiment, give it a unique name and fill in your details (fig xxx). Alternatively it is also
possible to load this experiment with pre-recorded images and open this manual. The correct configuration will be loaded automatically as well but the functionalities of the software will be limited to
avoid overwriting the existing data.
Fig. 7
4
How to create a new or open an existing experiment
PHYWE Systeme GmbH & Co. KG © All rights reserved
P2550600
Alignment of the camera
-
-
-
TEP
5.5.06
-00
Switch on the X-rays (fig. 8.1) and activate the 'Live view' (fig. 8.2). When the Live view is activated,
every new image that is retrieved from the X-ray detector is displayed. The Detector exposure load
bar (fig. 8.3) indicates the average degree of fill for each pixel. It is very important to remain below the maximal fill degree of the detector. Otherwise the detector will be saturated and won't
work properly. If the saturation level is reached, the 'detector exposure' load bar will turn red. (see
experiment 1 for more details)
Calibrate the detector by clicking on "Calibrate'(fig. 8.4). When the calibration is successfully performed, the indication LED (fig. 8.5) will turn green. The Load bar (fig. 8.3) will disappear and the
Contrast/intensity cursor (fig. 8.6) will become available. (see experiment 1 for more info)
Place object XXXX on the sample stage and close the door.
Adjust SOD (fig. 8.7) and SDD (fig. 8.8) in the software according to the actual position.
Fig. 8: Settings to set before start of a CT-scan, part 1
-
Go from the "Live view page" to the "CT scanning page". The indication pictogram will turn blue
when the page is activated.
Fig. 9: CT scanning page
www.phywe.com
P2550600
PHYWE Systeme GmbH & Co. KG © All rights reserved
5
TEP
5.5.06
-00
Alignment of the camera
Start a CT scan (fig. 10.1). During the CT scan the progress (fig. 10.2) as well as the remaining time
(fig. 10.3) is displayed. The current image (fig. 10.4) being recorded is shown and the temporary result (fig. 10.5) is calculated during the scan. It is also possible to track the position of the rotation (fig.
10.6). When the scan is finished it is possible to replay the acquisition as a simulation (fig. 10.7).
-
Fig. 10: Start a CT-scan
When the CT scan is finished it is possible to proceed to the reconstruction. Go from the "CT
scanning page" to the "Data reconstruction page". The indication pictogram will turn blue when
the page is activated.
Fig. 11: Data reconstruction page
6
PHYWE Systeme GmbH & Co. KG © All rights reserved
P2550600
Alignment of the camera
TEP
5.5.06
-00
Change the COR value until the image looks as sharp as possible. The optimal value for the centre of rotation is 250. The detector itself is 1000x1000 pixels, meaning that the central pixel column is 500. When the detector is used in 500x500 binning mode, the central pixel column is
250,....
Fig. 12: Optimisation of centre of rotation
If the COR is between 240 and 260, it is very close to optimal. This value can also be saved in
the default settings of the software so that it automatically uses this value for the next reconstructions (Note: the software will have to be restarted first).
Unscrew the rotation stage and position it further away from the door. Rotate the object using the
manual rotation positioning on the unit between 0°-180° and between 90°-27°. If the object remains in the field of view of the detector, the rotation is well aligned.
Perform several times a scan to check for the influence of this parameter.
2. Optimise the tilt and correction
Loosen the screw at the back of the detector and tilt the detector as much as possible, than retighten the screw.
Fig. 13: Detector tilt
Recalibrate the detector.
Place object XXXX in the XRstage.
Perform a CT scan with the same parameters:
www.phywe.com
P2550600
PHYWE Systeme GmbH & Co. KG © All rights reserved
7
TEP
5.5.06
-00
Alignment of the camera
After the scan, go to the reconstruction tab.
The effect of the reconstruction parameters can be tested with the test button (fig. 14.1). The result is displayed (fig. 14.2) for a certain slice (fig. 14.3) which corresponds to a certain row of the
detector (fig. 14.4). The SOD and SDD (fig. 14.5) parameters should not be altered if they correspond to the physical position of the XRstage and XRIS.
Fig. 14: Data reconstruction page and buttons
8
Start with optimising the COR for the central detector row (height= 250). When this value is optimal, change the height to 50 and test. Since the detector is misaligned the image should be
blurry again. Instead of adjusting the COR value, change the tilt value (fig.14.8) until the image is
sharp.
During tilting of the detector, it is possible that the vertical centre has slightly changed. This can
be checked by testing the slice at row 450. If the result is still as sharp as for row 50, the vertical
centre is still good. In case it is not the vertical centre will have to be altered until the result is
better. Tip: start with big changes in altering the vertical centre and then iteratively smaller down
the step until the result looks good.
If the vertical centre was changed: Go back to row 50. Very probably the result won't look good
anymore, start again with changing the tilt, go to row 450 and adjust the vertical centre. Repeat
this operation until both row 50 and 450 are sharp.
Now you managed to define the reconstruction parameters with a misaligned detector. Change
the tilt again to a better alignment and perform a CT-scan. Check whether there is tilt. In case
there still is, try to improve it as much as possible.
PHYWE Systeme GmbH & Co. KG © All rights reserved
P2550600
Alignment of the camera
TEP
5.5.06
-00
Theory
Alignment
One of the crucial parameters for a CT scan is the correct alignment of the setup. During the reconstructon, the software presumes that the rotation of the sample is according to the set parameters, if this is
not the case, the reconstruction will be incorrect and the data sub-optimal.
In an ideal situation, the source, detector and rotation stage are all perfectly aligned on the optical axis.
The optical axis is defined as an axis perpendicular to the detector plane, through the spot of the X-ray
source.
The detector is well positioned if the optical axis intersects with it in the central pixel. The rotation stage
is well positioned if its rotation axis (the axis around which the sample rotates) intersects in a perpendicular way with the optical axis.
There are many possible misalignments, the most important ones can be corrected either manually or in
the measureCT software. These misalignment are described here:
- Centre of rotation (COR)
If the rotation axis is not coinciding with the optical axis, the COR will not correspond with the
central pixel of the detector (see fig xx).
www.phywe.com
P2550600
PHYWE Systeme GmbH & Co. KG © All rights reserved
9
TEP
5.5.06
-00
Alignment of the camera
This can have two effects. The first is that the images look blurry. This can best be resolved by
adjusting the COR value in the reconstruction tab of measureCT (see fig xx).
The second effect is that, if the object is relatively large, it will not fit on the detector anymore
during the rotation in a scan. This will cause some image artefacts due to missing information
(see fig xxx). This can best be resolved by manually moving the XRstage. (Unscrew the fastening screw and position it so that the objects fits on the detector at all times of the rotation.)
- Tilt and vertical centre:
The main detector misalignment occurs when it is not parallel with the rotation axis (fig xxx).
The software presumes that the COR is identical for the all the pixels rows but if the detector is
tilted, the COR will be vary from top to bottom pixel rows. By adjusting the tilt parameter in the
reconstruction, this can be corrected. Note: the vertical centre is the height around which the
images are tilted for correction, in some cases this needs to be adjusted to get optimal results.
10
PHYWE Systeme GmbH & Co. KG © All rights reserved
P2550600
Alignment of the camera
TEP
5.5.06
-00
- Source detector distance (SDD):
Less crucial but still important is the correct SDD. in case this value is incorrect, the software will not take the correct cone-angle into account and the reconstruction will be suboptimal.
www.phywe.com
P2550600
11
PHYWE Systeme GmbH & Co. KG © All rights reserved
TEP
5.5.06
-00
12
Alignment of the camera
PHYWE Systeme GmbH & Co. KG © All rights reserved
P2550600


