VGA Adapter
advertisement
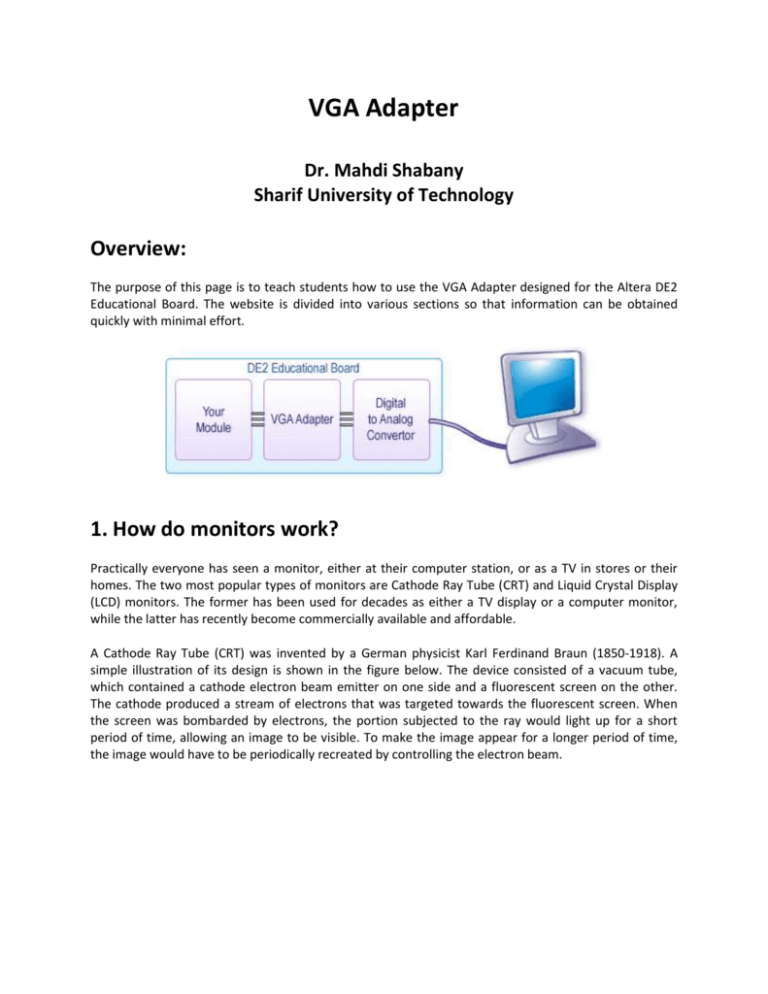
VGA Adapter Dr. Mahdi Shabany Sharif University of Technology Overview: The purpose of this page is to teach students how to use the VGA Adapter designed for the Altera DE2 Educational Board. The website is divided into various sections so that information can be obtained quickly with minimal effort. 1. How do monitors work? Practically everyone has seen a monitor, either at their computer station, or as a TV in stores or their homes. The two most popular types of monitors are Cathode Ray Tube (CRT) and Liquid Crystal Display (LCD) monitors. The former has been used for decades as either a TV display or a computer monitor, while the latter has recently become commercially available and affordable. A Cathode Ray Tube (CRT) was invented by a German physicist Karl Ferdinand Braun (1850-1918). A simple illustration of its design is shown in the figure below. The device consisted of a vacuum tube, which contained a cathode electron beam emitter on one side and a fluorescent screen on the other. The cathode produced a stream of electrons that was targeted towards the fluorescent screen. When the screen was bombarded by electrons, the portion subjected to the ray would light up for a short period of time, allowing an image to be visible. To make the image appear for a longer period of time, the image would have to be periodically recreated by controlling the electron beam. There are generally two ways in which an image can be formed on a CRT. One way is to keep the intensity of the particle stream constant and then change where they hit the screen. This is in essence how an oscilloscope works. The other way it to fix a pattern in which the stream of particles hit the screen and then vary the intensity of the particle stream. In essence the second method allows an image or a shape to be drawn line by line. This is how an image on your computer screen is formed. As the technology matured the quality of the image produced by a CRT was increased, first by producing a sharper image and then by adding color to it. The former was achieved through a finer control of the electron beam allowing smaller and smaller fragments of the screen to be illuminated independently. The latter became possible by replacing the fluorescent coating with a phosphor coating with three different colors - red, green and blue. The screen became a mesh of dots of these three colors. Because the dots are really small (less than a quarter of a millimeter) a group of these dots appears to a human eye as a single point. By controlling the intensity of each of the colors in the dot triplet (red, green, blue) almost any color can be produced. 1.1. Controlling the Display: In the 1980s as the Personal Computers became more and more popular it was necessary to create a standardized way to control the CRT, especially from a computer programmer's the point of view. This was done by abstracting the CRT screen as a grid of picture elements (pixels). Each pixel was comprised of a group of (red, green, blue) dot triplets. The screen could then be thought of as having x columns and y rows of pixels, which could be easily manipulated on a computer. Many display standards emerged, each with a different number of rows, columns and colors. One of such standards was introduced by International Business Machines (IBM) in 1987. It is called the Video Graphics Array and defined a way to display an image 640 pixels wide by 480 rows high (known as 640 by 480 resolution) with 16 colors. Since then the number of colors supported at the resolution of 640 by 480 has increased, but the way to control the monitor in this resolution has remained the same. In the related pages we describe a VGA adapter, which implements the hardware necessary to control a monitor in a 640 by 480 resolution. It abstracts the inner workings of the monitor to the point of it being perceived strictly as an array of pixels that you can easily control. 2. What does the VGA adapter do? The VGA Adapter is a hardware module designed for the Altera DE2 board to control video display in a 640 by 480 resolution. The adapter provides a simple interface to draw pixels on a monitor screen, without the need to fully comprehend the VGA signaling standard necessary to actually transmit each pixel to a monitor. The adapter stores the location and color of each pixel in its internal memory and then updates the image on a monitor approximately every 60th of a second. A block diagram of the adapter is shown below. Because of the limit of on-chip memory on the Altera DE2 board (~500k bits) a full 640 by 480 resolution with more than a two colors is not feasible, hence we reduce the resolution available to the user to one of 320x240 and 160x120. Instead of a resolution of 640 by 480 pixels, the screen is divided into 320/160 columns and 240/120 rows of Mega Pixels. 2.1. Mega Pixels: Because of the limit of on-chip memory on the Altera DE2 board (~500k bits) a full 640 by 480 resolution with more than a two colors is not feasible, hence we reduce the resolution available to the user to one of 320x240 and 160x120. Instead of a resolution of 640 by 480 pixels, the screen is divided into 320/160 columns and 240/120 rows of Mega Pixels. To light up a specific MegaPixel on the screen the user simply specifies the (x, y) coordinates and its color to the adapter. The adapter then updates its internal memory and displays the new image during the next screen update cycle. 2.2. Interface: The "VGA Adapter's Interface" page outlines all of the details involved with the VGA Adapter module and explains how to use the VGA Adapter module. You can use that page as a quick future reference to obtain relevant details about the module. 3. VGA Adapter’s Interface: The VGA Adapter provides an easy to use interface for drawing on a screen. It takes the x and y coordinates as well as a color of a MegaPixel to be drawn from the user. When the user sets the plot input to a logic 1, then at the next positive edge of the clock the adapter will store the new MegaPixel in its memory and draw it the next time the monitor screen is updated. To illustrate how to use the adapter we present the following example. Suppose that you specify that the adapter is to function at a resolution of 160 by 120 MegaPixels and uses 1 bit per color channel. Then you VGA Adapter interface would look as follows: Now, lets try to use the adapter to draw a few pixels somewhere on the screen. For example, let us draw two pixels, one at (15, 62) and the other at (109,12). The timing diagram representing how the input signals should be set is presented below. In the diagram the first MegaPixel drawn is red and is placed at (15, 62). The second is a yellow MegaPixel being written to (109, 12). As outlined, the values for the signals (color, x, y) are set up before and held after the positive edge of the clock. 3.1. Port Description: The following table outlines the connections to the VGA Adapter module and their respective descriptions. Port Name Description resetn This is an active low input port that causes the VGA Adapter to reset. Typically, this port is connected to the top-level reset signal in the design. clock This port supplies the main clock source for the VGA Adapter. To function properly, the clock frequency of this clock must be set to 50MHz. On a DE2 board such a clock is found on PIN_N2. colour The colour bus defines the color of the Mega Pixel to be drawn. In the MONOCHROME mode this bus has only one bit. If set to 1 it causes the colour of the pixel drawn to be white. Otherwise a black pixel is drawn. In a colour mode, this bus has 3*n bits, where n is the number of bits used per colour channel (BITS_PER_COLOUR_CHANNEL parameter). It is a composition of three separate busses that define the intensity of red, green, and blue colour components of a MegaPixel. The top n bits represent the red colour, the middle n bits represent the green colour, and finally the bottom n bits represent the blue colour. Port Name Description x These ports are used to specify the coordinates of the MegaPixel you would like to modify. In 160 by 120 resolution the values for x are (0-159), while the values for y are (0-119). In the 320 by 240 resolution the values for x are (0-319), while the values for y are (0-239). y plot If this signal is raised to high, the information from x, y and color is stored in the VGA Adapter module on the next positive edge of the 50 MHz clock. This will cause a MegaPixel to be drawn onto the screen during the next update. VGA_R[9..0] These ports are to be connected to the 10-bit DACs (Digital to Analog Converters) on the VGA_G[9..0] DE2 Educational Board. Once converted to analog, these signals are transmitted to the VGA monitor. VGA_B[9..0] VGA_HS VGA_VS These ports produce the horizontal and vertical sync signals for the VGA monitor. They must be connected to pins A7 and D8 respectively on the DE2 Educational Board. VGA_CLK This output clock signal operates at the frequency of 25 MHz. This signal is derived from the clock input of the VGA Adapter. This signal should drive pin B8 on the DE2 Educational Board in the top-level design to ensure correct operation of the VGA Adapter. VGA_BLANK This signal is always 1 and is necessary for the VGA adapter to function correctly. This output should be connected to PIN_D6. VGA_SYNC This is a syncronization signal for the monitor. This signal should be connected to pin PIN_B7 on the DE2 board. 4. Changing Adapter Parameters: The VGA Adapter module is a parameterized module that can be configured for a set of different MegaPixel resolutions as well as the number of available colors. The module has four parameters to control the operation of the adapter: RESOLUTION - can be set to either "320x240" or "160x120". The default value is "320x240". MONOCHROME - can be set to "TRUE" to indicate a black & white display or to "FALSE" to indicate a color display. The default value is "FALSE". BITS_PER_COLOUR_CHANNEL - number of bits each color channel has when the adapter is not in the monochrome mode. It can be any integer number between 1 and 7, depending on the resolution used. The default value is 1. BACKGROUND_IMAGE - an MIF file that contains the initial contents for the video memory. The contents of this file must match the resolution and the color depth of the screen and effectively provide an image (other than blank screen) that appears when you reprogram the DE2 board. Note that resetting the VGA Adapter will not cause the image stored in this file to reappear on the screen. By default this parameter is set to background.mif. To change these settings you will need to change the above parameters when you instantiate the module in your Verilog code or in the schematic diagram. To change these parameters in the Verilog code you have to instantiate the VGA Adapter in your code and change the parameters of the module using defparam statements. Verilog code to do so is shown below: vga_adapter VGA( .resetn(KEY[0]), .clock(CLOCK_50), .colour(SW[17:15]), .x(SW[14:7]), .y(SW[6:0]), .plot(~(KEY[1])), .VGA_R(VGA_R), .VGA_G(VGA_G), .VGA_B(VGA_B), .VGA_HS(VGA_HS), .VGA_VS(VGA_VS), .VGA_BLANK(VGA_BLANK), .VGA_SYNC(VGA_SYNC), .VGA_CLK(VGA_CLK)); defparam VGA.RESOLUTION = "160x120"; defparam VGA.MONOCHROME = "FALSE"; defparam VGA.COLOUR_CHANNEL_DEPTH = 1; defparam VGA.BACKGROUND_IMAGE = "image.colour.mif"; The above code is taken from the demo example. In this demo you can specify the x and the y coordinate for a pixel using switches SW[14:7] and SW[6:0] respectively. The colour is specified with switches SW[17:15]. Once you set these three parameters you have to push button KEY[1] on the Altera DE2 board for the given pixel to be drawn. In the above example notice two important items. First, the vga_adapter module is instantiated with an instance name "VGA". Second the instance name "VGA" appears in each of the defparam statements. It is followed by a dot, a parameter name, an equal sign and a new parameter value. Make sure that when you are using Verilog code the instance name of the vga_adapter and the string before the period in each of the defparam statements are identical. This is because in Verilog the defparam statement uses the instance name of a module to determine the module for which a specific parameter is defined. In a schematic diagram the change of parameters happens a bit differently. First, you need to copy the vga_adapter.bsf file from the VGA Adapter package to your project directory. Then insert a symbol for the VGA Adapter into your design using the schematic editor. When you do this, the following image should appear on your schematic diagram: To change the VGA Adapter parameters, simply double-click on the box with parameters. This will open up a "Symbol Properties" window in which you can modify module parameters by going to the "Parameters" tab. Then for each parameter you want to change, select it from the list at the bottom of the window, modify the parameter's value and press the "change" button. Once you have modified the parameters to your liking, press the "Ok" button for the changes to take effect. 4.1. Resolution/Color Table: The following table shows parameter settings for the VGA Adapter module and the resulting number of colors and memory usage. Notice that with the increase in resolution and the number of colors, the amount of memory used increases as well. Choose your parameters according to your needs, keeping in mind that the VGA Adapter will likely not be the only component of your design that uses memory. Resolution Color Channel Depth Monochrome Color Range Memory Usage (bits) Memory Usage (%) 160x120 - TRUE 2 19,200 4% 160x120 1 FALSE 8 57600 12% 160x120 2 FALSE 64 115200 24% 160x120 3 FALSE 512 172800 36% 160x120 4 FALSE 4096 230400 48% 160x120 5 FALSE 32768 288000 60% 160x120 6 FALSE 262144 345600 72% 160x120 7 FALSE 2097152 403200 84% 320x240 - TRUE 2 78600 16% 320x240 1 FALSE 8 230400 48% 5. BMI2MIF Converter: The BMP2MIF converter is a simple program that can help you in your ECE241 project. In essence it takes an image saved in a BMP file and converts it to a Memory Initialization File used within Quartus II. The Memory Initialization File, or MIF, can be used to initialize a memory block on the Cyclone II FPGA you have on the DE2 board. The converter takes only one parameter - the name of the BMP file you wish to convert. It produces two files: image.colour.mif - an MIF file containing your image in 8 color. This assumes you set the VGA Adapter to work with 1 bits per color channel. image.mono.mif - an MIF file with a black and white representation of your image. It assumes the MONOCHROME parameter of the adapter is set to "TRUE" Once you create an MIF file, you will need to create a memory block in your design to facilitate the data in the MIF file. When you create such memory and specify either of the above files as the initialization file for the memory, Quartus II will be able to copy the contents of the MIF file to the Cyclone II chip on the DE 2 board when you are programming the device. Please note that any time you change the MIF file you need to recompile your project entirely. Only then will the MIF file be read by Quartus II and its data included in a programming file for the FPGA. Once you create a memory in your design to store your image, the image will be loaded into it during the time you use the programmer to configure your FPGA. The image itself will be stored as a set of values in the memory. For example, if your image is m pixels wide and n pixels high, then the first m data elements in memory will represent the first row of the image, from left to right. The next m data elements will represent the second row and so on. BMP2MIF converter comes as a package. The package contains a compiled bmp2mif.exe executable file you can run on a Windows based system, as well as a Visual Studio Project and the source code for the converter. You can modify it as you wish to suit your needs. You can download this converter from the course website.
