RADIOLOGICAL ANATOMY OF LOWER LIMB
RADIOLOGICAL ANATOMY OF LOWER LIMB
LEARNING OBJECTIVES
1-To correlate bone with the X Ray.
2- To identify the bone and joint in X-ray.
3- To know the different views of the X ray.
4- To identify the different directions on X Ray.
INTRODUCTION:
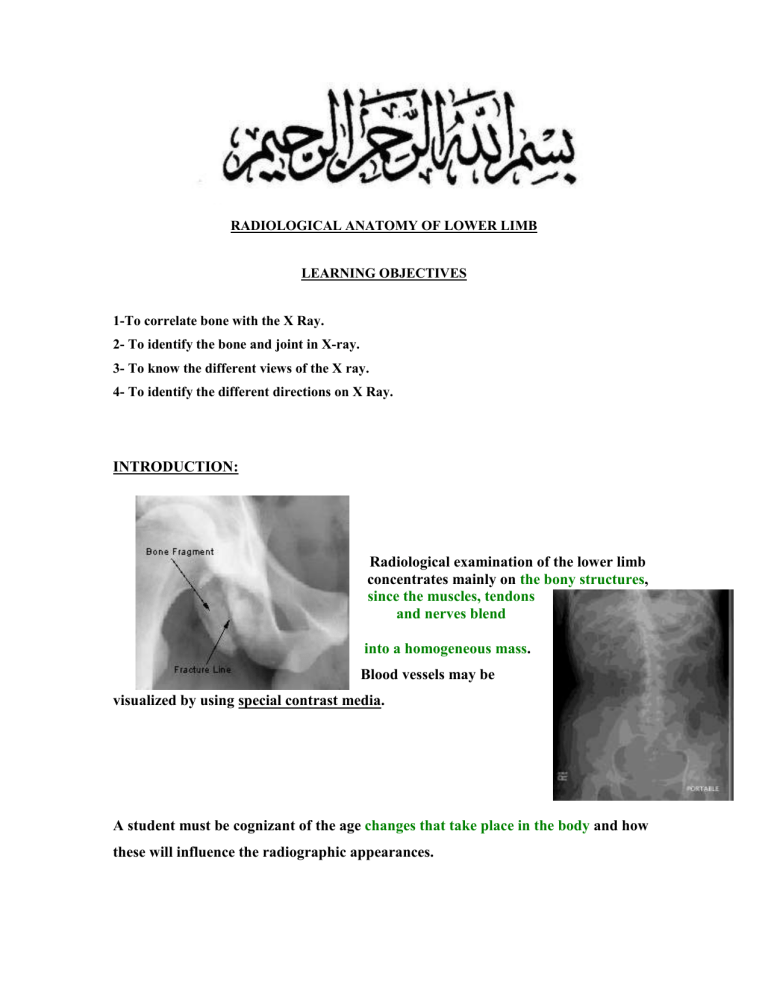
Radiological examination of the lower limb concentrates mainly on the bony structures , since the muscles, tendons and nerves blend
into a homogeneous mass .
Blood vessels may be visualized by using special contrast media.
A student must be cognizant of the age changes that take place in the body and how these will influence the radiographic appearances.
For example, knowing the times at which the primary and secondary centers of ossification appear in the different bones, and the dates at which they fuse, is essential since without this information an epiphysis line could be mistaken for a fracture.
Remember that a person has two lower limbs, and that the normal side may serve as a baseline for comparison with the potentially abnormal side.
HOW TO READ AN X-RAY:
The process of reading X-ray film should be as methodical as clinical examination.
A convenient sequence for examination is;
Patients
Soft tissues
Bones
Joints
Diagnostic Association .
PATIENTS:
Make sure that the name on the film is that of your patients; mistaken identity is a potent source of error.
Then try to look through the film and to visualize the living person, especially the age, build and sex.
SOFT TISSUES:
Look for variation in shape in density.
BONES
When studying the bones and joint, establish a search pattern based on the local
Anatomy. Throughout this search we record abnormalities of shape, density and architecture.
Examine carefully Periosteal surface, Cortex and Endosteum
JOINTS:
The radiographic “joint” consists of the articulating bones and space between them.
The articular cartilage is radiolucent, varies in thickness 1 – 8 mm.
It looks much wider in children than in adults because much of the epiphysis is still cartilaginous and therefore radiolucent.
DIAGNOSTIC ASSOCIATION:
The search for associated abnormalities, or clarification of some poorly observed feature in the plain film, may call for further examination by one of the other imaging techniques.
RULE OF 2’S :
Two views.
Two joints
.
Two limbs.
Two Occasions.
RADIOGRAPHIC APPEARANCES OF THE HIP REGION
In AP view first, examine the relevant features seen in the pelvis, sacrum and sacroiliac joints. The iliopectineal line and the symphysis pubis are well shown. The boundaries of the obturator foramen and the ischial tuberosity can be identified.
The superior shelving margin of the acetabulum can be seen.
The articulating surfaces of the hip joint are seen to be parallel and separated by a narrow space occupied by radiotranslucent articular cartilage. The head, the neck, the greater and lesser trochanters, and the intertrochanteric crest of the femur can all be visualized.
The axial relationships of the hip joint should be studied. The inferior margin of the neck of the femur should form a smooth continuous curve with the superior margin of the obturator foramen (shenton’s line).
Radiograph (a) and line drawing (b) of Shenton's line
The angle formed by the long axis of the neck of the femur with the long axis of the shaft of the femur measures between 120 and
130 degrees.
In lateral view first identify as many of the relevant parts of the pelvis as possible.
The obturator foramen, the ischial spine and tuberosity, the pubic ramus, and the body of the pubis may all be recognized. The acetabular rims and the head and the whole neck and lesser trochanters and the proximal part of the shaft are visualized.
PELVIS (ANTEROPOSTERIOR)
1. Lateral part of the sacrum
2. Gas in colon
3. Ilium
4. Sacroiliac joint
5. Ischial spine
6. Superior ramus of pubis
7. Inferior ramus of pubis
8. Ischial tuberosity
9. Obturator foramen
10. Intertrochanteric crest
11. Pubic symphysis
12. Pubic tubercle
13. Lesser trochanter
14. Neck of femur
15. Greater trochanter
16. Head of femur
17. Acetabular fossa
18. Anterior inferior iliac spine
19. Anterior superior iliac spine
20. Posterior inferior iliac spine
21. Posterior superior iliac spine
22. Iliac crest
Hip Joint (Anteroposterior)
1. Anterior superior iliac spine
2. Ilium
3. Anterior inferior iliac spine
4. Pelvic brim
5. Acetabular fossa
6. Head of femur
7. Fovea
8. Superior ramus of pubis
9. Obturator foramen
10. Inferior ramus of pubis
11. Pubic symphysis
12. Ischium
13. Lesser trochanter
14. Intertrochanteric crest
15. Greater trochanter
16. Neck of femur
RADIOGRAPHIC APPEARANCES OF THE KNEE REGION:
In the AP view the lower part of the shaft of the femur, the lateral and medial epincondyles, and the adductor tubercle are easily visualized. The patella is seen superimposed in front of the lateral and medial femoral condyles. The fabella , a sesamoid bone in the lateral head of the gastrocnemius, is sometimes seen superimposed on the lateral femoral condyle.
The parallel joint surfaces, separated by a wide space occupied by the articular cartilage and the semilunar cartilages, which cast no shadow, are easily recognized.
The intercondylar notch of the femur and the intercondylar eminence of the tibia are well shown.
The medial and lateral condyles of the tibia are seen. The head of the fibula partly overlaps the lateral condyle of the tibia. The neck of the fibula and the upper parts of the shafts of the fibula and tibia are usually clearly seen.
In the lateral view the lower part of the shaft of the femur is seen, and the lateral and medial femoral condyles are partly superimposed on each other. The patella is clearly visualized in front of the femoral condyles.
The intercondylar eminence of the femur and its summit is overlapped by the femoral condyles. The lateral and medial tibial condyles are superimposed, and the tibial tuberosity is seen on the anterior surface of the bone. The head, neck, and upper part of the shaft of the fibula are seen, the fibula overlapping the tibia to some extent.
KNEE JOINT (ANTEROPOSTERIOR)
1. Femur
2. Patella
3. Medial epicondyle of femur
4. Lateral epicondyle of femur
5. Medial condyle of femur
6. Lateral condyle of femur
7. Intercondylar eminence
8. Intercondylar notch
9. Knee joint
10. Lateral condyle of tibia
11. Medial condyle of tibia
12. Tibia
13. Fibula
KNEE JOINT (LATERAL)
1. Femur
2. Lateral condyle of femur
3. Medial condyle of femur
4. Fabella
5. Patella
6. Base of patella
7. Apex of patella
8. Intercondylar eminence
9. Apex of fibula
10. Fibula
11. Tibia
12. Tibial tuberosity.
LOWER LEG (ANTEROPOSTERIOR)
1. Femur
2. Medial condyle of femur
3. Lateral condyle of femur
4. Knee joint
5. Intercondylar eminence
6. Lateral condyle of tibia
7. Medial condyle of tibia
8. Fibula
9. Tibia
10. Head of fibula
11. Neck of fibula
LOWER LEG (LATERAL)
1.
Femur
2. Knee joint
3. Intercondylar eminence
4. Tibial tuberosity
5. Fibula
6. Tibia
7. Ankle joint
8. Talus
9. Calcaneus .
PATELLA (DISTAL-PROXIMAL)
1. Patella
2. Medial part of patella
3. Lateral part of patella
4-5. Patellofemoral joint
6. Lateral femoral condyle
7. Medial femoral condyle
RADIOGRAPHIC APPEARANCES OF THE ANKLE JOINT:
In the AP view the lower ends of the tibia and fibula and the inferior tibiofibular joint are well shown. The medial and lateral malleoli and the articular surfaces of
the tibia and the body of the talus are easily seen. The lateral malleolus usually partly overlaps the lateral aspect of the talus.
The articular surface of the lower end of the tibia and the superior surface of the talus are seen to be parallel and separated by a narrow space occupied by the articular cartilage, which is radiotranslucent. Other than the talus, the tarsal bones are not clearly visualized.
The lateral view shows the lower ends of the tibia and fibula; the lateral and medial malleoli are superimposed. The articuar surfaces of the ankle joint are clearly visualized. The talus and calcaneum are seen in profile, and the subtalar and transverse tarsal joints can be identified. The cuneiform bones and the cuboid are overlapped and not clearly seen.
ANKLE JOINT (ANTEROPOSTERIOR)
1. Fibula
2. Tibia
3. Distal tibiofibular joint
4. Malleolar fossa
5. Lateral malleolus
6. Ankle joint
7. Medial malleolus
8. Talus
ANKLE JOINT (LATERAL)
1. Fibula
2. Tibia
3. Ankle joint
4. Promontory of tibia
5. Trochlear surface of talus
6. Talus
7. Posterior tubercle of talus
8. Calcaneus
9. Sustentaculum tali
10. Tarsal tunnel
11. Navicular
12. Cuneiforms
13. Cuboid
RADIOGRAPHIC APPEARANCES OF THE TARSUS, METATARSUS AND
PHALANGES
The views commonly used are:
(1) Anteroposterior,
(2) Lateral, and
(3) Oblique.
The particular view used will depend on which bone is need to be visualized to best advantage. The oblique view of the metatarsal bones is often of greater value than the lateral view, since in the later the bones are superimposed.
In the Anteroposterior view, the tarsal bones the metatarsals, and the phalanges are seen. The two sesamoid bones of the big toe overlap the head of the first metatarsal bone.
FOOT (DORSO-PLANTAR)
A-E: Toes 1-5. (A: Great toe)
I-V. Metatarsals
1, 3: Distal phalax
4: Middle phalax
2,5: Proximal phalax
6. Interphalangeal joints
7. Metatarsophalangeal joints
8. Sesamoids
9. Head of metatarsal
10. Shaft (body) of metatarsal
11. Base of metatarsal
12. Cuneiforms
13. Navicular
14. Cuboid
15. Talus
16. Calcaneus
17. Tibia
18. Fibula
19. Tarsometatarsal joints
20. Transverse midtarsal joint.
AT BIRTH
FOOT (OBLIQUE)
A-E: Toes 1-5. (A:Great toe)
1,3: Distal phalax
4: Middle phalax
2,5: Proximal phalax
6. Interphalangeal joints
7. Metatarsophalangeal joints
8. Sesamoids
9. Head of metatarsal
10. Shaft (body) of metatarsal
11. Base of metatarsal
12. Cuneiforms
13. Navicular
14. Cuboid
15. Talus
16. Calcaneus
17. Tibia
18. Fibula
19. Tarsometatarsal joints
20. Transverse midtarsal joint
15 MONTHS
3 YEARS
FRACTURE VS EPIPHISEAL LINE
MRI HIP JOINT
MRI KNEE JOINT
MRI ANKLE JOINT
CT HIP JOINT
