Click here to select the Powerpoint presentation on this repair
advertisement
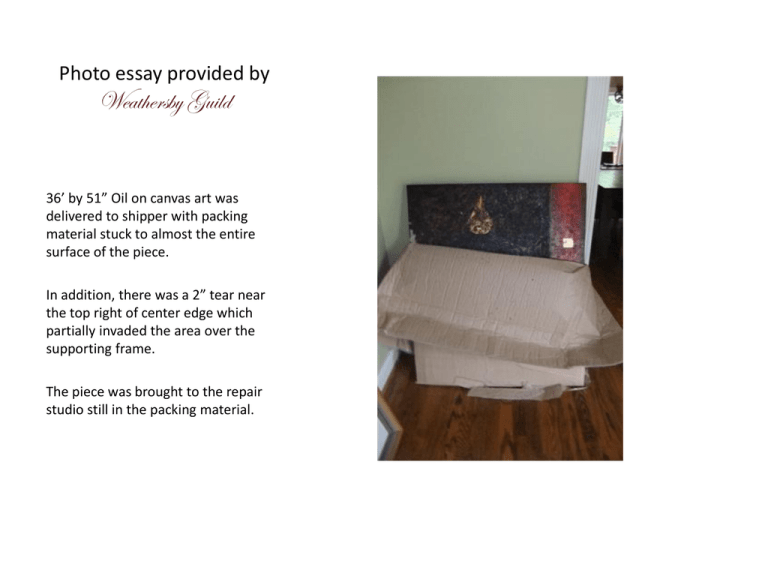
Photo essay provided by Weathersby Guild 36’ by 51” Oil on canvas art was delivered to shipper with packing material stuck to almost the entire surface of the piece. In addition, there was a 2” tear near the top right of center edge which partially invaded the area over the supporting frame. The piece was brought to the repair studio still in the packing material. Excision of packing material The packing material was stuck to the oil and acrylic medium on practically the entire surface of the piece. An Exacto knife was used to coax the packing material off the oil and acrylic surface. Excision of packing material The packing material was stuck to the oil and acrylic medium on practically the entire surface of the piece. An Exacto knife was used to coax the packing material off the oil and acrylic surface. Excision of packing material The packing material was stuck to the oil and acrylic medium on practically the entire surface of the piece. An Exacto knife was used to coax the packing material off the oil and acrylic surface. Excision of packing material Having removed the bulk of the packing carton, there remained extensive paper fiber damage to the surface of the piece. The fibers had become embedded in the medium in microscopic to large portion of the piece. At this point, one might suggest that there is a contributory cause situation eliminating liability under the provisions of inherent vice. It is believed that this does not apply because art works of this type are by their nature soft and therefore subject to this type damage and thus requiring special attention. A better question might be: does the high value inventory apply? Preparation for repair The surface of the piece was carefully examined to determine the severity of the invasion of the fibers into the oil and acrylic comprising the art. If the fibers are deeply embedded, a solvent more caustic than water would be required. Fortunately, the “stuck” fibers did not penetrate deeply and could therefore be softened with water and removed with careful abrasion using cotton swabs and dental tools. Torn Surface The most severe damage is a 2” tear in the canvas. The tear was made through the surface front to back and traversed an area with 3 or 4 colors. Fortunately, there were no minute details or facial features that would require demanding in-painting. Preparation for repairing tear Tears are typically repaired using 1 of 2 methods. Severely damaged paintings with large tears are restored by relining them. This incorporates placing a wax embedded substrate on the versa (reverse side) of the piece. A heated vacuum table is required for this process. Less severe damages and tears are often repaired by placing a patch on the versa thereby providing a support for the repair. Preparation for repairing tear The patch is accomplished by creating a canvas or Japanese tissue sub-patch which is attached to the versa over the tear. Preparation for repairing tear The patch is frayed on the extremities so that there will be no hard edges which might be detectable on the art surface. Preparation for repairing tear An adhesive which will not decompose and is compatible with both the canvas and medium is used to attach the patch. Preparation for repairing tear The adhesive is a heat cure resin which is lightly and carefully heated to create the bond. Obviously, the heating must be carefully monitored and controlled to preclude to the art. Repair of the tear The edges of the tear are probed to insure that they are securely attached to the tear. If they are not, a non-heat cure adhesive is applied to the voids. Repairing the tear For this repair, oil paint diluted with Japan dryer was used to in-paint a base color for the in-painting. At this stage, water color is acceptable. Repairing the tear Molten Ethylene Vinyl Acetate (hot glue) is used to fill the void above the patch. The EVA was chosen because it mimics the flexibility of the oil and acrylic and it also mimics the granular surface of the piece. Repairing the tear The filled void is examined to determine the quality of the patch. It may be necessary to supplement the voids with additional applications of EVA. In-painting the repair In-painting in this instance was relatively easy because of the freeform style of the applied oil and acrylic. A combination of Lamp Black, Payne's Gray, Raw Sienna, and Cadmium Red Hue were used to duplicate the theme of the painting. Restorers may “shy away” from restorations of this type thinking that they are not artists. In-painting is not the same as creating original art. As furniture repair technicians, we inpaint on finished wood every day. In-painting Once the in-painting process is complete, the piece is viewed from all directions to insure that the repair is fully compatible with the hue (name of the color), the sheen, and the feel of the entire piece. Finishing the repair Once the in-painting is determined to be within professional standards, the entire piece receives a coat of varnish Completed Repair The oil and acrylic was returned to the owner who was delighted with the finished product. The process did not require the use of and cost of a third party restorer.
