Installation Instructions
advertisement
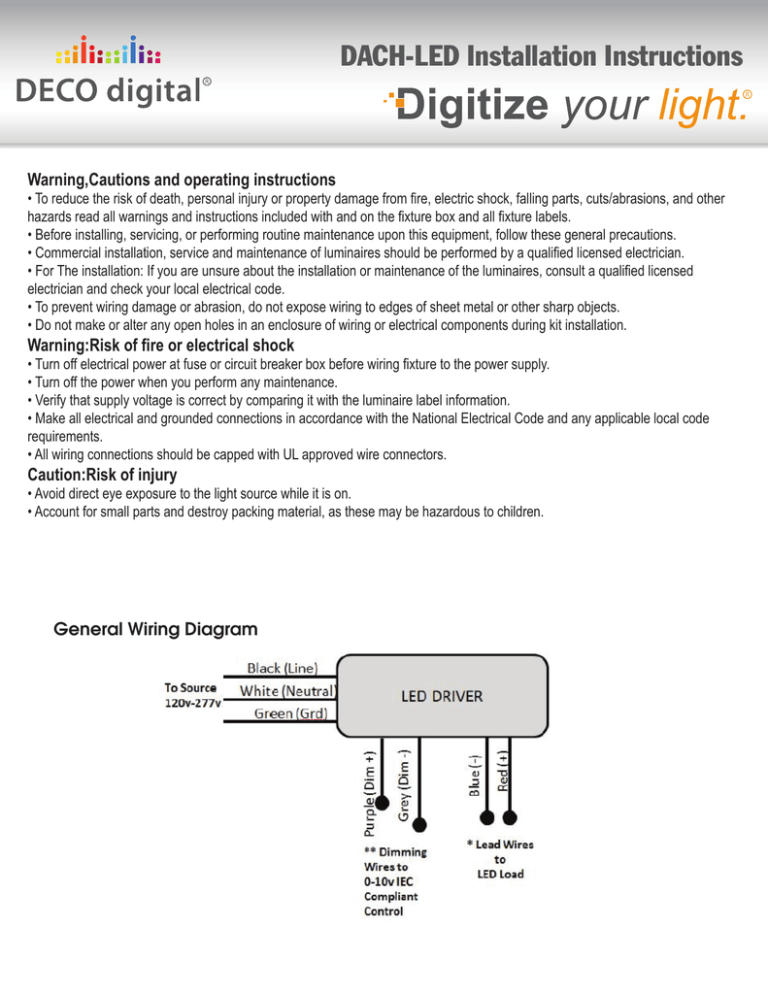
DACH-LED Installation Instructions Warning,Cautions and operating instructions • To reduce the risk of death, personal injury or property damage from fire, electric shock, falling parts, cuts/abrasions, and other hazards read all warnings and instructions included with and on the fixture box and all fixture labels. • Before installing, servicing, or performing routine maintenance upon this equipment, follow these general precautions. • Commercial installation, service and maintenance of luminaires should be performed by a qualified licensed electrician. • For The installation: If you are unsure about the installation or maintenance of the luminaires, consult a qualified licensed electrician and check your local electrical code. • To prevent wiring damage or abrasion, do not expose wiring to edges of sheet metal or other sharp objects. • Do not make or alter any open holes in an enclosure of wiring or electrical components during kit installation. Warning:Risk of fire or electrical shock • Turn off electrical power at fuse or circuit breaker box before wiring fixture to the power supply. • Turn off the power when you perform any maintenance. • Verify that supply voltage is correct by comparing it with the luminaire label information. • Make all electrical and grounded connections in accordance with the National Electrical Code and any applicable local code requirements. • All wiring connections should be capped with UL approved wire connectors. Caution:Risk of injury • Avoid direct eye exposure to the light source while it is on. • Account for small parts and destroy packing material, as these may be hazardous to children. General Wiring Diagram DACH-LED Installation Instructions Model shown for reference only Figure 1 Mounting Options B C E A D A: B: C: D: E: End Cap Chain Mounting with V hook Surface Mounting T-Bar Clip Mounting Hole Wiring Knockouts Figure 2 Installation Step: Always turn off the power supply from main circuit breaker first! B: Chain Mounting with V hook C: Attach customer supplied V-Hooks to each end of the luminaire base.Attach customer supplied chain to the V-hooks and mounting surface. Surface Mounting D: Secure luminaire base to mounting surface by inserting customer supplied #8 anchor screws, toggle bolts or suitable fasteners, depending on structural conditions, into key hole slots on the top side of the luminaire base. T-Bar Clip Mounting Hole Attach customer supplied T-Bar clips to the designated opening on the luminaire as show in Figure 2. Bring luminaire into T-Bar ceiling grid and secure luminaire to grid. NOTE: (Please see Figure 1,Rear of Base is provided with holes for mounting.)
