Installation for EZ Hang No Tray
advertisement
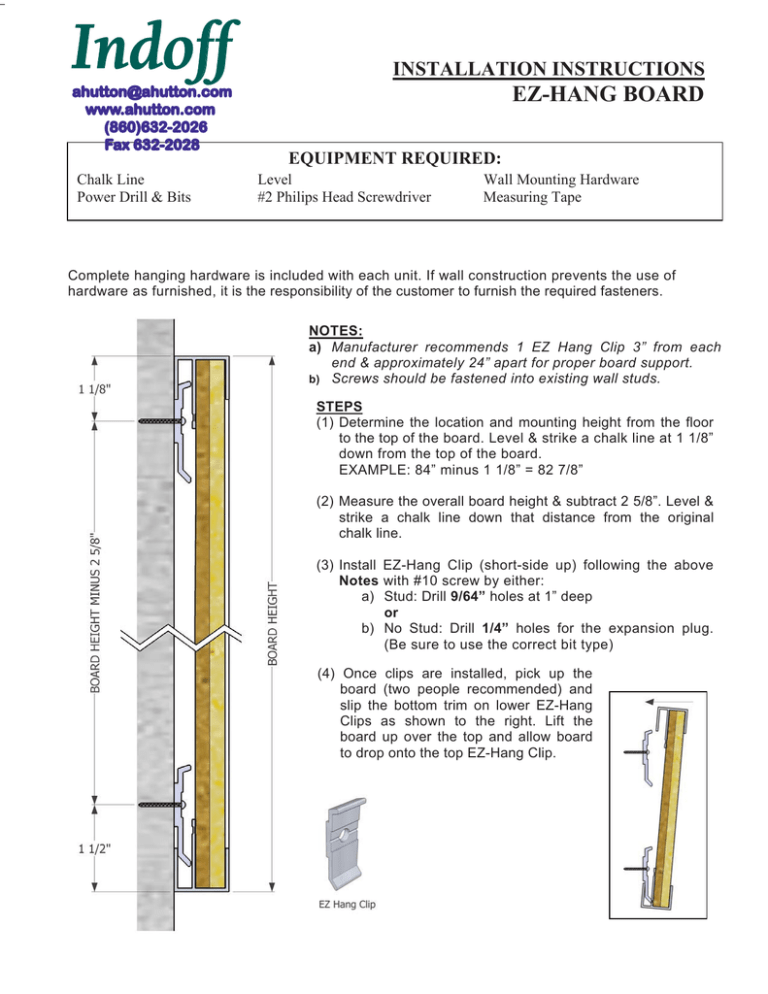
Indoff ahutton@ahutton.com www.ahutton.com (860)632-2026 Fax 632-2028 Chalk Line Power Drill & Bits INSTALLATION INSTRUCTIONS EZ-HANG BOARD EQUIPMENT REQUIRED: Level #2 Philips Head Screwdriver Wall Mounting Hardware Measuring Tape Complete hanging hardware is included with each unit. If wall construction prevents the use of hardware as furnished, it is the responsibility of the customer to furnish the required fasteners. NOTES: a) Manufacturer recommends 1 EZ Hang Clip 3” from each end & approximately 24” apart for proper board support. b) Screws should be fastened into existing wall studs. STEPS (1) Determine the location and mounting height from the floor to the top of the board. Level & strike a chalk line at 1 1/8” down from the top of the board. EXAMPLE: 84” minus 1 1/8” = 82 7/8” (2) Measure the overall board height & subtract 2 5/8”. Level & strike a chalk line down that distance from the original chalk line. (3) Install EZ-Hang Clip (short-side up) following the above Notes with #10 screw by either: a) Stud: Drill 9/64” holes at 1” deep or b) No Stud: Drill 1/4” holes for the expansion plug. (Be sure to use the correct bit type) (4) Once clips are installed, pick up the board (two people recommended) and slip the bottom trim on lower EZ-Hang Clips as shown to the right. Lift the board up over the top and allow board to drop onto the top EZ-Hang Clip.
