Moving from Exchange to Cowboy Mail
advertisement

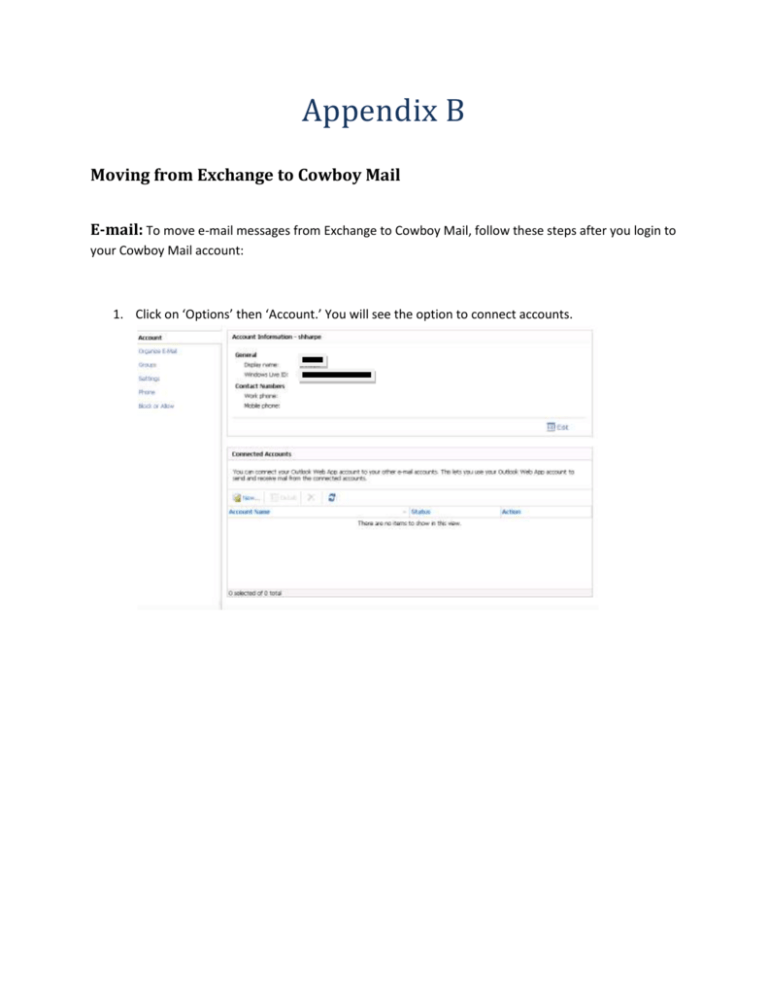
Appendix B Moving from Exchange to Cowboy Mail E-mail: To move e-mail messages from Exchange to Cowboy Mail, follow these steps after you login to your Cowboy Mail account: 1. Click on ‘Options’ then ‘Account.’ You will see the option to connect accounts. 2. Type in the e-mail address and password of the account. 3. Click ‘Finish.’ 4. It will automatically download your e-mail from your Exchange account. 5. When it is complete, it will list the Status as ‘OK.’ Other Data: To move contacts, calendar information and tasks from Exchange to Cowboy Mail, follow these steps after you login to your Cowboy Mail account: From an IT Computer Lab (http://labs.okstate.edu): 1. Login to the lab computer using your Orange Key credentials. NOTE: During this procedure, do not reboot, restart, or shutdown the computer. When the IT lab computers are restarted, the hard drives are cleared and set to default. If the computer is rebooted, restarted, or shutdown during these steps, this process will have to be restarted. 2. Open Microsoft Office Outlook. 3. When Outlook loads, the setup wizard should start. Click the Next button to continue. 4. On the Account Configuration window, select the radio button next to Yes to setup an e-mail account then click Next. 5. After a few seconds, the account should be automatically configured showing your name and email address in the fields by the same name. Click Next to continue. 6. After clicking Next additional account information will be verified. This may take a few minutes. When the Finish button is enabled, click Finish to complete the process. From an off-campus computer: NOTE: You can only have one Microsoft Exchange account setup in Outlook at a time. 1. 2. 3. 4. 5. 6. 7. 8. 9. Open the Control Panel and double click on the Mail icon. Click on "Show Profiles." Click on "Add" in this window Enter any name you like, preferably one that identifies the account that you will remember. Click "OK." Click on the check box that says "Manually configure server settings or additional server types" near the bottom of the new window named "Add New E-mail Account." Click "Next." Click on the radio button that says "Microsoft Exchange" then click on "Next." Type in the server name: "ad.okstate.edu" in the Microsoft Exchange Server textbox. Type in the OSU e-mail address in the User Name box for the account to be added. NOTE: Do NOT click on the button "Check Name." 10. Click on "More Settings." NOTE: This may cause it to error out to a message that says "The action cannot be completed. The connection to Microsoft Exchange is unavailable. Outlook must be online or connected to complete this action." Skip past this by pressing 'OK' 11. If you get a Microsoft Exchange window with only one tab that says General, press Cancel. 12. You should now be at the Microsoft Exchange window with five tabs at the top. Click on the "Security" tab. 13. Check "Encrypt data between "Microsoft Office Outlook and Microsoft Exchange." 14. Ensure that the "Logon network security:" is set to "Password Authentication (NTLM)" 15. Click on the "Connection" tab. Make sure "Connect using my Local Area Network (LAN)" is selected. 16. Check the box that says "Connect to Microsoft Exchange using HTTP" at the bottom then click on the button that says "Exchange Proxy Setting…" 17. On the Exchange Proxy Settings Page, ensure there is a check mark in ALL check boxes. 18. Enter "mail.okstate.edu" under "Use this URL to connect to me Proxy server for Exchange" field. 19. Ensure the "Connect using SSL only" and "Only connect to proxy servers that have this principal name in their certificate:" checkboxes are checked. 20. 21. 22. 23. 24. 25. 26. Enter "msstd:mail.okstate.edu" under the "...proxy servers...principal name..." field. Click OK on the Microsoft Exchange Proxy Settings Window Click Apply then OK on the Microsoft Exchange window. Click the "Check Name" button. This may take a little time before it prompts you. Enter the OSU e-mail address as the username and the password in this prompt and click OK. You should see the name and Server underlined. Click Next and then Finish. Start Microsoft Outlook. You may be prompted for the OSU email address and password again. Exporting Calendar, Contacts, and Tasks to a PST file: 1. With Outlook open and after the mailbox items have been updated completely, select File from the menu bar (Outlook 2007). 2. From the File menu, select Import and Export... 3. On the Import and Export Wizard window, choose Export to a file from the list box titled Choose an action to perform. Click Next. 4. The next window, titled Export To A File, choose Personal Folder File from the list box then click Next. 5. Select Calendar from the Select the folder to export from box, then check the box next to Include Subfolders. Click Next. 6. On Export Personal Folders, click the Browse... button and choose a destination to save the Calendar PST file. NOTE: You can save the file to a folder on the Desktop to find easily later. 7. In the Options section, select the radio button next to Allow duplicate items to be replaced. Click Finish. 8. A window titled Create Microsoft Personal Folders should appear. Enter Calendar in the Name field. NOTE: You can specify a password, however doing so is not recommended by OSU IT as password recovery is difficult. 9. Click OK on the Create Microsoft Personal Folders window. 10. The PST file should be created at the specified location. Repeat the above steps substituting Calendar for Contacts and then Tasks. Once all three have been backed up to a PST file, you can continue to the next phase. 11. Setup Outlook With Cowboy Mail Account (Exchange Only) 12. You will need to setup Outlook with the Cowboy Mail using Microsoft Exchange. Before you can setup Cowboy Mail with Exchange settings, you will need to remove the OSU Exchange Account configured above. To remove the OSU Exchange mailbox, follow the directions at: http://office.microsoft.com/en-us/outlook-help/add-or-remove-an-e-mail-accountHA001231634.aspx#BM6 13. Once there are no more Exchange accounts in Outlook, follow the directions at the link below to setup the Cowboy Mail account: http://help.outlook.com/en-US/140/cc511396.aspx?r=ia&s=EDU_Org_Own_E14_R4 NOTE: The above link will configure Outlook to connect to Cowboy Mail using Microsoft Exchange. Do not setup Outlook with IMAP settings as issues could arise during the import process. Import PST Backup Files: 1. With Outlook open and after the mailbox items have been updated completely, select File from the menu bar (Outlook 2007). 2. From the File menu, select Import and Export... 3. On the Import and Export Wizard window, choose Import from another program or file from the list box titled Choose an action to perform. Click Next. 4. On the Import a file window, scroll down to the bottom of the Select file type to import from list box and choose Personal Folder File (.pst). Click Next. 5. A window titled Import Personal Folders should appear. Click Browse... and open the location where you exported the PST files. Choose a PST file to import (such as the Calendar backup). NOTE: If you already have items in your Cowboy Mail Calendar, Contacts, and/or Tasks, you may want to select the radio button next to Allow duplicates to be created so that data will not be overwritten. 6. Click Next button. 7. It may take some time to import the selected PST depending on the size of the data. 8. Repeat the above steps in this section for the remaining PST files that were exported until all three mailbox items (calendar, contacts, and tasks) are imported into your Cowboy Mail Account. 9. Once the above is completed, you can log off of the lab computer.


