SSD vs HDD
advertisement
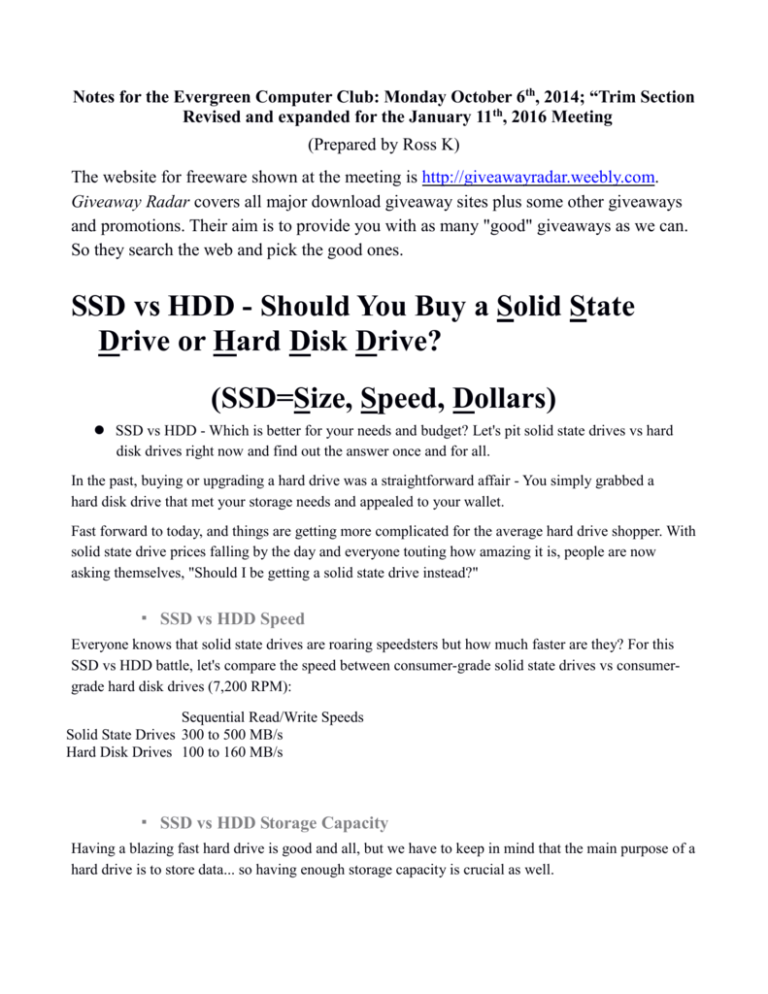
Notes for the Evergreen Computer Club: Monday October 6th, 2014; “Trim Section Revised and expanded for the January 11th, 2016 Meeting (Prepared by Ross K) The website for freeware shown at the meeting is http://giveawayradar.weebly.com. Giveaway Radar covers all major download giveaway sites plus some other giveaways and promotions. Their aim is to provide you with as many "good" giveaways as we can. So they search the web and pick the good ones. SSD vs HDD - Should You Buy a Solid State Drive or Hard Disk Drive? (SSD=Size, Speed, Dollars) SSD vs HDD - Which is better for your needs and budget? Let's pit solid state drives vs hard disk drives right now and find out the answer once and for all. In the past, buying or upgrading a hard drive was a straightforward affair - You simply grabbed a hard disk drive that met your storage needs and appealed to your wallet. Fast forward to today, and things are getting more complicated for the average hard drive shopper. With solid state drive prices falling by the day and everyone touting how amazing it is, people are now asking themselves, "Should I be getting a solid state drive instead?" ▪ SSD vs HDD Speed Everyone knows that solid state drives are roaring speedsters but how much faster are they? For this SSD vs HDD battle, let's compare the speed between consumer-grade solid state drives vs consumergrade hard disk drives (7,200 RPM): Sequential Read/Write Speeds Solid State Drives 300 to 500 MB/s Hard Disk Drives 100 to 160 MB/s ▪ SSD vs HDD Storage Capacity Having a blazing fast hard drive is good and all, but we have to keep in mind that the main purpose of a hard drive is to store data... so having enough storage capacity is crucial as well. As you can expect, hard disk drives don't just offer larger storage capacities, but at a lower price point too (we shall discuss their price differences in detail later). Let's compare the highest storage capacity offered by (consumer-grade) solid state drives vs hard disk drives at the time of writing: Maximum Storage Capacity Solid State Drives 1 TB (1,000 GB) Hard Disk Drives 6 TB (6,000 GB) ▪ SSD vs HDD Price Now let's talk money - Just like how everyone knows that solid state drives have a speed advantage, it's also common knowledge that they burn a bigger hole in your wallet. So how much more does a SSD cost? Let's compare the average price of hard drives per gigabyte at the time of writing: Price per GB Solid State Drive: US$0.80 per GB Hard Disk Drive: US$0.04 per GB Even with SSD prices free-falling in recent years, solid state drives will still cost you a whopping 20 times more when compared to a hard disk drives of similar capacities. The prices of both SSD and HDD will continue dipping in the future, with SSD prices falling faster and harder. Even so, solid state drives are still going to cost heaps more than hard disk drives in the foreseeable future. If you buy a Solid State Drive; Why SSD TRIM Support is So Important; How to Enable It How to Verify That TRIM Is Enabled In Windows 7 The TRIM command has been designed to counter the performance drops of Solid State Drives over time. TRIM basically allows the operating system to notify the SSD about data blocks that are no longer in use so that they can be wiped. Before TRIM, SSDs degraded in performance over time due to the way they handle write operations. Some manufacturers countered this with reset tools, which had to be run regularly to keep the performance at an acceptable level. Finally, some added garbage collection to the controller. This basically meant that the data on the drive would be defragmented, or that the TRIM command would be issued based on the findings of the garbage collection. Now, the difficulty with TRIM is that it is only supported by Windows 7, Windows Server 2008 R2 and Linux at the moment. Users who do not run those operating systems do not have access to TRIM. Windows users need to make sure that TRIM is working properly, especially if they notice that the performance of the Solid State Drive seems to drop significantly over time. We would like to introduce two options to find out if TRIM is enabled in the operating system. Drive Controller Info The portable software program performs a scan of all drives and will report if Windows Filesystem Delete Notification (ATA TRIM) is enabled or not. All it takes is to execute the program, wait some seconds for the scan to complete to see the results in the main program interface. Drive Controller Info can be downloaded by clicking on this link. Administrator Command Prompt The second option requires no third party software. Users need to start a command prompt with elevated rights. This is done by clicking on the start orb, then All Programs, Accessories, right-clicking on Command Prompt and selecting Run as Administrator. Now execute the command “fsutil behavior query DisableDeleteNotify” and take a look at the result. Two results are possible: DisableDeleteNotify = 0: This indicates that TRIM is enabled and working on the operating system. DisableDeleteNotify = 1: This means that TRIM is not enabled, and that SSDs will therefor not benefit from it. If TRIM is not active on the system, which can be the case if the SSD has not been properly recognized, if it is to slow or if drivers have not been properly installed. TRIM can be enabled with a similar command if it is not enabled in Windows 7. To activate TRIM issue the command “fsutil behavior set DisableDeleteNotify 0”. Windows 10 Treats SSDs Extremely Well with Improved Management Features Put all fancy new features aside, Microsoft also did a good job that makes SSD’s life a lot easier, healthier, and longer. Windows 7 is the first Windows version that recognizes SSD drives, therefore, optimizes itself to work better with them. Windows 8 inherited these features and were moving forward with more enhanced features. Now it’s Windows 10’s turn to bring in more improvements designated only for SSDs. Trim is more visible A Trim command is initialized to allow the operating system to inform an SSD which blocks of data are no longer considered in use and can be wiped out for writing the data. It’s an important feature that helps SSD manage space that contains data that has been deleted by the operating system. Trim has been available since Windows 7 but back then was pretty much invisible to the end-user. In Windows 10, Trim has surfaced in the Tools menu in Drive properties in a feature called Optimize. Drive Tool Properties - Optimize Clicking on Optimize button takes you to Optimize Drives app that allows you to execute Trim on a predefined schedule or run it manually. Manually running an Optimize to a drive could be very useful sometimes. For example, you’ve just deleted a large chunk of data from the drive. Running Optimize can immediately reclaim that space back and improve the SSD performance. It’s especially useful on drives that are nearly full. By default, the disk optimization is scheduled to run on a weekly basis but you can change it by clicking Change settings button in Optimize Drives window. The scheduled job is part of the jobs in Task Scheduler app. I would respectfully suggest that TRIM be run daily instead of weekly if you use your computer daily and regularly. Defragment for SSD drives is completely removed Generally speaking, defrags should not be run on SSDs. Even though Windows 7 or 8.1 is smart enough not include SSDs in the scheduled defragment, it’s safe or probably best to just disable any regular defrags just to be sure. Now rest assured in Windows 10 since defrags for SSDs is completed removed out of the map. Nothing to worry about this matter anymore. Enable TRIM On SSD (Solid-State Drives) In Ubuntu For Better Performance Just for completeness, here is a link to the process in Linux Ubuntu. I have included the command lines that I use to run TRIM automatically and daily on my Linux Ubuntu System. I have two SSD Drives each with three partitions and thus there are Six TRIM commands. -----------------------------#!/bin/sh LOG=/var/log/trim.log echo "*** $(date -R) ***" >> $LOG fstrim -v / >> $LOG fstrim -v /dev/sda1 >> $LOG fstrim -v /dev/sda2 >> $LOG fstrim -v /dev/sda3 >> $LOG fstrim -v /dev/sdc1 >> $LOG fstrim -v /dev/sdc2 >> $LOG fstrim -v /dev/sdc3 >> $LOG
