PowerPoint Multimedia - Prince George's Community College
advertisement
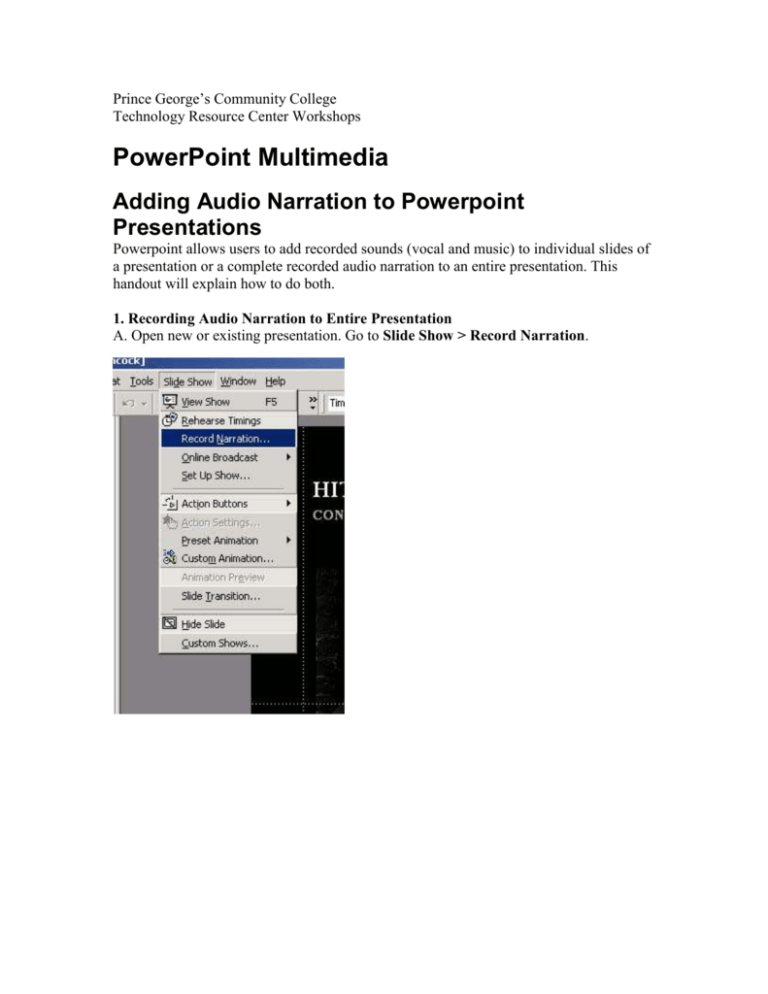
Prince George’s Community College Technology Resource Center Workshops PowerPoint Multimedia Adding Audio Narration to Powerpoint Presentations Powerpoint allows users to add recorded sounds (vocal and music) to individual slides of a presentation or a complete recorded audio narration to an entire presentation. This handout will explain how to do both. 1. Recording Audio Narration to Entire Presentation A. Open new or existing presentation. Go to Slide Show > Record Narration. B. The Record Narration dialog box will appear. The box contains all of the settings for your audio narration. C. First click on Set Microphone Level… The Microphone Check box will appear. Speak into the microphone to test the level (green display in Mic. Check box). D. Next select the Change Quality… button. The Sound Selection box will appear. Select CD Quality. This optimizes the audio for CD quality playback. E. You can choose to either link your narrations (linking the audio wav. Files to the presentation file in a specific drive of your computer (floppy, zip, C, etc.) or to embed the audio files. Leaving the link narrations checkbox unchecked will cause the audio files to embed into your presentation. As a result your presentation file will be a larger file size if you embed the audio files. Linking the sound files (checking the box) will cause the wav. files to be saved separately while remaining linked to your slides. The presentation file will remain its original size. Note: Embedding the audio into your presentation will cause less confusion later when you are viewing the presentation. The trade-off is that the presentation file size will be larger. F. Finally click OK in the Record Narration dialog box and Powerpoint will immediately launch your first slide. Start recording your voice. To move on to the next slide while in the act of recording your narration, press your space bar on the computer keyboard or click once on your mouse. Continue doing your narration. When you finish recording audio to the last slide hit the space bar or click your mouse and Powerpoint will ask you to save the slide timings. Click Yes. Powerpoint will then display your entire slide layout with all of the audio timings displayed. G. You can now view your completed slide show with audio narration. The audio will play back as long as you have speakers connected to the computer or are using headphones. H. If you make a mistake or another error occurs while recording, you can end the narration by clicking through the remainder of your slides. Start the recording process again and the new audio will replace the earlier version. 2. Adding Sounds to Individual Slides A. Open new or exisiting presentation. B. Select the slide that you want to add sound to, then go to: Insert > Movies and Sounds > Record Sound. C. The Record Sound dialog box will appear. When ready to record click on the red record button. Recording will begin and the length of your recording (Total sound length) will begin counting off. When you finish and want to stop the recording, click on the blue stop button. DO NOT OPEN UP ANY OTHER APPLICATIONS WHILE USING THE RECORDING FUNCTION. DOING THIS WILL DISABLE THE RECORDING. D. When recording is complete a speaker icon will appear on the slide. To view the completed slideshow go to Slideshow > View Slideshow. The audio will play back as long as you have speakers connected to the computer or are using headphones. Adding Narration To Your Slide Show - Getting Started Put your PowerPoint presentation together exactly the way you want it before adding any narration. If you are planning to do any editing to your sound clips, then turn off all animations because the timing will be altered. If you are planning to leave your sound clips unedited, the animations can be used. Once your PowerPoint presentation is ready to be narrated, place it in its own folder (if you plan on editing your clips, this is VERY important). During the recording process, PowerPoint creates a WAV file for each slide's narration. 1. Under Slide Show, select Record Narration. This will bring up the Record Narration control panel. 2. Click on the Microphone Level box and adjust the level as needed. 3. Click OK and then click on the Change Quality button. If your slide show is to be used online you should select the smallest audio compression format in PowerPoint which is 8000 kHz, 8 bit, Stereo so that you are creating the smallest possible audio file. 4. If you are going to put you PowerPoint on CD then pull down the Attributes bar and select the 11.025 kHz, 16 bit, mono, 21 kb/sec option. This will give you a better sound quality than the default 8 bit setting, but will not create such big files as the 12 kHz options. 5. At the bottom of the control panel is a small box you can check if you'd prefer to link to the sound files rather than embed them into the presentation. If you plan to edit your sound files, then you MUST select this box. We highly recommend doing this if you have a fairly long presentation, or if you will be speaking quite a bit on each slide. Doing this will help keep the size of the PowerPoint file to a minimum. If you do select this option, you will need to click on the Browse button to select a place to save those sound clips. Save them directly to the folder that contains your PowerPoint presentation. DO NOT save them into their own folder within the folder that contains your presentation. This will cause problems later on. Recording Once you've completed these steps, click on the OK button to begin narrating your presentation. When you click on the OK button, PowerPoint will begin a slide show with your presentation, so you must be ready to start recording when you hit that button. Pause a moment, then speak slowly and clearly. When you've completed what you want to say for that slide, pause briefly, then advance to the next slide. Again, pause briefly and then begin speaking. You cannot pause while recording the presentation once you begin. If you must stop there is a way you can go back to that point and begin again and we will touch on that later in this instruction sheet. When you've recorded the last slide in the presentation, go ahead and advance to the black screen that tells you the slide show has ended. You must advance to the next slide to save the sound clip on your current slide. If you end the slide show at the last slide instead of advancing to the black screen, you will not save the narration for that last slide. Once you have reached the end of the slide show, or need to stop before you reach the end (stop recording by pressing the escape button), a message box will pop up and let you know your recordings have been saved to each slide and asks if you want to save the timings for them. Click on Yes. You've successfully completed your narration. When you play the slide show it will automatically play your narrations. If you were forced to stop before you completed the slide show, you can go back and start where you left off. Simply advance to the slide where you stopped (a speaker icon will appear on each slide that has a sound clip recorded to it) and again, under Slide Show select Record Narration. Remember to select the 11.025kHz, 16 bit mono attribute under the Change Quality button and to select the box to link your sound clips (if you are doing that) and select where those sound clips should be stored before you click the OK button to begin narrating. When you click the OK button, a message box will pop up telling you that you can start the narration anywhere within the presentation. It then gives you the option of starting at the first slide or the current slide. You want to start at the current slide. Begin narrating that slide and continue through to the end. Editing Within Powerpoint (Re-recording a Slide) You have two choices if you make a mistake in your narration. If you plan on editing your sound clips, just pause, then continue on with the correct phrase. If you will not be editing your sound clips, you can re-record that particular slide. Go ahead and complete your narration. Go back to the slide that needs to be re-recorded and add a blank slide AFTER it. Proceed through the setup process in the previous paragraph and re-record that slide. Once you've completed the narration of that slide, you MUST advance to the blank slide, then press the escape button to stop the narration. DO NOT stop the slide show until you advance to the blank slide. You MUST insert the blank slide BEFORE you begin re-recording the slide. If you don't insert a blank slide and try to re-record the incorrect slide, you will either not get the slide sound clip saved if you do not advance to the next slide, or if you do advance to the next slide, you will delete the sound clip for that slide when you stop the slide show. When you've completed the narration for that slide and have saved the timings, save your presentation, then delete the blank slide. Other Items to Note Once you have completed recording your narration, do not move the sound clips around. Leave them in the folder with the presentation. If you chose to link to the sound clips, you need the whole folder (including the clips) to be able to play the presentation with sound. If your sound clips accidentally got saved to the wrong place, you can move them to the correct spot and re-link to them. Simply move them to your folder. Again, right-click on the sound icon on the slide and select Play Sound. Since you've moved the clip, it will not be able to find it to play, so it will bring up a message box saying that it cannot find the clip and asks you if you would like to locate it yourself. Choose Yes, then browse to find its new location. Again, save your presentation and you're all set to go. Deleting a sound clip from the slide is also easy. Select the sound clip Adding Music to your slide presentation If you only need to play one sound across multiple slides, here's the simplest approach: Switch to the first slide (or the slide where you want the sound to start playing) From the Slide Show menu, select "Slide Transition" In the "Sound" field select the WAV file you want to use (scroll to the bottom of the list box and click "Other Sound ..." to choose a sound file other than the ones in the list) Put a checkmark next to "Loop until next sound" When you launch slideshow, the sound should play through all the slides in the presentation and keep repeating (because of the "Loop until next sound" setting). The sound will stop if another sound plays for any reason. More Music and Sound solutions From the Insert menu, select Movies and Sounds (see figure 2 below). You have two options: either to use a CD or a sound file. See both options below. If you would like to use a WAV file, select Sound from File... An explorer window will pop-up, browse for your WAV file and click OK. You will be asked Do you want your slide to play automatically in the slide show? Answer YES. NOTE: If you are using PowerPoint 97, you will not be asked this question. -orIf you would like to use a music CD, select Play CD Audio Track... from the Insert Movies and Sounds menu (see figure 2 above). Consider the length of your presentation. Is it longer or shorter than your song? If it is longer, in the Play Options section, click on the box next to Loop until stopped. If it is shorter, do nothing in the Play Options sections. In the Play CD Audio Track section, select the track you want the presentation to start and end on. If it’s the same song, indicate the same number in both of the Track boxes (see figure 3 below). For the At portion, indicate when to start and stop the CD. Click OK. REMEMBER: When it's time to play your show, the CD must be in the CD-ROM drive of your Broadcast computer. Click on the Slide Show menu at the top of your screen and select Custom Animation. In the Check to animate slide objects: field, check the Media checkbox (see figure 4 below.) Click on the Multimedia Settings tab. NOTE: Actions A and B of Step 7 will be slightly different for users of PowerPoint 97. If you use PowerPoint 97, you will want to select your Media from the Slide objects without animation field, then select Animate Automatically, 0 seconds after previous event in the Start animation field. Next, click on the Play Settings tab and continue. Click the Continue Slide Show radio button. Under the Stop Playing section, click the After__ slides radio button. Indicate in the box how many slides are in your presentation. Click OK. Click on the "Slide Show" menu and select View Show to preview.

