Grade K Module 4 - Los Angeles Unified School District
advertisement
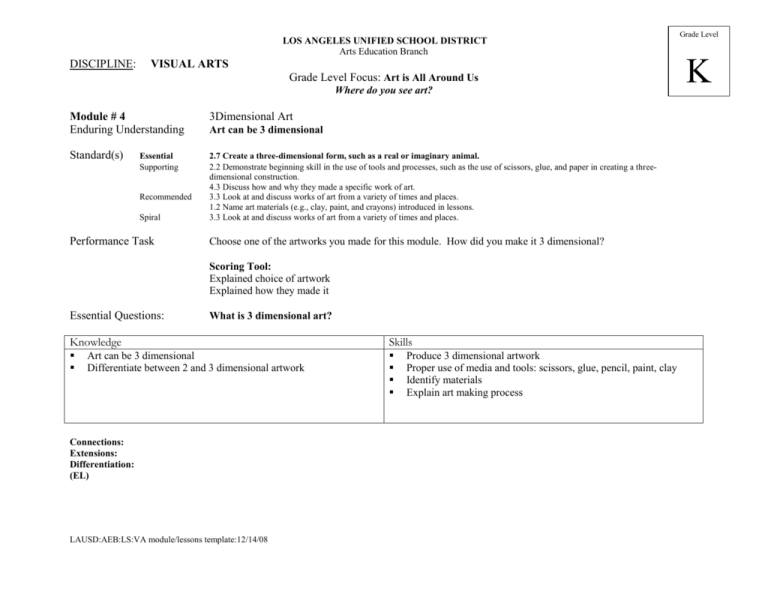
LOS ANGELES UNIFIED SCHOOL DISTRICT Arts Education Branch DISCIPLINE: VISUAL ARTS Grade Level Focus: Art is All Around Us Where do you see art? Module # 4 Enduring Understanding 3Dimensional Art Standard(s) 2.7 Create a three-dimensional form, such as a real or imaginary animal. 2.2 Demonstrate beginning skill in the use of tools and processes, such as the use of scissors, glue, and paper in creating a threedimensional construction. 4.3 Discuss how and why they made a specific work of art. 3.3 Look at and discuss works of art from a variety of times and places. 1.2 Name art materials (e.g., clay, paint, and crayons) introduced in lessons. 3.3 Look at and discuss works of art from a variety of times and places. Essential Supporting Recommended Spiral Performance Task Art can be 3 dimensional Choose one of the artworks you made for this module. How did you make it 3 dimensional? Scoring Tool: Explained choice of artwork Explained how they made it Essential Questions: What is 3 dimensional art? Knowledge Skills Art can be 3 dimensional Differentiate between 2 and 3 dimensional artwork Connections: Extensions: Differentiation: (EL) LAUSD:AEB:LS:VA module/lessons template:12/14/08 Produce 3 dimensional artwork Proper use of media and tools: scissors, glue, pencil, paint, clay Identify materials Explain art making process Grade Level K Sequence of instruction: Grade K Module#4 Lesson 1 of 5 Standards: 1.3, 2.2, 2.7 Objective: The students will create a three-dimensional form. Vocabulary: Line, form, 2-D, 3-D. Resources: Examples of Alexander Calder art on transparency, realia. Materials: 9x12 black construction paper, oil pastels or construction paper crayons, ½ X 12 inch strips of brightly colored construction paper, white or Tacky glue. Opening Phase Student Engagement (5 minutes) Aesthetic Exploration Line Design with Form Intro the definition of form by using realia. Have a student come up to demonstrate. Ask: ”Does he/she have height, width and depth?” “What else has form?” Name the objects in the room that have form or are 3-D. Show transparencies of Alexander Calder. Does this show form and why? ( 5 minutes) Demonstration Exploring/Creating Phase ( 10 minutes) Creative Expression (20 minutes) Reflection Phase Reflection/Assessment (10 minutes) Use a line chart as a visual reference during creative expression. Using black 9 X 12 construction paper demonstrate filling the paper with a variety of different lines and colors. Encourage students to draw edge to edge. Using strips of ½ X 12 construction paper, show how to curl, fold and twist. Fold the end back as a tab for better gluing. Glue strips to create form on your black construction paper base. Pass out black construction paper and have students write their name. Pass out pastels or crayons and have students fill the paper using a variety of colors to create their line design. Pass out strips of various colors for students to create their 3-D form on their line design. Think/Pair/Share: ”Did I create a form and why?” Assessment is informal observation, the teacher will walk around and check for understanding. Extension: Sort 3-D and 2-D manipulatives such as blocks, and different kinds of paper. LAUSD:AEB:LS:VA module/lessons template:12/14/08 Grade K Module#4 Lesson 2 of 4 Standards: 1.3, 2.2 Objectives: The student will make a three-dimensional windsock form using lines and color. Materials: 12x18 white drawing paper, white crayons or oil pastels, various colors of tissue paper torn in strips, tempera brushes, water containers, and music(optional) Resources: Kandinsky or Miro poster or transparencies, chart of lines, Harold and the Purple Crayon Vocabulary: Overlap, lines, windsock, and tissue paper Opening Phase Student Engagement (5 minutes) Aesthetic Exploration ( 5 minutes) Demonstration xploring/Creating Phase ( 10 minutes) Creative Expression ( 20 minutes) Reflection Phase Reflection/Assessment ( 10 minutes) Windsock Design Part 1 Review previous lesson. Talking about our line design from last week, what did you draw on the black paper? Teacher will draw the lines from the student responses on the board. Read Harold and the Purple Crayon and have students identify different kinds of lines from the story. Or using Kandinsky or Miro, have students identify a variety of different lines. Part 1-To music (optional), draw examples of white lines on the white paper. Reproduce the sample lines on the board so students can identify the lines. Lines should be edge to edge, using seven different lines. Part 2-Cover line design with tissue paper strips that will be “painted” down with water. Do not remove tissue until completely dry. Part 1-Pass out paper and white crayons and the student will create their white line design on their paper. Part 2-Students will add tissue paper on top of their white line design. Using large tempera brushes, they will use water to paint over the tissue. Let it dry completely before removing the tissue from the artwork. As a whole group, have students explain the process that was used to create their artwork. LAUSD:AEB:LS:VA module/lessons template:12/14/08 Grade K Module#4 Lesson 3 of 4 Standards: 2.2, 2.6 Objective: The student will complete their windsock reinforcing the element of form. Vocabulary: Form, windsock, streamers. Resources: Actual windsock, Dong Kingman “Cable Car Festival”, Catch the Wind by Gail Gibbons, and The Story of Kites by Ying Chang Compestine Materials: Painting from previous lesson, glue, pre-cut 2X 12 inch strips of tissue in a variety of colors, 3 4x4 in. construction paper per student in a variety of colors. Opening Phase Student Engagement (5 minutes) Aesthetic Exploration ( 5 minutes) Demonstration Exploring/Creating Phase ( 10 minutes) Creative Expression (20 minutes) Reflection Phase Reflection/Assessment (10 minutes) Windsock Design Part 2 Review previous lessons emphasizing the element of form. Have students recall how they created form in the first lesson. Tell the students that they are going to create a new kind of form called a wind sock. What is a windsock? Show the teacher sample of a windsock and discuss the three-dimensional quality of it. Demonstrate the flat artwork, “Can it stand up on its own?” Demonstrate the folding and gluing to create the windsock. ”Now can it stand up on its own?” Have I created a form? Demonstrate how you overlap the two ends before gluing to make it a form. Demonstrate to show the placement of the streamers in each of the panels. The student will fold their artwork into fourths. Or teacher may prefold. Distribute pre-cut strips of tissue (4 per student). Have students glue streamers to the bottom edge of each folded section. Refold overlapping the two sides gluing together to form a triangular prism. Pinch each fold open scissors wide and cut one slit into each fold. Insert the three (4x4) construction pieces into the slits. Using a hole punch, punch two holes at the top. Using yarn, attach to the windsock so it can hang. Think/Pair/Share with your partner and explain why your windsock is a form. Share whole group. Assessment is informal observation, the teacher will walk around and check for understanding LAUSD:AEB:LS:VA module/lessons template:12/14/08 Grade K Module#4 Lesson 4 of 5 Standard: 2.1, 2.7 Objectives: The student will create a three-dimensional animal. Vocabulary: Form, three-dimension, sculpture, Model Magic, clay Materials: Four packages of Model Magic (Primary Colors) for every 5 students for a class of 24 and paper plates. If not available, use clay. Wooden skewers can be used to hold the form together. Resources: The Hungry Caterpillar by Eric Carle Opening Phase Student Engagement (5 minutes) Aesthetic Exploration Three-dimensional Animal Sculpture Read The Hungry Caterpillar by Eric Carle What colors do you see in the caterpillar? Do you see any patterns? Do real caterpillars have form/3-D? Using posters or realia or classroom objects to clarify 2-D and 3-D concepts. ( 5 minutes) Demonstration Exploring/Creating Phase ( 10 minutes) Creative Expression ( 20 minutes) Reflection/Assessment Reflection Phase Using the primary colors of Model Magic, the teacher will demo color mixing using ¼ of each package. Pull each primary color apart to make two of each color for a total of six pieces. Show students how to mix two primary colors to produce the secondary colors which will be a total of three pieces. Next show students how to pull each secondary color in half. Roll each secondary color into circles for a total of six. Then show students how to create their caterpillar. Attach each circle by gently pressing together the body making a pattern of secondary colors. Extra Model Magic will be used to create eyes, antenna, mouth, nose, and feet. Students will work on paper plates. If clay is used, use wooden skewers about six inches long as an armature to hold the body together. Glue can be used as a glaze in place of firing. The student will create their own caterpillar. Write their name on the paper plate. ( 10 minutes) As a whole group, have students explain the process of creating a 3-D form. The teacher will write the responses. Using their journals students will draw and color their caterpillar. Extension: If there is only white model magic, paint with watercolors. Connection: Literature and Science: studying insects the students will create a diorama to incorporate the caterpillar’s environment. Grade K Module#4 Lesson 5 of 5 LAUSD:AEB:LS:VA module/lessons template:12/14/08 Standard: 2.1, 2.7, and 4.3 Objective: The student will create a three-dimensional mask using color. Vocabulary: Mask, shape, color, patterns, and form. Materials: 9 x 12 Black construction paper, stapler, glue, construction paper in a variety of colors and shapes for the eyes and nose, tempera paint in bright or fluorescent colors, Q-tips, paper plates and newspaper to cover the tables. Opening Phase Student Engagement (5 minutes) Aesthetic Exploration ( 5 minutes) Reflection Phase Exploring/Creating Phase Demonstration ( 10 minutes) Creative Expression (20 minutes) Reflection/Assessment Performance Task (10 minutes) Three Dimensional Mask The student will view a variety of masks from different cultures. The teacher will ask questions: 1. Why do people create masks? 2. How do you feel when you wear a mask? 3. What are some of the materials used to create masks? Have students identify lines, shapes, and colors that create a pattern. Also note that many masks are 3-D or have form. The teacher will cut shapes for the eyes. The students will be given extra scraps of paper for the nose to cut out a shape such as a triangle. Glue the shapes on the black construction paper. Using Q-tips and tempera paint create a mouth and patterns using dots around facial features and the entire mask while emphasizing large eyes. The student will make a mask creating patterns using dots of paint. When completed, the teacher will cut one slit at the top and one at the bottom of the mask. Overlap the slit, and staple to create a 3-D mask. One half of the class will come to the front of the room with their masks and hold them up in front of their faces. Ask the observers: 1. Where do you see patterns on the mask? 2. Do these masks show form? Why? The other half will come up and switch places. Connections: Math- patterns, and shapes. Extensions: Add tongue depressors and glue onto the mask. Have students use their mask to tell a story. Performance Task: Choose one of the artworks you made for this module. How did you make it 3 dimensional? LAUSD:AEB:LS:VA module/lessons template:12/14/08
