Configuring TEDs Tasks using the SCXI
advertisement
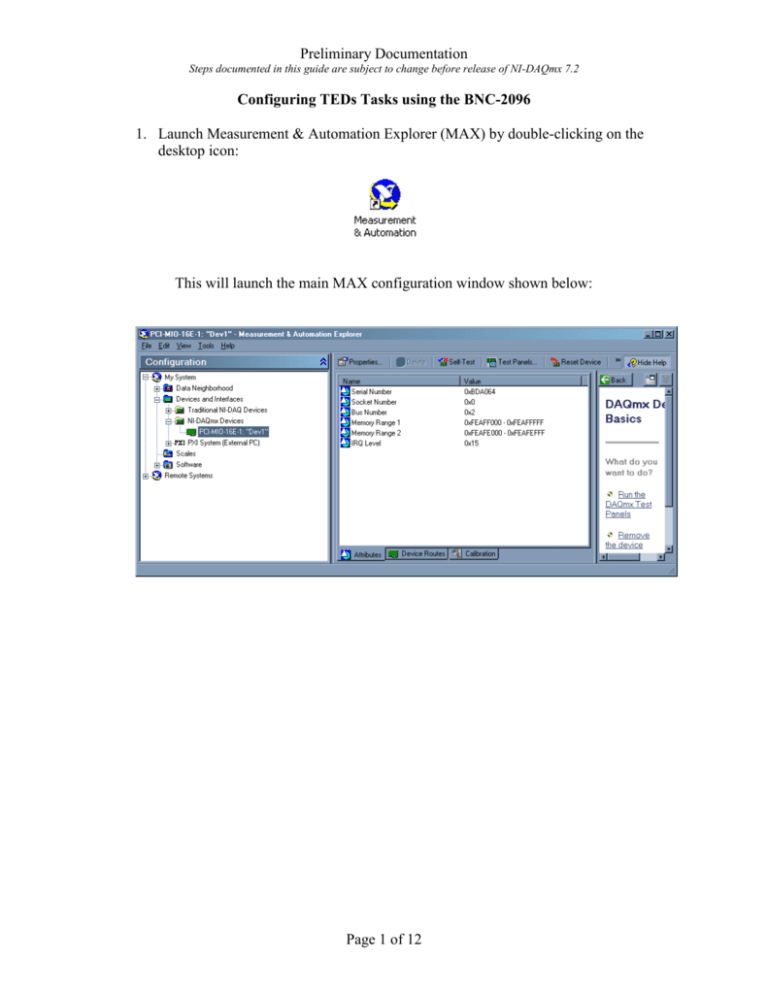
Preliminary Documentation Steps documented in this guide are subject to change before release of NI-DAQmx 7.2 Configuring TEDs Tasks using the BNC-2096 1. Launch Measurement & Automation Explorer (MAX) by double-clicking on the desktop icon: This will launch the main MAX configuration window shown below: Page 1 of 12 Preliminary Documentation Steps documented in this guide are subject to change before release of NI-DAQmx 7.2 2. Expand Devices and Interfaces by using the icon. Right click on NI-DAQmx Devices >> Create New NI-DAQmx Devices >> NI-DAQmx TEDS Carrier >> BNC-2096. The BNC-2096 Configuration window will appear as shown below. Select the MIO device connected to the rear of the BNC-2096 as the Controlling Device. The LED to the right of your module should appear bright green (as pictured below) if your sensor is connected. If the sensor is not connected, then connect it now, and click on “Scan for TEDS” button. Then click “Ok”. . Page 2 of 12 Preliminary Documentation Steps documented in this guide are subject to change before release of NI-DAQmx 7.2 3. Expand your E Series Device using the icon, then expand the module connected to your TEDS sensor, and highlight the TEDS sensor marked by the TEDS icon by left clicking on it. Once it is highlighted, you should be able to view your TEDS sensor’s data sheet on the right pane of the window: 4. After you have verified that your TEDS data has been imported correctly, the next step is to create a NI-DAQmx Global Channel or Task using the channel that has been associated with the TEDS sensor. Page 3 of 12 Preliminary Documentation Steps documented in this guide are subject to change before release of NI-DAQmx 7.2 Creating a Global Channel or Task using a configured TEDS channel 1. In MAX, after having configured your TEDS hardware under NI-DAQmx Devices, right click on Data Neighborhood >> Create New This will bring up the Create New window shown below: Page 4 of 12 Preliminary Documentation Steps documented in this guide are subject to change before release of NI-DAQmx 7.2 2. Select NI-DAQmx Task or global channel and click Next. Select Analog Input, and then the appropriate measurement type for your sensor. For example, for an Accelerometer select Temperature >> Acceleration. Page 5 of 12 Preliminary Documentation Steps documented in this guide are subject to change before release of NI-DAQmx 7.2 3. Click on the TEDS tab then highlight the configured TEDS channel that you would like to use to take the measurement. Then click Next. Page 6 of 12 Preliminary Documentation Steps documented in this guide are subject to change before release of NI-DAQmx 7.2 4. Give the task a name of your choice and click Finish Page 7 of 12 Preliminary Documentation Steps documented in this guide are subject to change before release of NI-DAQmx 7.2 5. If you have created a task, you should ensure that you have all the appropriate settings configured in your task. Specifically, check the Task Timing (you probably want to set it to Continuous). 6. You can start taking measurements right away in MAX test panels by clicking on the Test button in the task toolbar: Page 8 of 12 Preliminary Documentation Steps documented in this guide are subject to change before release of NI-DAQmx 7.2 Creating Your LabVIEW Application Now that you have configured your measurement hardware, TEDS channels, and NIDAQmx measurement task, you are now ready to write your measurement application using LabVIEW 7.1 and the NI-DAQmx 7.2 Application Programming Interface. This can be done by auto-generating code. 1. Open LabVIEW 7.1. Select New >> Blank VI Page 9 of 12 Preliminary Documentation Steps documented in this guide are subject to change before release of NI-DAQmx 7.2 2. In the Block Diagram, right click to bring up the functions palette. Go to All Functions >> NI Measurements >> NI-DAQmx Data Acquisition palette. Page 10 of 12 Preliminary Documentation Steps documented in this guide are subject to change before release of NI-DAQmx 7.2 3. Drag the NI-DAQmx Task Name Constant or and drop it on the block diagram. Move your cursor over the drop down arrow and single left click. Choose your TEDS task from the dropdown list: Page 11 of 12 Preliminary Documentation Steps documented in this guide are subject to change before release of NI-DAQmx 7.2 4. Right click on the NI-DAQmx Task Name Constant, go to Generate Code >> Configuration and Example 5. Double click the configuration icon to view the configuration settings. Page 12 of 12
