STA 1060 - Pegasus @ UCF
advertisement
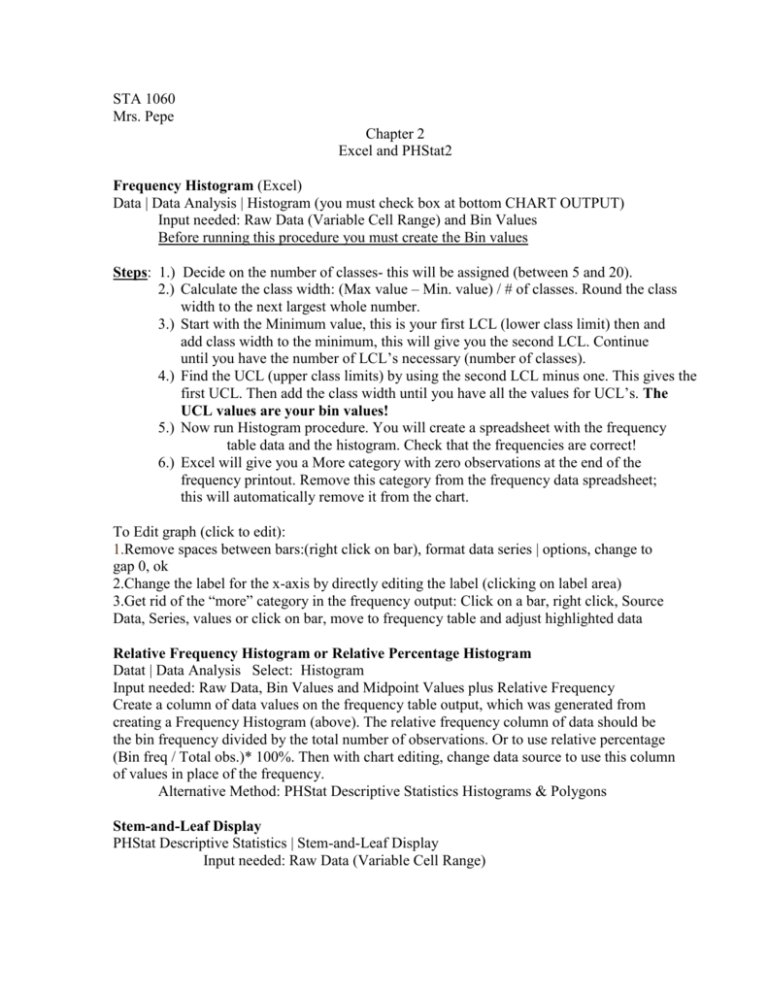
STA 1060 Mrs. Pepe Chapter 2 Excel and PHStat2 Frequency Histogram (Excel) Data | Data Analysis | Histogram (you must check box at bottom CHART OUTPUT) Input needed: Raw Data (Variable Cell Range) and Bin Values Before running this procedure you must create the Bin values Steps: 1.) Decide on the number of classes- this will be assigned (between 5 and 20). 2.) Calculate the class width: (Max value – Min. value) / # of classes. Round the class width to the next largest whole number. 3.) Start with the Minimum value, this is your first LCL (lower class limit) then and add class width to the minimum, this will give you the second LCL. Continue until you have the number of LCL’s necessary (number of classes). 4.) Find the UCL (upper class limits) by using the second LCL minus one. This gives the first UCL. Then add the class width until you have all the values for UCL’s. The UCL values are your bin values! 5.) Now run Histogram procedure. You will create a spreadsheet with the frequency table data and the histogram. Check that the frequencies are correct! 6.) Excel will give you a More category with zero observations at the end of the frequency printout. Remove this category from the frequency data spreadsheet; this will automatically remove it from the chart. To Edit graph (click to edit): 1.Remove spaces between bars:(right click on bar), format data series | options, change to gap 0, ok 2.Change the label for the x-axis by directly editing the label (clicking on label area) 3.Get rid of the “more” category in the frequency output: Click on a bar, right click, Source Data, Series, values or click on bar, move to frequency table and adjust highlighted data Relative Frequency Histogram or Relative Percentage Histogram Datat | Data Analysis Select: Histogram Input needed: Raw Data, Bin Values and Midpoint Values plus Relative Frequency Create a column of data values on the frequency table output, which was generated from creating a Frequency Histogram (above). The relative frequency column of data should be the bin frequency divided by the total number of observations. Or to use relative percentage (Bin freq / Total obs.)* 100%. Then with chart editing, change data source to use this column of values in place of the frequency. Alternative Method: PHStat Descriptive Statistics Histograms & Polygons Stem-and-Leaf Display PHStat Descriptive Statistics | Stem-and-Leaf Display Input needed: Raw Data (Variable Cell Range) Plot or Scatterplot (two numerical variables) Insert | Chart | XY (Scatter) Input needed: Data needs to be in (x,y) pairs. Chart Wizard will assume the X variable is located in the first column of the cell range. Follow directions. Add x-axis and y-axis labels and chart title. Pie Chart (categorical data) Enter data in the form of a table, click on any cell, Insert, Chart, Pie Select all data except totals Check and change legend, labels and title. To change number of decimal places, right click on one of the %’s Alternative Method: PHStat Descriptive Statistics | One-Way Tables & Charts Single Numerical Variable Descriptive Statistics Excel | Tools | Data Analysis | Descriptive Statistics Options (Check boxes): Summary Statistics (Make sure you check this option) Confidence Level Kth largest Kth smallest Summary Statistics Include: Mean Standard Error Range Median Minimum Mode Maximum Standard Deviation Sum Sample Variance Count Kurtosis Skewness (Note: more than one variable may be specified at one time) Be careful of whether you include labels in the first row! When you generate the output, stretch out the columns so you can read the numbers. Label the new spreadsheet “Summary Stats”. Box and Whisker Plot (with Descriptive Statistics) PHStat | Descriptive Statistics | Box & Whisker Plot The box shows the lowest value, Q1, Q2, Q3 and highest value Options for: Single variable, multiple groups unstacked or groups stacked Follow directions for single variable. Check box for Five-Number Summary (min, Q1, median, Q3 and max values) Diagram shows minimum and maximum values as broken lines. Solid lines designate Q1, median, and Q3 (from left to right). Five number summary values are printed on a separate sheet.
