Biological Drawing Guide: Accuracy & Technique
advertisement
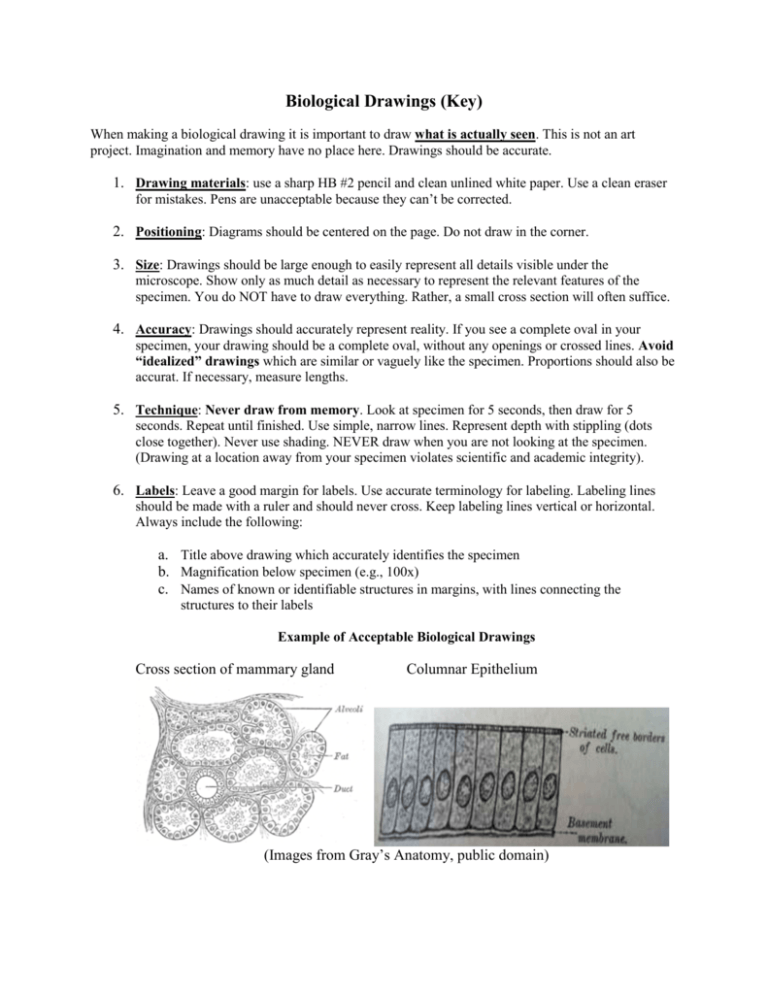
Biological Drawings (Key) When making a biological drawing it is important to draw what is actually seen. This is not an art project. Imagination and memory have no place here. Drawings should be accurate. 1. Drawing materials: use a sharp HB #2 pencil and clean unlined white paper. Use a clean eraser for mistakes. Pens are unacceptable because they can’t be corrected. 2. Positioning: Diagrams should be centered on the page. Do not draw in the corner. 3. Size: Drawings should be large enough to easily represent all details visible under the microscope. Show only as much detail as necessary to represent the relevant features of the specimen. You do NOT have to draw everything. Rather, a small cross section will often suffice. 4. Accuracy: Drawings should accurately represent reality. If you see a complete oval in your specimen, your drawing should be a complete oval, without any openings or crossed lines. Avoid “idealized” drawings which are similar or vaguely like the specimen. Proportions should also be accurat. If necessary, measure lengths. 5. Technique: Never draw from memory. Look at specimen for 5 seconds, then draw for 5 seconds. Repeat until finished. Use simple, narrow lines. Represent depth with stippling (dots close together). Never use shading. NEVER draw when you are not looking at the specimen. (Drawing at a location away from your specimen violates scientific and academic integrity). 6. Labels: Leave a good margin for labels. Use accurate terminology for labeling. Labeling lines should be made with a ruler and should never cross. Keep labeling lines vertical or horizontal. Always include the following: a. Title above drawing which accurately identifies the specimen b. Magnification below specimen (e.g., 100x) c. Names of known or identifiable structures in margins, with lines connecting the structures to their labels Example of Acceptable Biological Drawings Cross section of mammary gland Columnar Epithelium (Images from Gray’s Anatomy, public domain) Specimen for biological drawing: This photograph is of Onion Root Tip Cells viewed under the compound light microscope, magnified 40x. The nuclei are clearly visible and some of the cells have begun the process of mitosis (nuclear division) 1. Identify and describe at least six unacceptable features in the student’s sketch above: The drawing to the right is bad biological drawing. Imagea.by Shoba Shanti (in the in pen. It ashould The drawing is done be in pencil There are many problems publicb. domain) The drawing is small and in the corner. It should be centered on the page and larger with it. c. The drawing is sloppy and idealized (note that many of the cells are drawn as incomplete “loops,” whereas in the photograph they are all complete Badd.example of a and chromosomes have been shaded in. Their darkness should be shown by The nuclei biological drawing stippling, not shading e. The title is beneath the drawing, but should be at the top f. There is no magnification or scale shown. It should say “40x” under the drawing g. The labeling lines are not straight (should be done with a rule) and they are diagonal (should be vertical or horizontal, only)


