Program of Information Technology
advertisement
ITS331 IT Laboratory I: (Laboratory #8) PHP & Form Processing I
School of Information and Computer Technology
Sirindhorn International Institute of Technology
Thammasat University
ITS331 Information Technology Laboratory I
Laboratory #8: PHP & Form Processing I
Objective:
- To learn how to use phpMyAdmin
- To learn how to connect to MySQL and retrieve data from PHP
1
phpMyAdmin
Until now, interacting with a MySQL sever is done through the command-line client.
Interacting with a MySQL server through a command-line interface is a little tedious as you do
not have a WYSIWYG interface. Although using the command-line interface enables you to
understand how MySQL client and its server interact, typing statements one by one may not
be the most practical choice.
There are several graphical programs written in such a way that each button click maps to a
MySQL statement. In this way, you can interact with the server with a GUI. Among several
others, phpMyAdminis one of the most popular software in this category. phpMyAdmingives
you an easy-to-use interface that allows you to create tables and run queries by filling in a
little bit of information and then having the tables created for you.
1.1
AcessingphpMyAdmin
phpMyAdmin is web-based software used for creating and maintaining MySQL databases.After
the installation (phpMyAdmin comes with AppServ), you can access to phpMyAdminwitha URL
just like usual web pages. By default, the URL is
http://localhost/phpmyadmin/
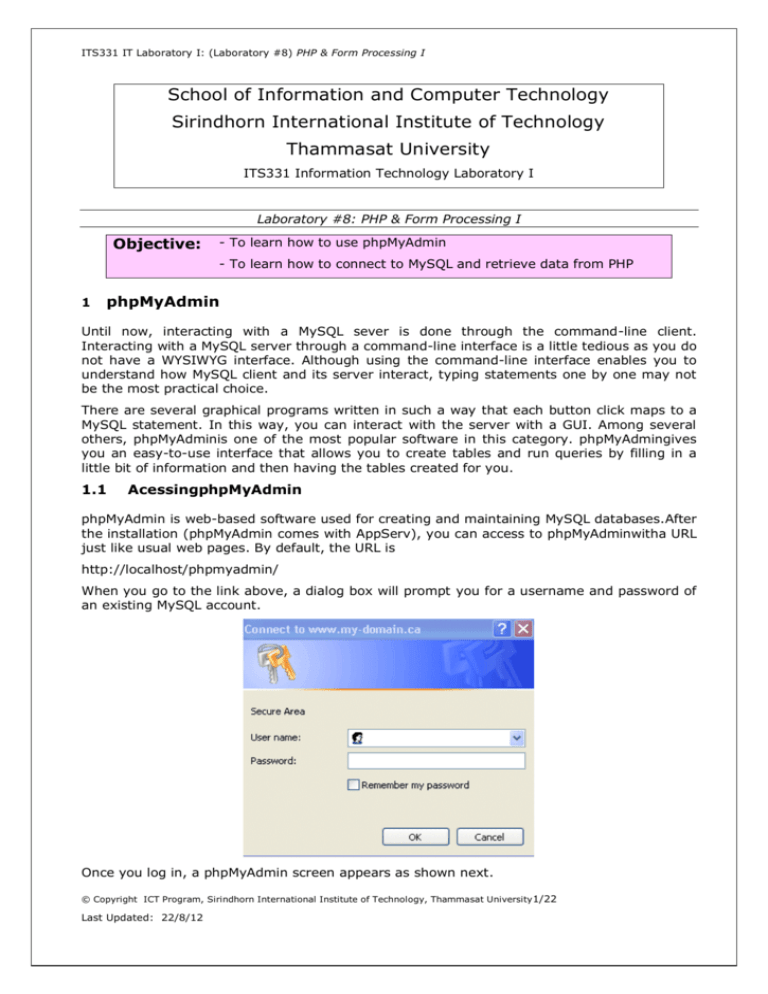
When you go to the link above, a dialog box will prompt you for a username and password of
an existing MySQL account.
Once you log in, a phpMyAdmin screen appears as shown next.
© Copyright ICT Program, Sirindhorn International Institute of Technology, Thammasat University 1/22
Last Updated: 22/8/12
ITS331 IT Laboratory I: (Laboratory #8) PHP & Form Processing I
1.2
Creating Database
To create a database (may need a root access), type the desired database name into the box
as followed
Click “Create” to create the database.
1.3
Creating Table
The left-hand frame in phpMyAdmin is used for navigation.You will see your database
displayed here (in this case called hr). As you create tables, they will show below this. Click
on your database in the navigation frame and a new window will appear on the right hand
side.
© Copyright ICT Program, Sirindhorn International Institute of Technology, Thammasat University 2/22
Last Updated: 22/8/12
ITS331 IT Laboratory I: (Laboratory #8) PHP & Form Processing I
We will create a table in the database, called "REGION". Use the “Create new table
feature. Type in the name of the new table “REGION”, and the number of columns 2 into
“Fields:”.
Then click “Go” and you should see something like this. The table title now appears under the
database name.
Now enter the names and attributes of our table fields. Enter the following information as
above:
Field
REGION_ID
REGION_NAME
Type
INT
VARCHAR
Length Values
Extra
Auto_increment
Primary Key
Yes
25
The Length value indicates the maximum allowable length of characters. There are many
different values that can be set for Type. The "id" field, which will be used as a Primary key
for this table, has been set to auto_increment. Thissaves you from having to type in the next
number in sequence when you input new records.
© Copyright ICT Program, Sirindhorn International Institute of Technology, Thammasat University 3/22
Last Updated: 22/8/12
ITS331 IT Laboratory I: (Laboratory #8) PHP & Form Processing I
Congratulations! You have created your first table in phpMyAdmin. The corresponding SQL
command for creating these fields is also displayed. Note that you can use Drop to delete a
table or fields.
1.4
Inserting New Records
Click the tab labeled "Insert" and another window should appear, like this.
Type in the details for each of the fields for this record.The "id" column was set to
auto_incrementso you do not need to enter a number.Now click Go and the record is saved to
the region table. When you've finished entering several records into the table, you can check
them by clicking on the Browse tab. You can click on individual records for editing or deleting.
1.5
Browse
Only the tables with existing records can be browsed. After you click on the Browse icon a
new window with the records list will be opened.
By clicking on the Pen icon you can edit the chosen record. You will see the record structure
and you can alter the values of the records.
1.6
Structure
© Copyright ICT Program, Sirindhorn International Institute of Technology, Thammasat University 4/22
Last Updated: 22/8/12
ITS331 IT Laboratory I: (Laboratory #8) PHP & Form Processing I
In the Structure screen you will see the table structure.
You will see the fields' names, their types, collations, attributes, additional extra information,
the default values and whether the fields' values can be NULL. You can browse for distinct
values by clicking on the corresponding action icon. Also, you can edit a field's structure or
delete a field. You can define different indexes: Primary, Unique, Index and Fulltext. This
structure information is equivalent to the result after issuing “desc” command in the MySQL
command-line client.
1.7
Search
Through the Search menu, you can generate a search query for the chosen table.
© Copyright ICT Program, Sirindhorn International Institute of Technology, Thammasat University 5/22
Last Updated: 22/8/12
ITS331 IT Laboratory I: (Laboratory #8) PHP & Form Processing I
You can either write the WHERE clause or you can use the "query by example" functionality.
You should click on the Go button to execute the query.
For example, if you want to visualize all the records with a field value that starts with a, you
should select the fields which you want to show. Pick the LIKE operator from the drop-down
menu and enter in the corresponding field value a% (% stands for a wildcard string). Click on
the Go button to see the result.
1.8
SQL
You can run a MySQL query through “SQL” Tab. There you should enter the entire SQL query
code and click on the Go button to execute it.
You can find more details about the MySQL syntax in the official MySQL Documentation.
1.9
Backup the Database
You can create a backup of your database through the “Export” tab.
© Copyright ICT Program, Sirindhorn International Institute of Technology, Thammasat University 6/22
Last Updated: 22/8/12
ITS331 IT Laboratory I: (Laboratory #8) PHP & Form Processing I
Select the tables you want to exported. Leave the radio button selection to the SQL
option. The Structure and the Data check boxes should remain checked.Select the Save as
file check box and then click on the Go button. An SQL dump file with your database
structure and content will be generated.
If you have a large database with a lot of records, the server timeout value can be reached.
In such a case you can export the database in several batches.
1.10 Restoring the Database
You can restore your database backup in the “Import” tab.
Click on the Browse button to select your database backup file from your local computer.
Pick the charset of the file from the corresponding drop-down menu.
If the file is too big, the MySQL server timeout can be reached. In such a case you can
interrupt the import action. Then you can continue with the data import defining the number
of the queries to be skipped from the file beginning. In this way you will skip the imported
queries and continue from the point of the interruption.
© Copyright ICT Program, Sirindhorn International Institute of Technology, Thammasat University 7/22
Last Updated: 22/8/12
ITS331 IT Laboratory I: (Laboratory #8) PHP & Form Processing I
2 Connect from PHP to MySQL
A flow chart illustrating the use of PHP together with a database to make a client/server web
application is shown as followed:
Start
Create Connection for
Needed Database
Send Needed SQL
commands
Yes
Receiving Data and
Processing Results
More command?
No
Closing Connection
END
From the figure, we firstly have to establish a connection to the MySQL Server. After that,
through the established connection, you can issue as many MySQL statements as needed to
the MySQL server. In the end, the database connection is closed to free the used resource.
The detail of each step in this work flow is described next.
2.1
Open a Connection
There are both procedural and object-oriented ways to connect to MySQL from PHP. In this
lab, we will use the object-oriented way with mysqli extension. Opening a connection to
MySQL is done by creating a new object of class mysqli as follows.
<?php
// In some cases, 127.0.0.1 may be needed instead of localhost
$mysqli = new mysqli('localhost','user','password','dbname');
if($mysqli->connect_errno){
echo $mysqli->connect_errno.": ".$mysqli->connect_error;
}
// All subsequent queries are done through $mysqli object.
// ...
$mysqli->close();
?>
The constructor of mysqli takes four arguments: the host to connect to (localhost in most
cases), MySQL user, MySQL password, and the databasename. Often, the connection is closed
automatically at the end of script execution. So, there is no need to explicitly close it. In a
rare case where it is needed, $mysqli->close() may be used.
The property connect_errno returns the last error code number from the last call to connect.
If there is no error, then zero is produced. Wrapping “if” around the connect_errno is a
common pattern when establishing a connection to MySQL. The property connect_error is
associated with connect_errno, and is the string description of the last connection error.
© Copyright ICT Program, Sirindhorn International Institute of Technology, Thammasat University 8/22
Last Updated: 22/8/12
ITS331 IT Laboratory I: (Laboratory #8) PHP & Form Processing I
2.2
Send Queries to MySQL
Now that we have a connection to the database, we can now send some queries. To execute
an SQL command in a PHP program, we call the method query() on the mysqli object. The
following code illustrates how an SQL CREATE statement is sent with query().
<?php
$mysqli = new mysqli('localhost','user','password','dbname');
if($mysqli->connect_errno){
echo $mysqli->connect_errno.": ".$mysqli->connect_error;
}
$q='CREATE table product(p_id int unsigned not null auto_increment
primary key, p_name varchar(30), p_price int)';
if($mysqli->query($q)){
echo 'CREATE was successful.';
}else{
Echo 'CREATE failed. Error: '.$mysqli->error ;
}
?>
The method query() of class mysqli takes a query string as its argument and returns either a
mysqli_result object on success for a SELECT, SHOW, DESC, and EXPLAIN query, or false
on failure. For a query which does not require a result set (i.e., CREATE, INSERT, UPDATE,
and DELETE), the method returns true on success.
Wrapping the query() call with an “if” statement is a common coding pattern as it attempts
to query and performs the failure checking in one go. In the case of a failure, the property
$mysqli->error will return the last error message associated with the latest query.
After the code is successfully executed, we would have a new table “product” in the database.
The table has the following structure.
+---------+------------------+------+-----+---------+----------------+
| Field
| Type
| Null | Key | Default | Extra
|
+---------+------------------+------+-----+---------+----------------+
| p_id
| int(10) unsigned | NO
| PRI | NULL
| auto_increment |
| p_name |varchar(30)
| YES |
| NULL
|
|
| p_price | int(11)
| YES |
| NULL
|
|
+---------+------------------+------+-----+---------+----------------+
It is simple to make a slight modification of the previous code to insert some rows to this
table. Here is a code snippet which inserts four rows into the Product table we just created.
We assume that $mysqli has already been created.
<?php
$recs=array(
array('Pencil',10),array('Eraser',5),
array('Mouse',600),array('Printer',4000)
);
foreach($recs as $r){
$q="INSERT INTO product(p_name, p_price) VALUES('$r[0]', $r[1])";
if(!$mysqli->query($q)){
echo "INSERT failed. Error: ".$mysqli->error ;
break;
}
}
?>
© Copyright ICT Program, Sirindhorn International Institute of Technology, Thammasat University 9/22
Last Updated: 22/8/12
ITS331 IT Laboratory I: (Laboratory #8) PHP & Form Processing I
In this example, we have the data in an array, where each element in this array is another
array representing a row. The for loop just iterates through each element, constructs an
insert query, and executes with $mysqli->query() as before. After the code is executed, the
“Product” table looks like:
+------+--------------------+---------+
| p_id | p_name
| p_price |
+------+--------------------+---------+
|
1 | Pencil
|
10 |
|
2 | Eraser
|
5 |
|
3 | Mouse
|
600 |
|
4 | Printer
|
4000 |
+------+--------------------+---------+
2.3
Retrieve Result Sets from MySQL
In the case that the query is of type SELECT, SHOW, DESC, or EXPLAIN, query() will return a
mysqli_result object on success, and return false on failure. Since in PHP anything that is
not null or not 0 is considered true, wrapping an “if” statement around the call of query()will
still work.
Here is a demonstration of how to retrieve a result set after executing “show tables” to list all
tables in the database.
<?php
if($result=$mysqli->query('show tables')){
while($row=$result->fetch_array()){
echo$row[0].'<br>';
}
$result->free();
}else{
echo "Retrieval failed";
}
?>
To understand the code above, it helps to recall that putting show tables in a command-line
client would produce (assuming database name is “its331” and there are seven tables):
+------------------+
| Tables_in_its331 |
+------------------+
| Course
|
| Product
|
| Register
|
| Section
|
| Student
|
| employee_data
|
| employee_per
|
+------------------+
In the code above, $result contains the mysqli_result object. A mysqli_result object
should be imagined to contain the result which would be returned in a command-line client. In
this case, mysqli_result object would contain the table above. Internally the mysqli_result
object has its own pointer which points to one row of the result set at a time. Each call to
$result->fetch_array()returns the row as an array and moves the pointer to the next row.
The array is indexed in such a way that 0 will give the value of the first column, 1 will give the
value of the second column, and so on. In the code above, since we have only one column
(index 0), we simply get the values and print them out. In the last call to fetch_array a null
value will be produced, and thus causes the loop to end. After the while loop, $result>free() is called to free the buffered result.
© Copyright ICT Program, Sirindhorn International Institute of Technology, Thammasat University 10/22
Last Updated: 22/8/12
ITS331 IT Laboratory I: (Laboratory #8) PHP & Form Processing I
2.4
Display Result Sets in a Table
Continuing from the example of “product” table, let us try to retrieve some data and display it
in an HTML table. The following code displays products and their prices which are greater than
100.
<?php
$q="select p_name, p_price from product where p_price> 100; ";
if($result=$mysqli->query($q)){
echo '<table border="1">';
echo '<tr><th>Name</th><th>Price</th></tr>';
while($row=$result->fetch_array()){
echo "<tr>";
echo "<td>".$row['p_name']."</td>";
echo "<td>".$row['p_price']."</td>";
echo "</tr>";
}
Echo '</table>';
$result->free();
}else{
Echo "Retrieval failed: ".$mysqli->error ;
}
?>
The structure of the code is almost identical to the previous example except that we now print
the result in an HTML table. In the previous example, $row is accessed by a numeric index. In
fact, the method fetch_array()also allows the values in each row to be accessed by their
column names as the keys in the returned associative array. In this particular example,
$row[‘p_name’] would give the same value as $row[0]. Notice that $mysqli->error also
works for a SELECT query, and will give an error message on a failure.
After the code is executed, the following table is obtained.
2.5
Get the Number of Rows
There are many circumstances where, besides the actual result set, the number of rows in the
result set is needed. The class mysqli_result has a property num_rows for this purpose. The
following code demonstrates how to use it. We assume $mysqli has already been constructed.
<?php
$q="select p_id from product where p_name like 'P%'; ";
if($result=$mysqli->query($q)){
$count=$result->num_rows;
Echo "There are $count products starting with P.";
$result->free();
}else{
Echo "Query failed: ".$mysqli->error ;
}
?>
In this example, we try to find the number of product names which start with „P‟. The number
can be obtained by referring to $result->num_rows.
© Copyright ICT Program, Sirindhorn International Institute of Technology, Thammasat University 11/22
Last Updated: 22/8/12
ITS331 IT Laboratory I: (Laboratory #8) PHP & Form Processing I
There is another way to get only the number of rows. That is to query “select count(*)
from Product where p_name like ‘P%’ ”, and use fetch_array() to get the count value. If
only the count is needed, then one may issue an SQL COUNT statement. However, if the
actual result set is also needed, we recommend the first way which is to use $result>num_rows to get the count. In this way, both the result set and the count can be obtained.
2.6
Get the Number of Columns
Often, the number of columns is known in advance when the query is constructed. However,
in the case that the query is dynamically constructed (i.e., columns to query depend on a user
input), or the query has “*” for all columns, the number of columns may be unknown. The
class mysqli_result has a property field_count for this purpose.
<?php
$q="select * from Product limit 1;";
if($result=$mysqli->query($q)){
$count=$result->field_count;
Echo "There are $count columns.";
$result->free();
}else{
Echo "Query failed: ".$mysqli->error ;
}
?>
In this example, we try to find the number of columns (fields) in the “Product” table. On a
success, “There are 3 columns” will be printed out.
2.7
Seek a Row in the Result Set
The object mysqli_result containing the result set works by maintaining an internal pointer
which points to the current row. Rows in the set are retrieved by moving this pointer (by
calling $result->fetch_array()) sequentially from the beginning to the end. However, in
some cases, we may be interested in only a particular row in the result set. This is when the
method data_seek() of class mysqli_result comes in handy. For example, we want to find
the product which has the third lowest price.
<?php
$q='select p_name, p_price from product order by p_price limit 3;';
if($result=$mysqli->query($q)){
// Seek to the third row (row index starts from 0)
$result->data_seek(2);
$row=$result->fetch_array();
Echo $row['p_name']." has the third lowest price which is
".$row['p_price'];
$result->free();
}else{
Echo "Query failed: ".$mysqli->error;
}
?>
In this example, we query the products and order them by their prices in ascending order. To
get the product having the third lowest price, we move the internal pointer of $result to
index 2 by using $result->data_seek(2). So, the next fetch by $result>fetch_array()will give the result of the third row. After executed, the output of this code is
“Mouse has the third lowest price which is 600”.
© Copyright ICT Program, Sirindhorn International Institute of Technology, Thammasat University 12/22
Last Updated: 22/8/12
ITS331 IT Laboratory I: (Laboratory #8) PHP & Form Processing I
2.8
Properly Escape Query Strings
When inserting a new record, it is very common to construct an INSERT statement by
concatenating the values input by the user. However, it is sometimes problematic when those
values contain characters used in MySQL syntax. Here is an example which will produce a
MySQL syntax error.
<?php
$r=array("Idiot's Guide Book",1200);
$q="INSERT INTO product(p_name, p_price) VALUES('$r[0]', $r[1])";
if(!$mysqli->query($q)){
echo "INSERT failed. Error: ".$mysqli->error ;
}
?>
In the code above, we attempt to insert a new product called “Idiot‟s Guide Book” into the
Product table. On the surface, the code looks fine. However, when executed, there will be a
MySQL syntax error produced. The reason is that the value “Idiot‟s Guide Book” contains a
single-quote which renders $q as
“INSERT INTO product(p_name, p_price) VALUES(‘Idiot’s Guide Book’, 1200)”.
As can be seen, the single-quote in the value accidentally becomes a single-quote closing the
string in the MySQL query.
To solve this problem, we can use the method $mysqli->real_escape_string() which will
properly escape MySQL special characters.
<?php
$r=array("Idiot's Guide Book",1200);
$q="INSERT INTO product(p_name, p_price)
VALUES('".$mysqli->real_escape_string($r[0])."', $r[1])";
if(!$mysqli->query($q)){
echo "INSERT failed. Error: ".$mysqli->error ;
}
?>
This time, $q will be
“INSERT INTO product(p_name, p_price) VALUES(‘Idiot\’s Guide Book’, 1200)”
(note the backslash in front of the single-quote). The added backslash signals the MySQL that
the following character is an actual value, not part of the syntax. With this code, the insertion
is successful, and the Product table‟s records become
+------+--------------------+---------+
| p_id | p_name
| p_price |
+------+--------------------+---------+
|
1 | Pencil
|
10 |
|
2 | Eraser
|
5 |
|
3 | Mouse
|
600 |
|
4 | Printer
|
4000 |
|
5 | Idiot's Guide Book |
1200 |
+------+--------------------+---------+
3 Short Reference
In this section, we give a summary of selected commonly used methods and properties of
mysqli and mysqli_result classes. Properties are denoted with a $. For full detail, see
http://www.php.net/manual/en/book.mysqli.php
© Copyright ICT Program, Sirindhorn International Institute of Technology, Thammasat University 13/22
Last Updated: 22/8/12
ITS331 IT Laboratory I: (Laboratory #8) PHP & Form Processing I
3.1
3.2
mysqli Class
mysqli::$affected_rows — Gets the number of affected rows in a previous MySQL
operation
mysqli::$client_info— Returns the MySQL client version as a string
mysqli::$client_version — Get MySQL client info
mysqli::close — Closes a previously opened database connection
mysqli::$connect_errno — Returns the error code from last connect call
mysqli::$connect_error — Returns a string description of the last connect error
mysqli::$errno — Returns the error code for the most recent function call
mysqli::$error — Returns a string description of the last error
mysqli::$field_count — Returns the number of columns for the most recent query
mysqli::get_client_info — Returns the MySQL client version as a string
mysqli::$host_info — Returns a string representing the type of connection used
mysqli::$server_info — Returns the version of the MySQL server
mysqli::$server_version — Returns the version of the MySQL server as an integer
mysqli::get_warnings — Get result of SHOW WARNINGS
mysqli::$info — Retrieves information about the most recently executed query
mysqli::$insert_id — Returns the auto generated id used in the last query
mysqli::query — Performs a query on the database
mysqli::real_escape_string — Escapes special characters in a string for use in an
SQL statement, taking into account the current charset of the connection
mysqli::select_db — Selects the default database for database queries
mysqli::$thread_id — Returns the thread ID for the current connection
mysqli::kill — Asks the server to kill a MySQL thread
mysqli_result Class
mysqli_result::$current_field — Get current field offset of a result pointer
mysqli_result::data_seek — Adjusts the result pointer to an arbitary row in the
result
mysqli_result::fetch_all — Fetches all result rows as an associative array, a
numeric array, or both
mysqli_result::fetch_array — Fetch a result row as an associative, a numeric array,
or both
mysqli_result::fetch_assoc— Fetch a result row as an associative array
mysqli_result::fetch_field_direct — Fetch meta-data for a single field
mysqli_result::fetch_fields — Returns an array of objects representing the fields
in a result set
mysqli_result::fetch_object — Returns the current row of a result set as an object
mysqli_result::$field_count — Get the number of fields in a result
mysqli_result::free — Frees the memory associated with a result
mysqli_result::$num_rows — Gets the number of rows in a result
© Copyright ICT Program, Sirindhorn International Institute of Technology, Thammasat University 14/22
Last Updated: 22/8/12
ITS331 IT Laboratory I: (Laboratory #8) PHP & Form Processing I
Worksheet
1. Create database named “STAFF” and create two tables along with the specified fields. The
following tables show the structure of STAFF database. Note that all fields, except primary
key, must be set to allow NULL values.
USERGROUP Table
Field
USERGROUP_ID
USERGROUP_CODE
USERGROUP_NAME
USERGROUP_REMARK
USERGROUP_URL
Type
INT
VARCHAR
VARCHAR
VARCHAR
VARCHAR
Length Values
Extra
Auto_increment
Primary Key
Yes
50
50
255
50
USER Table
Field
USER_ID
USER_TITLE
USER_FNAME
USER_LNAME
USER_GENDER
USER_EMAIL
USER_NAME
USER_PASSWD
USER_GROUPID
DISABLE
Type
INT
VARCHAR
VARCHAR
VARCHAR
VARCHAR
VARCHAR
VARCHAR
VARCHAR
INT
INT
Length Values
Extra
Auto_increment
Primary Key
Yes
25
50
50
25
50
25
25
2. Complete add_group.html so that data input in add_group.html is inserted into the
USERGROUP table in the database. To check inserting data, go to PHPMyadmin, retrieve
data in “USERGROUP” Table in “STAFF” database.
add_group.html (worksheet 1)
© Copyright ICT Program, Sirindhorn International Institute of Technology, Thammasat University 15/22
Last Updated: 22/8/12
ITS331 IT Laboratory I: (Laboratory #8) PHP & Form Processing I
add_group.html (worksheet 2)
add_group.html (worksheet 3)
© Copyright ICT Program, Sirindhorn International Institute of Technology, Thammasat University 16/22
Last Updated: 22/8/12
ITS331 IT Laboratory I: (Laboratory #8) PHP & Form Processing I
3. Complete group.php by retrieving data from USERGROUP table and display it in the form of
table as shown in the following image. In case of no insertion data,
group.php (worksheet 1)
group.php (worksheet 2)
© Copyright ICT Program, Sirindhorn International Institute of Technology, Thammasat University 17/22
Last Updated: 22/8/12
ITS331 IT Laboratory I: (Laboratory #8) PHP & Form Processing I
group.php (worksheet 3)
In group.php, if data is submitted from add_group.html (i.e., if the submit button is clicked),
insert it to the USERGROUP table. Then, query the content from USERGROUP table, and
display it in an HTML table as shown above. If there is no data submitted, then just query and
display the data in an HTML (no insert).
© Copyright ICT Program, Sirindhorn International Institute of Technology, Thammasat University 18/22
Last Updated: 22/8/12
ITS331 IT Laboratory I: (Laboratory #8) PHP & Form Processing I
Exercise
1. Complete add_user.php (page with form to add new users) so that data input in
add_user.html is inserted into the USER table in the database. To check inserting data, go to
PHPMyadmin, retrieve data in “USER” Table in “STAFF” database.
add_user.php (worksheet 1)
add_user.php (worksheet 2)
© Copyright ICT Program, Sirindhorn International Institute of Technology, Thammasat University 19/22
Last Updated: 22/8/12
ITS331 IT Laboratory I: (Laboratory #8) PHP & Form Processing I
add_user.php (worksheet 3)
The choice names in the combo box for “User Group” must be the actual data in the table
USERGROUP (i.e., “USERGROUP_NAME” column in USERGROUP table). However, the choice
values must be from “USERGROUP_ID” column.
Recall that the choices of a combo box are created with an <option> tag. In this case, the
following code may be used to make the combo box.
<select name="usergroup">
<?php
$mysqli = new mysqli('localhost','…','…','STAFF');
$q='select USERGROUP_ID, USERGROUP_NAME from USERGROUP;';
if($result=$mysqli->query($q)){
while($row=$result->fetch_array()){
echo '<option value="'.$row[0].'">'.$row[1].'</option>';
}
}else{
echo 'Query error: '.$mysqli->error;
}
?>
</select>
© Copyright ICT Program, Sirindhorn International Institute of Technology, Thammasat University 20/22
Last Updated: 22/8/12
ITS331 IT Laboratory I: (Laboratory #8) PHP & Form Processing I
2. Complete user.php by retrieving data from USER table and display it in the form of table as
shown in the following image. Note that User Group must show in form of USERGROUP_NAME
from USERGROUP table.
user.php (Worksheet 1)
user.php (Worksheet 2)
© Copyright ICT Program, Sirindhorn International Institute of Technology, Thammasat University 21/22
Last Updated: 22/8/12
ITS331 IT Laboratory I: (Laboratory #8) PHP & Form Processing I
user.php (Worksheet 3)
In user.php, if there is data submitted from add_user.php (i.e., if the submit button is
clicked), insert it to the USER table. Then, query the content from USER table, and display all
users in an HTML table as shown above. If there is no data submitted, then just query and
display the user data in an HTML (no insert).
© Copyright ICT Program, Sirindhorn International Institute of Technology, Thammasat University 22/22
Last Updated: 22/8/12
