Experiment 3 Inversion of the image on the retina
advertisement
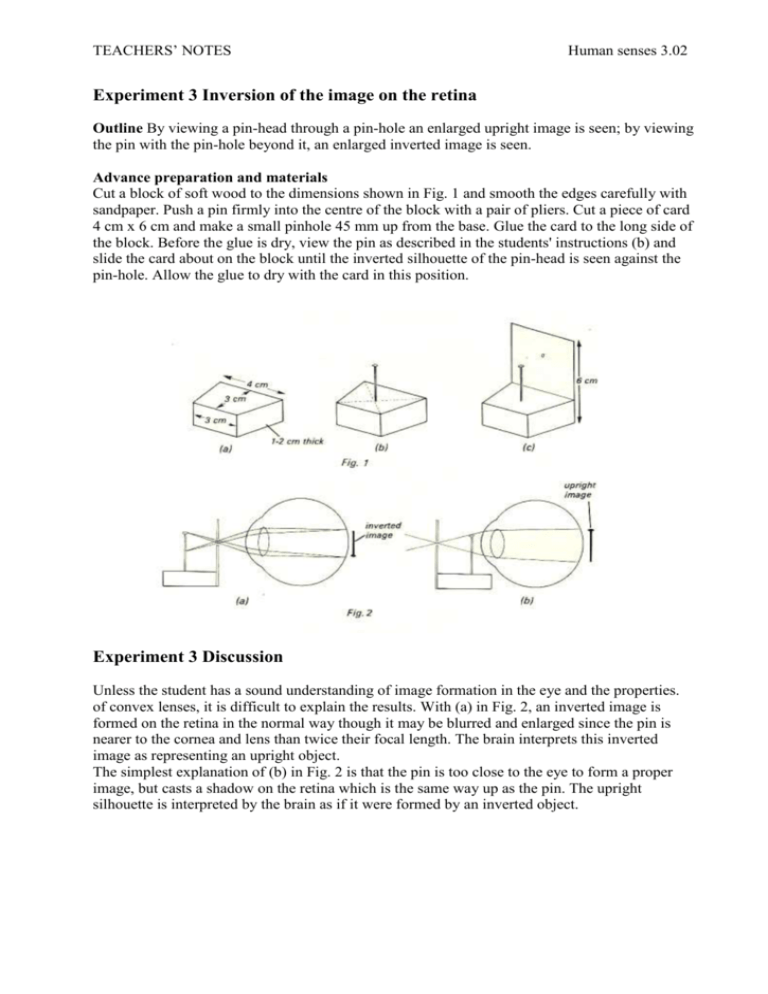
TEACHERS’ NOTES Human senses 3.02 Experiment 3 Inversion of the image on the retina Outline By viewing a pin-head through a pin-hole an enlarged upright image is seen; by viewing the pin with the pin-hole beyond it, an enlarged inverted image is seen. Advance preparation and materials Cut a block of soft wood to the dimensions shown in Fig. 1 and smooth the edges carefully with sandpaper. Push a pin firmly into the centre of the block with a pair of pliers. Cut a piece of card 4 cm x 6 cm and make a small pinhole 45 mm up from the base. Glue the card to the long side of the block. Before the glue is dry, view the pin as described in the students' instructions (b) and slide the card about on the block until the inverted silhouette of the pin-head is seen against the pin-hole. Allow the glue to dry with the card in this position. Experiment 3 Discussion Unless the student has a sound understanding of image formation in the eye and the properties. of convex lenses, it is difficult to explain the results. With (a) in Fig. 2, an inverted image is formed on the retina in the normal way though it may be blurred and enlarged since the pin is nearer to the cornea and lens than twice their focal length. The brain interprets this inverted image as representing an upright object. The simplest explanation of (b) in Fig. 2 is that the pin is too close to the eye to form a proper image, but casts a shadow on the retina which is the same way up as the pin. The upright silhouette is interpreted by the brain as if it were formed by an inverted object.
