Purchase Order Changes
April 2011
Purchase Orders are delivered to SCP from the Buyer’s backend system. All previously
issued versions of an order must be ‘Accepted’ or ‘Acknowledged with Exceptions’ and
then SENT to the Buyer, before the next version can be viewed.
Step 1: Locate Purchase Order Change (POC)
To process from a list of new POCs:
From Navigation Tree, click on My Workspace
In Order Summary box, click number hyperlink for the New Change state
To see POC details, click the Order Number link from the list of POCs
Note: Once a POC has been viewed or printed, the POC is blended in with original PO’s
under the ‘Processing’ status.
To locate and respond to a specific PO/POC:
From Navigation Tree, go to Order Management Purchase Orders Order
Search
Enter the PO’s Order Number
Click Search
The earliest version of the PO or POC (that was not sent yet) will be shown on the
screen
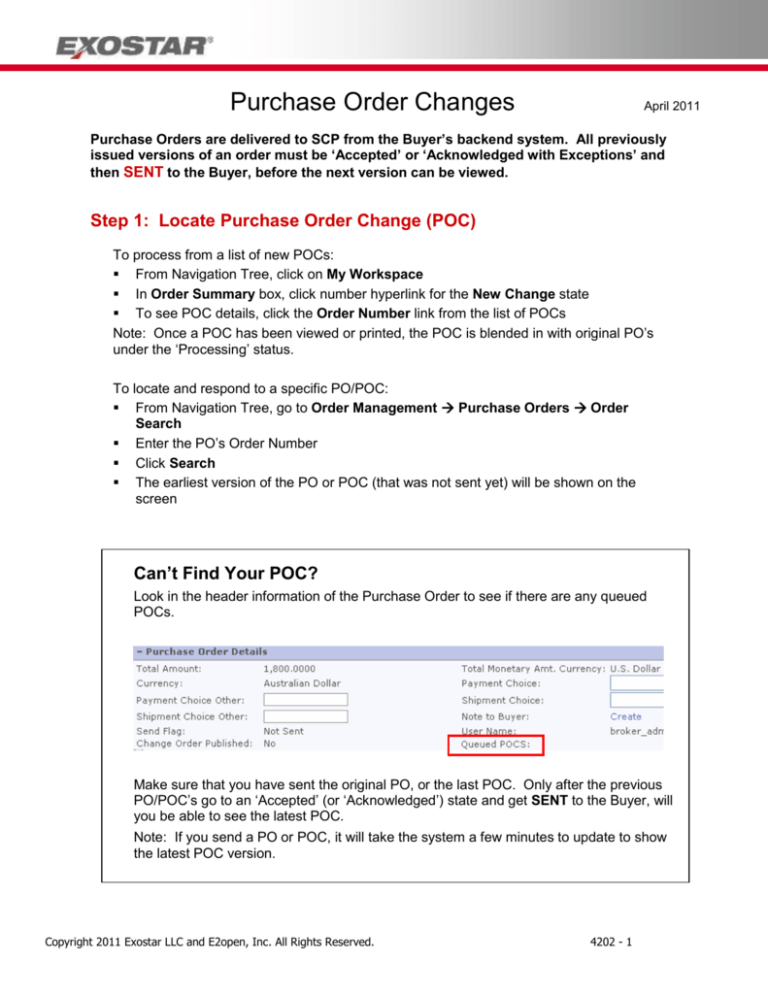
Can’t Find Your POC?
Look in the header information of the Purchase Order to see if there are any queued
POCs.
Make sure that you have sent the original PO, or the last POC. Only after the previous
PO/POC’s go to an ‘Accepted’ (or ‘Acknowledged’) state and get SENT to the Buyer, will
you be able to see the latest POC.
Note: If you send a PO or POC, it will take the system a few minutes to update to show
the latest POC version.
Copyright 2011 Exostar LLC and E2open, Inc. All Rights Reserved.
4202 - 1
Step 2: View POC Details
At bottom of header section of POC, click View Details button
POC details will pop up as a separate screen
Any changes will be highlighted in yellow on the screen (but not in the print out version)
To expand/collapse sections, click blue header bars
Step 3: View POC Attachments
View attachments from Order Schedules page or Purchase Order Details page
Click the attachment icon next to an Order Number
The number in parenthesis (#) indicates the number of attachments
For attachments at the line item level, click the attachment icon in the Attach column
From the Tab page, click the attachment hyperlink
Select Open or Save to view or download the file
Step 4: Respond to POC
From Purchase Order Details page:
Select checkboxes for lines to be included in action
Select an Action Option:
o
Accepted – moves lines to ‘Accepted’ state
o
* Acknowledged with Exceptions – use to change lines, moves them to an
‘Acknowledge with Exceptions’ state
o
* Add Promises – splits lines to offer multiple quantities and/or delivery dates for a
line item, moves them to ‘Acknowledged with Exceptions’ state
o
Save – changes lines, no state change
* Using these two states requires a response in the Note to Buyer field
Time Saver: Accepting Multiple POC’s
At the Order Schedules (List) page, use checkboxes to select POC’s to
be accepted
Click the action item of Batch Accept or Batch Accept and Complete
Note: All of the PO schedule lines on the Order List page must be in a
‘Processing’ state and an Event Type of ‘Viewed’, in order to see the Accept
button.
Copyright 2011 Exostar LLC and E2open, Inc. All Rights Reserved.
4202 - 2
Step 5: Send POC Response
IMPORTANT NOTES:
1. To send a response, the POC cannot be in a ‘New Change’ or ‘Processing’ state.
2. All line items are sent at the same time.
3. Once sent, edits can no longer be made to that particular POC (however, the Buyer can
send a new POC).
4. For multiple POCs in the queue: Only when a PO/POC is sent to the buyer, will the next
(more recent) POC be available for review and processing.
5. Once a PO/POC has been sent, the ‘Send’ button is no longer available for that PO/POC
Confirm that the status of the order is ‘Accepted’, ‘Acknowledged with Exceptions’ or
‘Rejected’
Click Send
Time Saver: Send Multiple POC’s
At the Order Schedule (List) page, use checkboxes to select POCs
to be sent
Click Send
Note: In order to see the Send button on the PO List page, all of the PO/POC
schedule lines that were searched must have a Status of ‘Accepted’,
‘Acknowledged with Exceptions’ or ‘Rejected’ and an Event Type of ‘Viewed’.
Step 6: Print or Export POC (Optional)
At the Order List page, select the POCs to be printed or exported
Click the Print or Export button
(Or at the Order Details page, click the Print or Export button)
Select a document type
Click Next
View History of POC’s
From the Order List page, select one order
(Or at the Order Details page, select one order line item)
Click View History
Copyright 2011 Exostar LLC and E2open, Inc. All Rights Reserved.
4202 - 3


