How to Set Up Outlook 2003 or 2007 Hosted on IAG's Exchange
advertisement
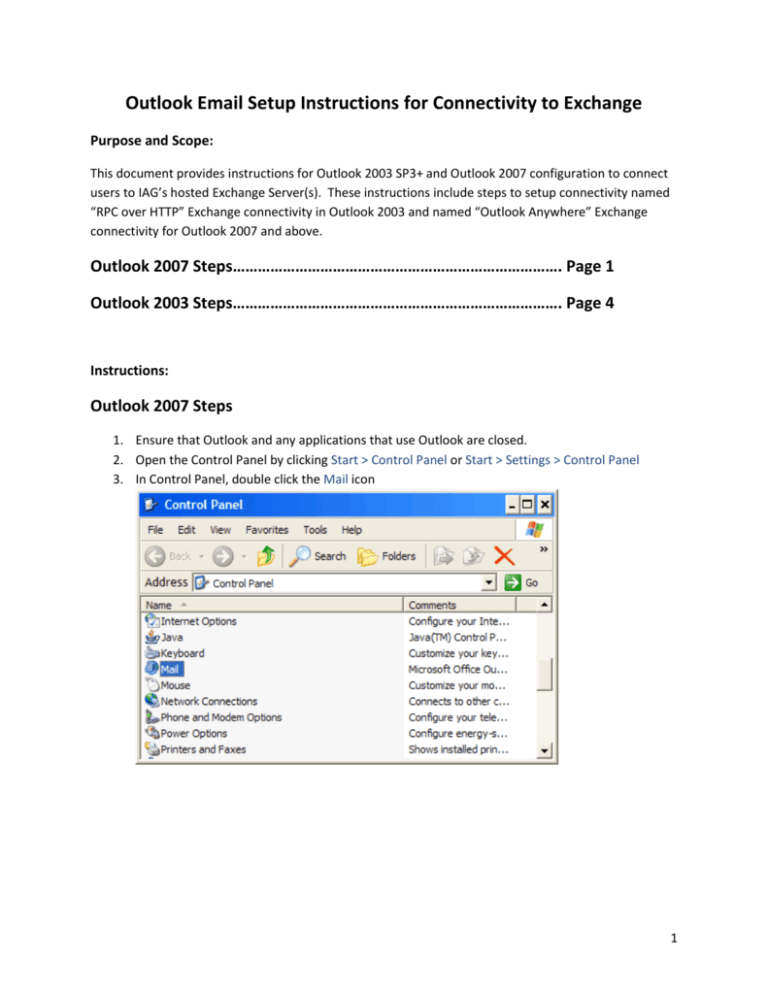
Outlook Email Setup Instructions for Connectivity to Exchange Purpose and Scope: This document provides instructions for Outlook 2003 SP3+ and Outlook 2007 configuration to connect users to IAG’s hosted Exchange Server(s). These instructions include steps to setup connectivity named “RPC over HTTP” Exchange connectivity in Outlook 2003 and named “Outlook Anywhere” Exchange connectivity for Outlook 2007 and above. Outlook 2007 Steps……………………………………………………………………. Page 1 Outlook 2003 Steps……………………………………………………………………. Page 4 Instructions: Outlook 2007 Steps 1. Ensure that Outlook and any applications that use Outlook are closed. 2. Open the Control Panel by clicking Start > Control Panel or Start > Settings > Control Panel 3. In Control Panel, double click the Mail icon 1 4. The “Mail Setup – Outlook” window opens. Click Show Profiles 5. The Mail window Appears. Click Add… 2 6. The New Profile window appears. Under Profile Name: type either your email address [ie: youremailaddress@YOUR-DOMAIN-NAME.com] and click OK. 7. The Add New E-mail Account wizard window appears. 8. Select the ‘Manually Configure server settings or additional server types’ check box. Click Next. 9. Select the ‘Microsoft Exchange’ option and click Next 3 10. Proceed to step 9 in the Outlook 2003 instructions Outlook 2003 Steps 1. Ensure that Outlook and any applications that use Outlook are closed. 2. Open the Control Panel by clicking Start > Control Panel or Start > Settings > Control Panel (may have to switch to classic view) 3. In Control Panel, double click the Mail icon 4 4. Click on ‘Show Profiles…’ 5 5. In the ‘Mail’ window click ‘Add…’ 6. The New Profile window appears. Type your email address (e.g. youremailaddress@YOURDOMAIN-NAME-HERE.com ) under Profile Name. Choose OK. 6 7. Choose ‘Add a new e-mail account’ and press ‘Next >’ 7 8. Choose ‘Microsoft Exchange Server’ and ‘Next >’ 8 9. In Microsoft Exchange Server: enter ‘kahless.infoadvisory.com’. Keep the checkmark next to Use Cached Exchange Mode. Enter your username which is firstName.lastName. Do not press ‘Check Name’ button. Press ‘More Settings’. 9 10. If you do not get the following warning continue to 11. If you receive the following message press ‘OK’ Then the following box will appear, choose ‘Cancel’. 10 11. Click on the ‘Connection’ Tab 11 12. Checkmark ‘Connect to my Exchange mailbox using HTTP’ and Press ‘Exchange Proxy Settings…’ 12 13. Under the ‘Connection settings’ : - Enter ‘mail.infoadvisory.com’ under ‘Use this URL to connect to my proxy server for Exchange:’ - Un-Checkmark ‘Mutually authenticate the session when connecting with SSL….” - Checkmark ‘On fast networks, connect using HTTP first, then connect using TCP/IP’ - Under ‘Proxy authentication settings’ change drop down list to ‘Basic Authentication’ (NOTE: ‘Connect using SSL only’ will grey out.) - Click ‘OK’ 14. Choose ‘OK’ again, ‘Next’ and ‘Finish’. 13 15. In the ‘Mail’window change ‘Always use this profile to the new youremailaddress@YOUR-DOMAIN-NAME-HERE.com address. Choose OK. 16. Open Outlook 17. You should be prompted with a “Connect to mail.infoadvisory.com” logon box. Enter your domain username and password. NOTE: “infoadvisory\” must precede your username. See image below: 14 18. Click OK. Outlook will open. If there is existing email in the mailbox, Outlook will begin downloading a cached copy of all email to the local computer. This download could take a while depending on the amount of email and size of the mailbox. Please be patient. 19. Allow the cache copy download to complete and use Outlook 2003 normally. 15
