Muscle Fitness: Basic Principles and Strength
advertisement
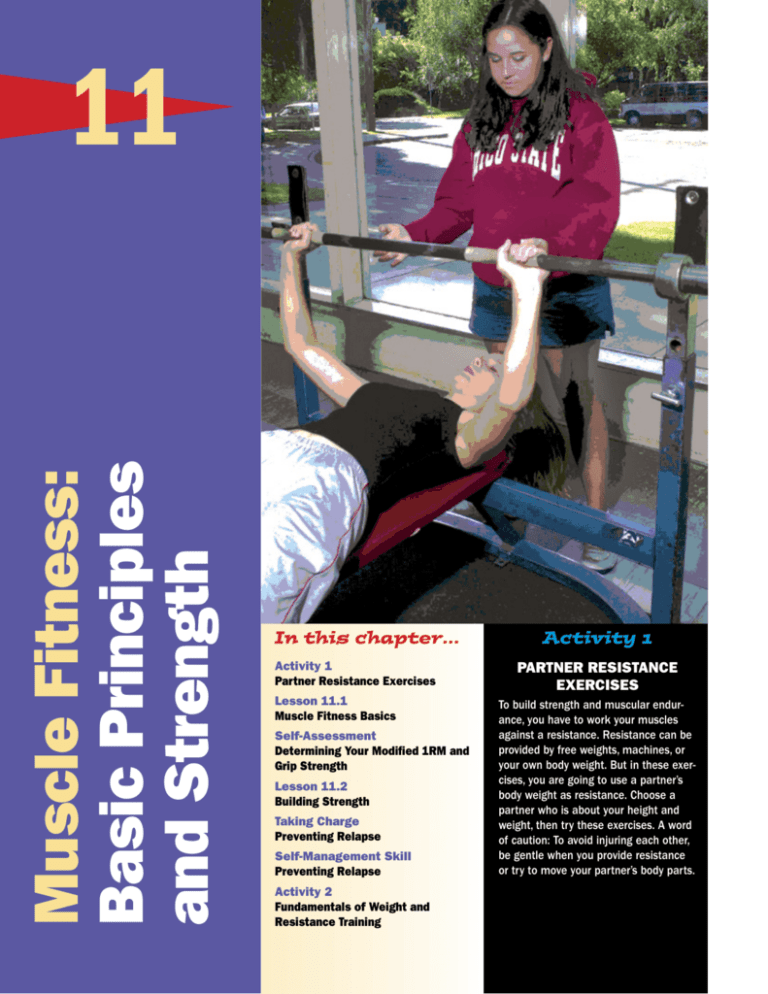
Muscle Fitness: Basic Principles and Strength 11 174 Fitness for Life In this chapter… Activity 1 Partner Resistance Exercises Lesson 11.1 Muscle Fitness Basics Self-Assessment Determining Your Modified 1RM and Grip Strength Lesson 11.2 Building Strength Taking Charge Preventing Relapse Self-Management Skill Preventing Relapse Activity 2 Fundamentals of Weight and Resistance Training Activity 1 Partner Resistance Exercises To build strength and muscular endurance, you have to work your muscles against a resistance. Resistance can be provided by free weights, machines, or your own body weight. But in these exercises, you are going to use a partner’s body weight as resistance. Choose a partner who is about your height and weight, then try these exercises. A word of caution: To avoid injuring each other, be gentle when you provide resistance or try to move your partner’s body parts. Lesson 11.1 Muscle Fitness Basics to a force that acts against your muscles. It is usually measured in terms of pounds. You can lift your own body weight, use free weights, or use a weight machine. Some machines use other forces, such as hydraulic pressure, air pressure, or friction to provide resistance. Various activities in levels 1 and 2 of the Physical Activity Pyramid can be helpful in promoting muscle fitness development, but for best results you should use muscle Lesson Objectives After reading this lesson you should be able to 1. Explain the difference between strength and muscular endurance. 2. Describe some of the health benefits of muscle fitness. 3. Describe the various types of muscles and muscle fibers. 4. Describe some of the methods of progressive resistance exercise used to improve muscle fitness. Rest or inactivity Exercise for strength and muscular endurance Level 3 Exercise for flexibility Lesson Vocabulary absolute strength (p. 180), calisthenics (p. 180), fasttwitch muscle fibers (p. 177), hypertrophy (p. 176), intermediate muscle fibers (p. 177), isokinetic exercise (p. 180), isometric contraction (p. 177), isotonic contraction (p. 177), one repetition maximum (1RM) (p. 180), progressive resistance exercise (PRE) (p. 175), relative strength (p. 180), reps (p. 176), set (p. 177), slow-twitch muscle fibers (p. 177) www.fitnessforlife.org/student/11/1 Muscle fitness is comprised of two health-related parts of physical fitness: strength and muscular endurance. Muscular endurance is the ability to contract muscles many times without tiring or to hold a muscle contraction for a long time. The person in the picture needs good muscular endurance to carry the backpack for a long time. Strength indicates the amount of force a muscle can exert. The amount of weight a muscle group can lift one time measures strength. The number of times a muscle group can repeat an exercise or how long a muscle group can hold a contraction without tiring measures muscular endurance. Both muscular endurance and strength are developed by a progressive resistance exercise (PRE). The exercises are called progressive because you gradually or progressively increase the amount of overload you apply to the muscles. This is consistent with the basic principles of overload and progression. Resistance refers Active aerobics Active sports and recreation Lifestyle physical activity Corbin/E2923/Fig. 11.1/80312/Mic G./R2 Hiking with a backpack requires good muscular endurance. 11. Muscle Fitness: Basic Principles and Strength 175 The Muscular Endurance–Strength Continuum Exercises used to develop muscular endurance and strength differ only in the number of repetitions and the amount of resistance. The relationship between endurance and strength can be illustrated by a continuum. The continuum shown here represents pounds of resistance one one edge and number of repetitions on the other edge. Pure strength High Moderate Low Resistance (lb) Repetitions (number) Low Moderate Muscular endurance–strength continuum. The continuum shows the resistance and repetitions that a person might use to build muscle fitness. You Corbin/e2923/fig 11.2/80313/Tom/R3-kh can see that you would use high resistance with few repetitions to develop strength, and a low resistance with a high number of repetitions for endurance. Using the resistance and the number of repetitions from the middle of the continuum would develop both strength and endurance. This continuum also shows that usually when you train for strength you will develop some endurance, and when you train for endurance you will develop some strength. Muscle Fitness Terminology You probably will hear the terms reps and sets in relation to muscular endurance exercises. The diagram on the next page can help you understand these terms. Repetitions, or reps, are the number of consecutive times you The girl lifting boxes (left) uses strength while the girl wearing the light backpack (right) uses muscular endurance. 176 Fitness for Life High Pure endurance fitness exercises using PRE from level 3 of the Physical Activity Pyramid. Strength and endurance use resistance in different ways. Strength is developed by doing an exercise for only a few times, but with a lot of resistance. The girl lifting the boxes needs strength. Muscular endurance is developed by doing an exercise many times, but with less resistance, such as the light backpack the girl is wearing in the picture. Strength training tends to increase the size of muscles as they become stronger. This increase in muscle size is called hypertrophy. Because muscular endurance training uses less weight, endurance training does not cause as much hypertrophy. 1 set of reps Rest Rest 2 sets of reps Rest Rest 3 sets of reps Rest Reps and sets. do an exercise. A set is one group of repetitions. For example, suppose you do an exercise 8 times, then rest; repeat it 8 times, then rest; and repeat another 8 times. 11.3/80314/Tom/R2 Then you willCorbin/e2923/fig have completed a total of 3 sets of 8 repetitions each. The Structure of Muscles The muscles of the body create the movement that allows you to do the activities described in this book. In this section you will learn more about how the muscles work. Muscle Types Your body has three types of muscles: smooth, cardiac, and skeletal. Smooth muscles make up the walls of internal organs such as the stomach and blood vessels. Your heart is made of cardiac muscle. Both smooth and cardiac muscles are classified as involuntary muscles because you cannot consciously control their movements. Skeletal muscles are attached to bones and make movement possible. You use these muscles to do physical activity. They are called voluntary muscles because you control them. Muscles work together to allow a body part to function. For example, when you contract the biceps muscle (see the figure on the bottom of page 178), your arm bends at the elbow, bringing your hand close to your shoulder. At the same time the triceps relaxes to allow the biceps to do its work. As the diagram shows, muscles are attached to bones on either side of a joint. The bones act as levers to which the muscles apply force. An isotonic contraction is a muscle contraction that pulls on the bones and produces movement of body parts. Isotonic exercises involve isotonic contractions in which body parts move. The two types of isotonic muscle contractions are concentric and eccentric. The first picture shows the biceps muscle doing a concentric, or shortening, contraction. In the second picture, as the arm is slowly straightened the biceps is doing an eccentric, or lengthening, contraction. An isometric contraction occurs when muscles contract and pull with equal force in opposite directions, so no movement can occur. Isometric exercises involve isometric contractions and body parts do not move. An example of an isometric contraction would be pushing your hands and arms together in front of your body. You push hard with both hands against the resistance of each other, but no movement exists. (See chapter 15 for examples of isometric exercises.) Muscle Fibers Muscle fibers are long, thin, cylindrical muscle cells. Skeletal muscles such as those in the arms and the legs are made of many muscle fibers. The strength and endurance of skeletal muscles depends on whether the muscles are made of slow, fast, or intermediate fibers and how much exercise they get. www.fitnessforlife.org/student/11/2 Slow-twitch muscle fibers contract at a slow rate and are usually red in color. These fibers generate less force than fast-twitch muscle fibers but they are able to resist fatigue. For this reason, a muscle with many slowtwitch fibers has good endurance. Slow-twitch fibers are also involved in cardiovascular activities such as running for distance. Fast-twitch muscle fibers contract quickly and are white in color. They generate more force when they contract, and for this reason muscles with many fast-twitch fibers are important for strength activities. Intermediate muscle fibers have characteristics of both slow- and fast-twitch fibers. They contract quickly and have good endurance. You use them for activities involving both strength and cardiovascular fitness. The types of fibers in your muscles are determined by your genes; however, you can increase the strength and endurance of your muscles with proper training. 11. Muscle Fitness: Basic Principles and Strength 177 Arm (elbow) flexion Triceps lengthens Biceps shortens A photomicrograph that shows slow-twitch (black) and fast-twitch (gray and white) muscle fibers. Reprinted with permission from J.H. Wilmore and D.L. Costill, 2004, Physiology of sport and exercise, 3rd ed, (Champaign, IL: Human Kinetics), p. 45. Elbow joint Arm (elbow) flexion Triceps lengthens Triceps shortens Arm (elbow) extension Biceps shortens Biceps lengthens Elbow joint Elbow joint Muscles work together to move bones to apply force. E2923/Corbin/ Fig11.5/80316/Argosy/R3-kh Triceps shortens 178 Fitness for Life Arm (elbow) extension Biceps lengthens FIT facts Birds, like humans, have both fast-twitch and slowtwitch muscle fibers. The flying muscles (breast muscles) of a duck or a goose are dark in color because they contain many slow-twitch fibers (typically red in color). The breast of a chicken is made up of mostly fast-twitch fibers (typically white in color) because the chicken needs power to fly up a few feet onto a perch; chickens typically do not fly long distances. For this reason, the breast of a chicken is mostly white meat while the wing muscles have more dark meat. www.fitnessforlife.org/student/11/3 Resistance Exercise: Training Method or Sport? Training is another term often used for exercise, especially for exercises used to build muscle fitness. For example, the term weight training is used to describe using weights to perform PRE. A difference exists between training done to improve muscle fitness and activities such as weightlifting. Weight Training This form of exercise is done to improve muscular strength and endurance. It can be used by anyone to improve health and fitness. It can also be used for those interested in improving performance for sports or for meeting job requirements. Weight training is not a competitive event. Resistance Training This type of training is the same as weight training except that a machine that provides resistance is used rather than weights. Circuit Training Circuit training has been described previously. It can be done to improve many different kinds of fitness such as flexibility and cardiovascular fitness. The circuit training exercises at the end of this chapter include PRE exercises designed to build muscle fitness. Other exercise circuits that build muscle fitness are included in chapters 12, 13, and 15. Weightlifting This is an Olympic sport involving the use of free weights; the athletes try to lift a maximum load. There are only two exercises in weightlifting: the snatch, and the clean and jerk. Powerlifting This is another competitive sport using free weights. There are only three exercises in powerlifting: the bench press, the squat, and the deadlift. The athletes try to make one maximal lift for each type of lift. Bodybuilding This sport can also be done competitively. The athletes are primarily concerned about the appearance of their bodies. They are judged based on how large and well defined their muscles are rather than how much they can lift. They train with more repetitions than weightlifters and powerlifters. The sport of bodybuilding can be done competitively. The athletes are judged based on how large and well defined their muscles are rather than how much they can lift. 11. Muscle Fitness: Basic Principles and Strength 179 Muscle Fitness Assessment FITNESS Technology In recent years, tremendous technological advances have been made You can assess muscle fitness in many in resistance exercise machines. Innovations have included adjustable ways. A one repetition maximum benches and chairs so that machines fit people of all sizes. Systems for (1RM) test is considered to be the changing resistance have made machines easier to use. Another innovabest test for strength. A true 1RM test tion is isokinetic resistance machines. Isokinetic exercise is a type requires a person to determine the of isotonic exercise in which the velocity of movement is kept constant amount of weight that can be lifted or through the full range of motion. New isokinetic machines are now availresistance that can be overcome in one able. They use special hydraulics or electronics to regulate movement repetition. For example, if a person velocity and to allow full exertion at all angles of joint movement during an exercise. With traditional free weights or resistance machines, the resiscould lift 100 pounds once, but not tance is often greater at the first part of a movement than at the end of twice, 100 pounds would be the 1RM the movement. Also, the speed of the movement may be greater at one for the muscle group being tested. point than another. Other advantages include extra safety and the advanThe 1RM test results can be used in tage of building power, a part of fitness important to athletic performance. several ways. First, the results give you Isokinetic machines are often used by researchers and in rehabilitating a good idea of your strength. Second, injuries. Disadvantages are the expense of the machines and that many the assessment can be performed for isokinetic machines do not allow eccentric contractions, which are often each of the major muscle groups of used in sports performances. the body. Finally, 1RM results can be used to determine how much weight www.fitnessforlife.org/student/11/4 or resistance you should use when performing the exercises shown later in this chapter. The true 1RM test is commonly size. Big people typically have more absolute strength used by athletes and adults, but most than smaller people. On average males are larger than experts recommend that a modified self-assessment be females, so the average absolute strength for males is used by teens. The modified 1RM self-assessment prohigher than for females. Your 1RM score is an example vides a good estimate of true 1RM and does not require of absolute strength. Relative strength is strength the lifting of maximal weight or the use of maximal adjusted for your body size. The most common resistance. Teens are advised to use only a percentage of method for determining relative strength is to divide 1RM both in testing strength and performing strength your weight into your absolute strength score to get a exercises. In the self-assessment in this chapter you will “strength per pound of body weight” score. Relative perform the modified 1RM test that uses multiple repstrength scores are considered to be fairer assessments etitions or lower than maximal weight (resistance) to of strength for those who do not have large bodies. The estimate 1RM. This self-assessment is safe for teens when ratings in the self-assessment in this chapter are for relaperformed properly. You can do a 1RM test for many tive strength. muscle groups, but two assessments, one for the upper body (arm press) and one for the lower body (leg press), www.fitnessforlife.org/student/11/5 are most often used. A dynamometer is often used to test isometric strength. You will learn more about these tests in the self-assessment for this chapter. For muscular endurance, various exercises—often called calisthenics—are typically used for self-assessLesson Review ment. In these assessments the number of repetitions 1. What is the difference between strength and is counted. Examples include the push-up and curl-up. muscular endurance? You will get the opportunity to try several self-assess2. What are some of the health benefits of muscle ments of muscular endurance in the next chapter. Absolute Versus Relative Strength Absolute strength is measured by how much weight or resistance you can overcome regardless of your body 180 Fitness for Life fitness? 3. What are the various types of muscles and muscle fibers? 4. What are some of the methods of progressive resistance exercise used to improve muscle fitness? Self-Assessment Determining Your Modified 1RM and Grip Strength PART 1: Estimating Your 1RM As you know, 1RM means one repetition maximum. It represents the maximum weight a group of muscles can lift one time (or resistance they can overcome). Because beginners should begin gradually (without heavy lifting), a modified method has been developed that allows you to determine your 1RM without overexerting your muscles. The results you get will allow you to see how strong you are. The modified 1RM can be done with free weights or machines, but the instructions that follow will be for machine use. Resistance machines are recommended for these selfassessments, especially for beginners, because they are safer. Two tests are used most often, and the ones performed in this self-assessment activity are for the upper body (arm press) and the lower body (leg press). If a person performing the arm press on a resistance machine can lift 50 pounds one time, but not more than one time, this number would represent the 1RM for the arm press. Similarly, if the person could move a resistance of 150 pounds one time with the leg press, but not more than one time, 150 would the 1RM for the leg press. As mentioned earlier in this chapter, 1RM scores for the arm press and leg press will be estimated to avoid maximal lifting, something that is discouraged for teens. Follow these directions for each of the two self-assessments: Choose a weight (resistance) that you think you can lift 5 to 10 times but is too heavy for you to lift more than 10 times. Do not use a weight that you can lift fewer than 5 times. Using correct technique, lift the weight as many times as you possibly can. Count the number of lifts and write the number on your record sheet. If you were able to do more than 10 lifts, wait until another day before you try a heavier weight for that exercise. Go to the next muscle group exercise. If you can tell that you will not be able to lift the weight at least 5 times, stop and choose a lighter weight. If you were able to do 5 to 10 lifts and no more, then refer to table 11.1. Find the weight you lifted in the left-hand column. Now find the number of reps you did in the top row. Your 1RM score is the number in the box where the horizontal weight row and the vertical rep column intersect. Divide each of the two 1RM scores by your body weight to get a strength per pound of body weight score. The strength per pound of body weight score adjusts for body size (relative strength). For example, a person weighing 150 pounds and has a 1RM of 100 pounds on the arm press has a score of .67 pounds per pound of body weight. Use tables 11.2 and 11.3 to determine your fitness rating. Fitness ratings are only determined for the arm and leg press. If time allows, perform this procedure to determine your 1RM for other exercises included in the activity at the end of this chapter. Do the 1RM self-assessment for as many exercises as time allows. You do not need to determine a strength per pound of body weight score for these exercises. Use the 1RM scores to help you determine how much resistance to use for your PRE program. Safety Tips: Proper form is essential for safety. Before you do the 1RM test, read the descriptions of the exercises and the directions that follow. Before performing the assessment, practice each of the two exercises and have a teacher check your form. During the assessment, have a partner spot you and follow the resistance training guidelines on page 189. 11. Muscle Fitness: Basic Principles and Strength 181 Table 11.1 Predicted 1RM Based on Reps to Fatigue Weight Repetitions Weight 5 6 7 8 9 10 30 34 35 36 37 38 39 35 40 41 42 43 44 40 46 47 49 50 45 51 53 55 50 56 58 55 62 60 Repetitions 5 6 7 8 9 10 140 157 163 168 174 180 187 45 145 163 168 174 180 186 193 51 53 150 169 174 180 186 193 200 56 58 60 155 174 180 186 192 199 207 60 62 64 67 160 180 186 192 199 206 213 64 66 68 71 73 165 186 192 198 205 212 220 67 70 72 74 77 80 170 191 197 204 211 219 227 65 73 75 78 81 84 87 175 197 203 210 217 225 233 70 79 81 84 87 90 93 180 202 209 216 223 231 240 75 84 87 90 93 96 100 185 208 215 222 230 238 247 80 90 93 96 99 103 107 190 214 221 228 236 244 253 85 96 99 102 106 109 113 195 219 226 234 242 251 260 90 101 105 108 112 116 120 200 225 232 240 248 257 267 95 107 110 114 118 122 127 205 231 238 246 254 264 273 100 112 116 120 124 129 133 210 236 244 252 261 270 280 105 118 122 126 130 135 140 215 242 250 258 267 276 287 110 124 128 132 137 141 147 220 247 255 264 273 283 293 115 129 134 138 143 148 153 225 253 261 270 279 289 300 120 135 139 144 149 154 160 230 259 267 276 286 296 307 125 141 145 150 155 161 167 235 264 273 282 292 302 313 130 146 151 158 161 167 173 240 270 279 288 298 309 320 135 152 157 162 168 174 180 245 276 285 294 304 315 327 "Predicted 1RM Based on Reps to Fatigue". This chart is used as modified from the Journal of Physical Education, Recreation, and Dance, January 1993, page 89. JOPERD is a publication of the American Alliance for Health, Physical Education, Recreation and Dance, 1900 Association Drive, Reston, VA 22091. 182 Fitness for Life Seated Arm Press 1. Sit on the stool of a seated press machine, the handles even with your shoulders. Grasp the handles with your palms facing away from you. Tighten your abdominal muscles. 2. Push upward on the handles, extending your arms until the elbows are straight. Caution: D o not arch your back. Do not lock your elbows. 3. Lower to the starting position. 4. If a seated press machine is not available, you can substitute the bench press. This exercise is described in the activity at the end of the chapter. This test evaluates the strength of triceps and pectoral muscles. Leg Press 1. Adjust the seat distance on a leg press machine for leg length comfort. The closer the seat, the greater the range for working and the greater the intensity. Sit with your feet resting on the pedal. 2. Push the pedal until your legs are straight. Caution: Do not lock your knees. 3. Slowly return to your starting position. This test evaluates the strength of the quadriceps, the gluteals, and calf muscles. 11. Muscle Fitness: Basic Principles and Strength 183 Table 11.2 Rating Chart: Arm Press (1RM) 15 years and younger Good fitness Marginal fitness Low fitness 15-17 years old 18 years and older Males Females Males Females Males Females .80+ .60+ 1.00+ .70+ 1.10+ .85+ .67-79 .50-59 .75-.99 .60-69 .80-1.09 .67-.84 <.66 <.49 <.74 <.59 <.79 <.66 Table 11.3 Rating Chart: Leg Press (1RM) 15 years and younger Good fitness Marginal fitness Low fitness 15-17 years old 18 years and older Males Females Males Females Males Females 1.50+ 1.10+ 1.75+ 1.30+ 1.90+ 1.40+ 1.35-1.49 .95-1.09 1.50-1.74 1.10-1.29 1.65-1.89 1.30-1.39 <1.34 <.94 <1.49 <1.09 <1.64 <1.29 PART 2: Grip Strength 1. A dynamometer is a device used to measure isometric strength. There are many different types of dynamometers that vary in appearance. Learn to adjust the dynamometer used in this assessment to fit your hand size, if it is adjustable. Many dynamometers allow you to make the grip bigger or smaller by turning the grip handle. 2. Squeeze as hard as possible. You may not touch your body with your arm or hand, but you may bend or extend the elbow. 3. Record the best of two scores for each hand. Write your scores on the record sheet and add them together. Look up your rating on table 11.4 and then record it. Table 11.4 Rating Chart: Grip Strength 15 years and younger Good fitness Marginal fitness Low fitness 184 Fitness for Life 15-17 years old 18 years and older Males Females Males Females Males Females 191+ 121+ 226+ 136+ 253+ 156+ 158-190 99-120 191-225 114-135 209-252 116-155 <157 <98 <190 <113 <208 <115 Lesson 11.2 Building Strength Lesson Objectives After reading this lesson, you should be able to 1. Describe health and wellness benefits of strength. 2. Describe some myths about strength and tell why they are wrong. 3. Explain the FIT formula for developing strength. 4. Describe some basic guidelines for safe PRE. ISOMETRIC Lesson Vocabulary double progressive system (p. 187), muscle-bound (p. 187) www.fitnessforlife.org/student/11/6 ISOTONIC In this lesson you will learn about the benefits of strength, some common misconceptions about strength training, and how to apply the FIT formula for building strength using both isotonic and isometric exercises. Isotonic exercises using weights or resistance machines are considered to be best for building strength, but isotonic calisthenics and isometric exercises can also be effective when performed with enough intensity. calisthenic Health and Wellness Benefits Strength is the amount of force a muscle can exert. If your muscles regularly work against heavy loads, they will stay strong. If you do not use your muscles, they become weak. Strong muscles help you jump, lift, push, and do activities of daily life. Strength enables you to work and play with less fatigue. Muscular strength can help prevent some health problems. For example, strong abdominal muscles can reduce the risk of backache. Exercises for muscle strength also strengthen bones and reduce the risk of osteoporosis (described in chapter 3). Osteoporosis occurs when bones become porous and weak. Resistance exercises that build strength are especially good for strengthening bone. ISOTONIC weight/resistance training 11. Muscle Fitness: Basic Principles and Strength 185 Another benefit of strength is that it can help prevent muscle injuries and muscle soreness. Strong muscles can help you look your best and give your body a firm appearance. Muscles also burn more calories than fat does, so having strong and fit muscles can help in fat control. Strong muscles also help you maintain good posture. Strength for Preteens and Teens Until recently, experts felt that muscle fitness exercises such as those done in weight training were inappropriate for preteens and teens. Recent evidence suggests that, when done properly, PRE can have health benefits for teens similar to those for adults. Still, concerns exist about doing too much PRE too soon, especially for some people. We know that for preteens and young teens, the body does not produce enough hormones to allow the body to build big muscles (hypertrophy), even with PRE. For these people, PRE can result in strength improvement but these improvements may not result in noticeable increases in muscle size. The strength gains are mostly because the body learns to use more muscle fibers when lifting rather than because of increases in muscle size. Placing emphasis on PRE may be discouraging for many teens because even if they give a lot of effort they may not see many benefits. This is especially true if the goal is to build big muscles. Even older teens who are late developers may have difficulty building large muscle until they get older. The American College of Sports Medicine (ACSM) and other groups (see address by the Web icon in the FitFact) recommend a program involving moderate resistance that builds both strength and muscular endurance if the goal is to improve health. This program is effective for teens of both sexes. A program recommended for most teens, especially those just beginning PRE, is described later in this chapter. Those who intend to perform sports that require strength and power and who have experience in PRE can choose a program of greater intensity when done under the supervision of a qualified teacher or coach. Programs for teenagers should be designed especially for their age group. Teens are encouraged to avoid seeking advice from people who are unknown to them including people who have a good physique, or figure. Just because a person has a body that looks strong does not mean that he or she uses healthy exercise practices. In fact, many violate sound exercise guidelines and more than a few use unhealthy supplements. 186 Fitness for Life FITfacts In addition to the ACSM, several other groups of experts have now prepared statements indicating that resistance training can be safe for teens when performed properly. Some of the groups include the American Academy of Pediatrics (medical doctors who specialize in youth) and the American Orthopaedic Society of Sports Medicine (medical doctors who specialize in bone problems associated with sports and activity). Self-assessments and muscle fitness exercises as described in this book follow guidelines outlined by these organizations. www.fitnessforlife.org/student/11/7 Myths and Misconceptions The amount of strength you need to stay healthy and to do what you want depends on your own personal needs and interests. For example, people who have jobs requiring a lot of lifting need more strength than people who work at a desk. Despite the fact that muscle fitness exercise has many benefits, many people still hold misconceptions about them. www.fitnessforlife.org/student/11/8 No Pain, No Gain Some people still cling to the myth that exercise must hurt if it is going to result in improvement. Some of the worst offenders are people who are hooked on strengthbuilding exercises. In fact, you should listen to your body. If you feel pain, it is your body’s way of telling you that it is hurting. When doing PRE, it is true that you will become quite fatigued and feel a sensation sometimes called the exercise burn. It is important to learn the difference between this feeling and pain. If in doubt, it is best to back off to avoid injury. Body Dysmorphia Body dysmorphia is a term used to identify a condition that occurs when people become obsessed with building muscle. This psychological disorder, sometimes referred to as reverse anorexia, often begins with reasonable amounts of exercise to build muscle fitness. At some point those with this problem get carried away wanting to build more and more muscle. The disorder is an obsessive-compulsive disorder and often requires treatment by a professional. In more than a few cases, people with this disorder do unhealthy behaviors such as taking drugs or doing unhealthy exercises. Injury rates are high among people with this condition. Doing reasonable PRE can enhance health. Becoming obsessed with fitness can lead to unhealthy conditions. Muscle Fitness for Females Some people think that only males need to be concerned about their strength. This notion is false. Both males and females need strength to be healthy, to avoid injury, to look good, and to save themselves or others in an emergency. Some girls and women fear that strength training will cause their bodies to look masculine. However, the hormones in female bodies prevent them from developing large, bulky muscles even when their exercise amounts are similar to those described in this book. Women and girls who perform strength exercises do develop strong muscles. Both men and women look more attractive with strong muscles because they are more likely to have good posture and firm bodies. Building good strength can help build your self-confidence as well. Muscle-Bound Some people think that strength training will cause them to be muscle-bound—that is, to have tight, bulky muscles that prevent them from moving freely. It is not resistance training, but rather incorrect training, that causes inflexibility. Training muscles only on one side of a joint or failing to stretch muscles are two examples of incorrect exercise that can cause a musclebound condition. Another example of incorrect training is failure to move your joints through their full range of motion when you lift weights or do other resistance exercises. For example, your elbow joint can bend to allow your hand to reach your shoulder and to let your arm straighten completely. When you do a biceps curl with weights, bring the weight all the way to the shoulder, then straighten the elbow each time you lower the weight. Caution: Do not bend your elbow or any other joint backward beyond a full range of motion. You can damage the joint if you move it in a way that it was not designed to move. Fitness Principles and Strength The three basic fitness principles can be applied to strength exercises. You have read about these principles—overload, progression, and specificity—in previous chapters. Principle of Overload A muscle must contract harder than normal to become stronger. In other words, the muscles must work against a greater load than they normally have in regular daily activity. Experts say a muscle must be contracted to at least 60 percent of 1RM if it is going increase strength. Less than 60 percent will build muscle fitness but will build a combination of strength and muscular endurance. Principle of Progression Overload gradually—increase the load over a period of time—to get the best improvement in muscle strength. You can injure yourself if you try to lift too much weight too soon. Also, lifting too much weight will not result in as much strength gain as would occur if you progressed gradually. To progress, you must continue increasing the resistance until you are as strong as you want to be. The concept of progressive resistance exercise is based on the principles of overload and progression. www.fitnessforlife.org/student/11/9 The double progressive system is the most often used method of applying the principle of progression for improving muscle fitness. In this system, you begin by performing a low number of repetitions (reps) in each set. As you improve, you gradually increase the number of reps you perform in a set. This part is the first progression. When exercising to build strength, you stop increasing reps when you reach 10. You drop back to doing a lower number of reps and increase weight or resistance. The gradual increase in weight or resistance is the second progression (double progression). You can use this system when performing your personal PRE program. When you add resistance after lowering repetitions, it is recommended that you increase 5 to 10 percent. For teens this increase will typically be 2 to 5 pounds. You can use this information when you apply the FIT formula later in this chapter. Principle of Specificity You must exercise the specific muscles you wish to develop. If you wish to strengthen the muscles on the back of the thigh, you must specifically overload the particular group of muscles, called the hamstrings, by doing an exercise such as one involving knee flexion. The ACSM suggests that you perform 8 to 10 exercises to build each of the specific muscle groups in the body. 11. Muscle Fitness: Basic Principles and Strength 187 In the activity at the end of this chapter, basic exercises are presented for building 10 basic exercises (called the Basic 10). The principle of specificity also means that you should do some strength exercises resembling the movement that you want to eventually use. For example, to strengthen the arm, a baseball pitcher might make a pitching motion against an elastic band. Principle of Rest and Recovery Although not discussed in earlier chapters, an additional principle is important for strength. The principle of rest and recovery indicates that you need to allow muscles time to rest and recover after a workout. For this reason, you should allow at least a day between strength workouts. This is why strength exercises are typically performed two to three days a week. Because you need to perform 8 to 10 exercises to build all of the important muscles of the body, some people choose to workout every day but do different exercises on different days. Many choose to do four or five upper body exercises one day and four or five lower body exercises the next. The FIT Formula and Strength For pure strength development, low repetitions and high weight or resistance produces best results. To improve strength, adults may use a resistance of 60 to 90 percent of their 1RM and perform as few as 3 reps per set. For teens, except in exceptional cases, experts recommend lower resistance and more reps (see table 11.5). The program for teens outlined in this chapter, including the program for younger teens, builds both parts of muscle fitness, strength and endurance, and is Experts recommend lower resistance and more reps for teens. consistent with the ACSM guidelines for developing the health benefits associated with PRE. Table 11.5 Fitness Target Zones for Strength Isotonic Exercise Isometric Exercise Frequency Teens 13-14 and older teen beginners: 2 days/wk on non-consecutive days Older teens and adults: 2-3 days/wk on non-consecutive days Non-consecutive days; 2+ days/wk Intensity Teens 13-14 and older teen beginners: 40-60% 1RM or resis tance allowing 10+ reps Older teens: 40-80% 1RM or resistance allowing 8+ reps* Adults: 60-90% 1RM or resistance allowing 3+ reps Contract the muscle as tightly as possible for the required length of time. Time Teens 13-14 and older teen beginners: 1 set of 10-15 reps Older teens: 1 or 2 sets of 8-12 reps Adults and adult athletes: 1-3 sets of 3 to 8 reps For all groups rest between sets 1 to 2 min. Hold the contraction for 7-10 sec. Rest for 1+ min. This is 1 set. Do 2+ sets. * Older teens and experienced athletes may train using lower repetitions after consulting with a qualified teacher or coach. 188 Fitness for Life It is easy to tell what percentage of your 1RM you are using when doing isotonic weight and resistance training, but it is more difficult to determine how much you are doing when you perform isometrics or calisthenics. For isometrics you simply contract the muscles as hard as you can for each exercise. Some calisthenics cannot provide enough overload to build strength, especially for strong people. Calisthenics are most effective for building muscular endurance and will be discussed in more detail in the next chapter. Resistance Training Guidelines When performed correctly resistance training is safe and will lead to improvement in your muscle fitness and physique. Follow these safety guidelines created especially for teens: Use the three S method. Use slow, smooth, and steady movements. Constantly remind yourself to take several seconds to make each movement. Stop at both ends of the movement. Avoid quick, sudden movements. Exercise through a full range of motion. For example, when doing the biceps curl, lift the weight all the way up and lower it all the way down. Always use spotters when working with free weights. You might be tempted to work on your own, but having a partner is much safer. Start with a moderate program. As you improve, increase the difficulty and keep working your way up. Do not hold your breath when you lift. Holding your breath can cause you to black out. Some resistance trainers recommend exhaling on the lift and inhaling on the return movement. Avoid overhead lifts with free weights. If possible, use machines for these lifts. If you must use free weights, have a partner with you. Avoid positions that cause the lower back to arch or the wrists to bend backward. These positions can cause injuries and are not optimal for building strength. Never use weights carelessly. Concentrate on your technique and on what you are doing. Never compete when you do resistance training. For example, do not have a contest to see who can lift the most weight. Genetic differences have a lot to do with how strong a person can be. You need only be concerned with trying to improve your strength gradually and enjoying the exercise, not lifting more than someone else. Resistance Machines Versus Free Weights Throughout this book a wide variety of exercises are presented. Some involve free weights, some require machines, and some require no equipment at all. You are encouraged to consider resistance exercises such as calisthenics, elastic bands, or isometrics because they can be done at home without expensive equipment. You may also want to consider the advantages and disadvantages of resistance machines and free weights before making a choice of which to use. Table 11.6 provides a summary of the characteristics of both exercise methods. Table 11.6 Resistance Machines Versus Free Weights Resistance Machines Free Weights Safety • They are safer because weights cannot fall on the lifter. • A spotter is often not needed. • You have a greater chance of injury from falling weights. • You can easily lose control of the weights, so you need a spotter. Cost • They are very expensive to own. • If you do not own the machines, you must join a club to use them. • They are relatively inexpensive. Versatility • They can easily isolate specific muscle groups. • Using them requires more balance, muscle coordination, and concentration. • You use more muscles, and the movements are more like moving heavy loads in daily life. Convenience • They require a lot of floor space. • You must go to where they are. • They take up little space. • Some weights are small enough to be carried around. • They can easily scatter and get lost or stolen. 11. Muscle Fitness: Basic Principles and Strength 189 Taking Charge: Preventing Relapse Anyone can begin a program to increase physical fitness. However, just beginning a program is not enough. Some people are active for a while and then drop out for a while. This behavior is called a relapse. Those who stay active all of their lives learn how to avoid relapses that can lead to becoming a couch potato. Luis missed his old school, especially his old friends. Now he usually came straight home after school instead of heading for the neighborhood court to play a little three-on-three basketball with his buddies. For the first month after he moved, Luis ate dinner, did his homework, and then clicked on the television to fill the time. Early one evening, his mom said, “Luis, why are you lying around? You like to be active. So get up and get moving!” Luis yawned. “Where am I going to go? Who am I going to go with? I don’t have any friends here.” “What about that boy who lives down the hall? I saw him leave with a gym bag the other day. He must have been going somewhere you’d like to go.” “Well, maybe,” Luis said. “But maybe he was going to play handball or something like that—something I don’t know how to do.” “And maybe he was going to play basketball, huh? And maybe it wouldn’t kill you to learn how to play handball or another new sport, right?” Luis smiled up at his mom. “Maybe. What’s his apartment number?” “3B—and while you’re there, ask his mom whether she knows about any exercise classes around here for old people like me, okay?” For Discussion What caused Luis to have a relapse into inactivity? What could he do if it turns out that the boy down the hall likes to swim and hates basketball? What are some other things that cause relapses? What can be done to avoid them? Fill out the questionnaire supplied by your teacher to find out how you might respond if something begins to interfere with your level of physical activity. Consider the guidelines on page 191. Lesson Review 1. What are some of the health and wellness benefits of having good strength? 2. What are some myths about strength? Why they are wrong? 3. What types of exercises can you do to improve your strength? Should teens do something different than adults? 4. What is the FIT formula for strength? 5. What are six guidelines that teens should follow for resistance training? Even in a new neighborhood you can get involved in pick-up games by finding out who else plays and asking them where a game can be found. 190 Fitness for Life Self-Management Skill Preventing Relapse Relapse means that you stop doing something that you want to keep doing or think you should keep doing. For example, you might start a PRE program but stop doing it because you feel you can’t take the time or for other reasons. Follow these guidelines to help you stick with something once you have started it: Do a self-assessment. It may help you see whether you are likely to stick with something and may give you ideas for how to stick with it if you have had problems in the past. Use the information from the selfassessment to determine areas that can be improved. Write down your goals for doing the behavior. Put them on the refrigerator or some place where you will see them every day. You have had good reasons to accomplish these goals or you would not have started to make a change in the first place. Keep focused on your goals. Monitor your behavior by keeping a log or chart. Use the log or chart to reinforce or reward yourself. Tell yourself that you have stuck with it so far and you can keep it up. Tell other people what you are trying to accomplish. Ask them to encourage you regularly. Select a regular exercise time. If you are trying to stick with exercise or another similar behavior, select a time of day and try to do the behavior at the same time every day. Do not let one setback be a reason for a long-term relapse. If you miss a day, tell yourself, “it is all right to take a day of once in a while.” Repeat this saying to yourself periodically. Consider a variety of activities. For a behavior such as being physically active, consider trying different activities from time to time for variety. Resolving Conflict: Developing and Enforcing Rules Joining a health club or taking advantage of a school’s weight room is a great way to build muscular fitness. However, encountering conflict during a workout is discouraging and may be a reason to avoid using weights and exercise machines. Problems have occurred in some exercise facilities, including failure to clean equipment after use, failure to put away weights, and extended use of equipment (staying on too long). Some people say they feel out of place in certain areas of the exercise room (such as the free weight area used by bodybuilders or athletes). The best way to prevent relapse for those just beginning a muscular fitness program is to have clear rules that help all users feel comfortable and welcome. If your school or health club does not have clearly posted rules, you can ask the supervisor if you can help develop some rules. The following are some important steps in developing rules: Develop a committee with members that represent all users. Survey users to determine what conflicts currently exist. Develop preliminary rules (guidelines). Avoid having unnecessary rules. Focus on those that help avoid or resolve conflict, such as methods of keeping equipment clean (cleaning after use), time limits on machines, and putting away equipment after use. Some gyms have dress codes. Ask users for comments before finalizing preliminary rules. Post rules or disseminate them in other ways. Recommend ways to enforce the rules. If the exercise room or club has rules but they are not enforced, the committee may want to develop guidelines for enforcement. The negotiating and discussion techniques described on page 147 may be useful for a committee that is developing or revising rules or guidelines for resolving conflict in an exercise room or health club. 11. Muscle Fitness: Basic Principles and Strength 191 Activity 2 Fundamentals of Weight and Resistance Training This activity will introduce you to safe training with free weights. As you learned earlier in the chapter, free weights can be less safe than using resistance machines. But you can injure yourself using either free weights or resistance machines if you do not exercise properly. In this activity you will learn correct lifting and spotting techniques. Spotting is providing assistance to a partner by being prepared to catch the weight if the partner loses control of the weight or gets off balance. Because the potential for injury is great, it is essential that you work through each of the mastery levels listed next. To keep track of your progress, an observer will check off your mastery of correct spotting and lifting techniques as well as your maturity and cooperation in assisting and giving coaching (feedback). Record your results on your record sheet. Warm up and stretch before beginning this activity. Level 1 mastery: lifting technique, no weight. Perform each exercise without any weights by using a wand or stick instead of a barbell. Concentrate on correct form (placement of body parts) when you are working. Give useful coaching when you are watching your partners. Level 2 mastery: spotting technique, no weight. While your partner performs the lift with the wand, you and another partner practice correct spotting technique. Pay particular attention to your leg and hand positions. Level 3 mastery: lifting and spotting, light weights. Perform each exercise using light weights, 5 lifts each. Practice your lifting and spotting techniques, and continue to give each other coaching on both lifting and spotting techniques. Level 4 mastery: your normal workout using free weights. Select the appropriate percentage of 1RM and the appropriate number of sets and repetitions (see table 11.5 on page 188). Perform each of the Basic 10 exercises. Note: The same abdominal and back exercises as used with resistance machines are used for free weights. www.fitnessforlife.org/student/11/10 Safety Tips: Make all moves slowly. Exhale on the lift; inhale on the return to starting position. Do not hold your breath. Handle all weights with care and awareness of the potential for serious injury. 192 Fitness for Life Seated Overhead Press Weights: barbell, dumbbells This exercise requires two spotters. Spotters stand by the lifter’s shoulders on either side of bench. Keep your hands with the palms up under the bar. Be ready to take the bar if the lifter loses control, especially at the top of the lift if the barbell begins to move backward or if the lifter begins to tremble. This exercise uses the muscles on the top of the shoulders, between the shoulder blades, and on the back of the arm. Deltoid Triceps Caution: Do not let theE2923/Corbin/ bar goFig11.6/80317/Argosy/R2 forward or backward. Do not lock your elbows. Do not arch your back. Bench Press 1. Sit on end of a bench in front stride (split-foot) position. 2. Hold the barbell at chest height in preparation for pushing the bar vertically. Grasp the barbell with your hands facing away from your body, hands slightly wider than your shoulders. 3. Tighten your abdominal, back, and arm muscles. Tip your head back slightly. 4. Push the bar straight up, directly overhead, keeping your arms perpendicular. 5. Lower the barbell to the starting position. Use the seated arm press exercise on the resistance machine (page 183) to determine your 1RM for this exercise. Pectoralis major Triceps E2923/Corbin/ Fig11.7/80318/Argosy/R2 Weights: barbell, dumbbells This exercise requires two spotters. Spotters stand by the lifter’s shoulders on either side of bench. Place the bar in the hands of the lifter. Keep your hands with the palms up under bar. Be prepared to take it if the lifter loses control. 1. Lie on your back on a bench with your feet on floor, lower back flat. Extend your arms perpendicularly to the floor, into the up position. 2. Grasp the bar with a palms-up grip, hands slightly wider than shoulder-width, elbows straight, bar approximately over your collarbones. Caution: Do not lock your elbows. This exercise uses the muscles on the front of the chest (pectoral) and the backs of the arms (triceps). 3. Lower the bar until it touches your chest, even with a Caution: Do not bounce the bar off your chest. line just below your armpits. When the bar touches your Do not arch your back or lift your hips. Keep chest, your forearms should be perpendicular to the floor your arms perpendicular to the floor. If the and your elbows should point neither at your feet nor out weight gets in front of or behind your arms, you to the sides but halfway in between (45 degrees). will lose control and get pinned. Use the bench press on the resistance machine (page 236) to 4. Push the bar up to the starting position, arms perpendetermine your 1RM for this exercise. dicular to the floor. The bar follows a slightly curved path. 11. Muscle Fitness: Basic Principles and Strength 193 Knee Extension Rectus femoris Vastus lateralis Weights: weighted boot or ankle weight One person can assist the lifter to put on the boot or ankle weight. 1. Put the weight on one foot or ankle. Sit on a bench, with your lower leg hanging over the edge. Grasp the bench with your hands. 2. Lift the weighted boot by extending your knee until your leg is straight. Vastus medialis E2923/Corbin/ Fig11.8/80319/Argosy/R1 Caution: Do not lock knees when you extend and do not kick the leg upward--lift slowly. 3. Repeat the exercise on the other leg. Use the knee extension on the resistance machine (page 23) to determine your 1RM for this exercise. This exercise uses the muscles on the top of the thigh (quadriceps). Half Squat Weights: barbell, dumbbells Note: This exercise can only be done if a squat rack is available. This exercise uses the muscles on the front of the thighs (quadriceps) and the buttocks muscles (gluteals). Gluteus Quadriceps Hamstrings E2923/Corbin/ Fig11.9/80320/Argosy/R1 194 Fitness for Life 1. Stand in a side-stride position with your feet shoulder-width apart or slightly wider, toes straight ahead or slightly turned out. Keep your head up and your back straight. 2. Hold the barbell across the back of your shoulders at the base of your neck, hands slightly wider than your shoulders, palms facing away from your body. Point your elbows toward the floor, and your forearms perpendicular to the floor. 3. Squat until your knees are at a right angle, then rise. Keep heels flat on floor. Do not let knees come ahead of the toes. Focus on a spot on the wall slightly higher than standing height. Remain looking at this spot for the duration of the lift, when lowering and straightening. Caution: Do not round the back. Do not lean too far forward at the hips or let knees get in front of toes. Do not squat too deeply. Use the leg press exercise on the resistance machine (page 183) to determine your 1RM for this exercise. Hamstring Curl Weights: weighted boot or ankle weight One person can assist the lifter to put on the boot or ankle weight. 1. Put the weight on one foot or ankle. Lie facedown on a bench, with your kneecaps hanging over the edge. Grasp the bench with your hands. 2. Lift the weighted boot by flexing your knee to a right angle. Biceps femoris This exercise uses the muscles on the back of the thigh (hamstrings). Semitendinosus Semimembranosus E2923/Corbin/ Fig11.10/80321/Argosy/R2 Caution: Do not lock knees when you extend. 3. Repeat the exercise on the other leg. Use the hamstring curl on the resistance machine (page 237) to determine your 1RM for this exercise. Biceps Curl Weights: barbell, dumbbells Spotters are not required, but they can place the barbell in the lifter’s palms-up hands. 1. Stand erect, feet in side-stride position. Tighten your abdominal and back muscles. 2. Grasp the bar with your palms up, hands slightly wider than your shoulders. 3. Keep your elbows close to your sides and lift the weight by bending your elbows only. Raise the weight to near your chin, then return. Caution: Do not move other joints, especially in the back. Biceps 4. You can repeat this exercise with your palms down to work the weaker elbow muscles. Use the biceps curl on the resistance machine (page 237) to determine your 1RM for this exercise. Brachioradialis E2923/Corbin/ Fig11.11/80322/Argosy/R2 This exercise uses the muscles on the front of the arm (biceps) and other elbow flexor muscles. 11. Muscle Fitness: Basic Principles and Strength 195 Heel Raise Weights: barbell, dumbbells This exercise requires two spotters. Spotters stand by the lifter’s shoulders, one on each side. Gastrocnemius Soleus 1. Stand with the balls of your feet on a 2-inch board, toes turned in slightly. 2. Rise onto your toes, then lower to the starting position. E2923/Corbin/ Fig11.12/80323/Argosy/R1 Caution: Keep your spine straight. 3. Advanced lifters may also try toes out and toes straight ahead. Use the heel raise on the resistance machine (page 238) to determine your 1RM for this exercise. This exercise uses the calf muscles. This exercise uses the muscles on the back of the upper arm (triceps). Seated French Curl Weights: dumbbell This exercise requires one spotter. 1. Sit on the end of a bench with your arms extended overhead, palms facing up. 2. Hold one end of a dumbbell in both hands above and behind the head. Tighten your abdominal and back muscles. Slowly lower the weight toward the back of your neck until the arms are fully flexed at the elbows. Keep the elbows high. 3. Slowly return to the starting position, moving only the elbow joints. Use the triceps press (page 239) to determine your 1RM for this exercise. 196 Fitness for Life Triceps E2923/Corbin/ Fig11.13/80324/Argosy/R2 Bent Over Dumbbell Row Weights: Dumbbell This exercise requires no spotters. 1. Hold the dumbbell in one hand and rest the free hand on a bench to support the weight of your trunk and protect your back. 2. Pull the dumbbell upward until it touches the side of your chest near the armpit and the upper arm is horizontal with the floor. 3. Slowly lower the weight. 4. Repeat the exercise with other arm. Use the seated row (page 239) to determine 1RM for this exercise. Trapezius This exercise uses the biceps, the shoulder muscles, and the muscles between the shoulder blades. Posterior deltoid Biceps Brachioradialis E2923/Corbin/ Fig11.14/80325/Argosy/R3 Back Extension Exercise (Trunk Lift) Erector spinae 1. Lie facedown on a table (or bench). Slide forward until your upper body extends over the edge at the waist. With a partner holding your legs, allow the upper body to lower. 2. From the low position, lift your upper body until it is even with the edge of the table. Caution: Do not lift any higher. E2923/Corbin/ Fig11.15/81353/Argosy/R2 3. Lower to the beginning position. Repeat the exercise up to 10 times. Safety Tip: As you do these exercises, move only as far as the directions specify. This exercise uses the back muscles. 11. Muscle Fitness: Basic Principles and Strength 197 Abdominal Exercise (Curl-Up) Rectus abdominis E2923/Corbin/ Fig11.16/81354/Argosy/R2 The curl-up, sometimes referred to as the crunch, is a good substitute for the straight-leg sit-up, bent-knee sit-up, and hands-behind-the-head situp. 1. Lie on your back with your knees bent and your feet close to your buttocks. 2. Hold your hands and arms straight in front of you and curl your head, shoulders, and upper back off the floor. 3. Slowly roll back to the starting position. Caution: Do not hold your feet while doing a trunk curl. As you improve, you might hold your arms across your chest. When you become very good, you might place your hands on your face (cheeks). This exercise uses the abdominal muscles. 198 Fitness for Life 11 Chapter Review Reviewing Concepts and Vocabulary Number your paper from 1 to 4. Next to each number, write the word (or words) that correctly completes the sentence. 1. ________ is the amount of force a muscle can exert. 2. _________ refers to an increase in muscle fiber size. 3. A person can become ________ if he or she does strength training improperly by developing some muscles while ignoring others. 4. When you do calisthenics to develop strength, you use your body weight as the ________. Number your paper from 5 to 10. Next to each number, choose the letter of the best answer. Project Keep a record of your daily participation in resistance exercises for strength development for one week. Record the minutes of these exercises you do each day. How might you adjust your physical activity to better maintain or improve your strength? What short-term goals might you have for performing specific strength exercises each day? Make a written plan for the following week, incorporating changes that might help you reach your goals. Use the worksheets provided by your teacher. Column I Column II 5.isometric exercise a. muscle fitness exercise that regulates velocity 6.weightlifting b. the maximum amount of weight a group of muscles can lift one time 7.progressive resistance c. exercises in which the muscles do not move 8.isokinetic exercise d. muscle fitness exercises that involve movement 9.1RM e. the gradual increase of weight used in strength training 10.isotonic exercise f. a sport, not a method of training Number your paper from 11 to 15. On your paper, write a short answer for each statement or question. 11. How do strong muscles help you look better and prevent health problems? 12. Why can’t preteens build as much muscle size as older teens? 13. Why should you assess your strength before you start a strength-training program? 14. Why should you gradually increase the amount of weight you use? 15. How often should you do your strength training program? Thinking Critically Click on the Web icon that provides additional information concerning muscle fitness myths (page 186). This Web site provides information about muscle fitness training for preteens and teens. It also leads you to the Web sites of the ACSM and the President’s Council on Physical Fitness and Sports. Read some of the articles at these sites (on resistance training for preteens and teens) and write a short paper on the topic. Report your results to your class. 11. Muscle Fitness: Basic Principles and Strength 199
