Digilent Plug-in for Xilinx 12.x
Tools User Manual
Revision: June 29, 2010
1300 NE Henley Court Suite 3
Pullman, WA 99163
(509) 334 6306 Voice and Fax
Overview
The Digilent Plug-in for Xilinx tools allows Xilinx software tools to directly use the Digilent USB-JTAG
FPGA configuration circuitry. For 12.x, Xilinx Impact, Chipscope Pro, EDK Xilinx Microprocessor
Debugger (XMD) command line mode, and EDK Software Development Kit (SDK) are currently
supported by the Plug-in. Refer to http://www.xilinx.com/ for more information about these Xilinx
design tools. Demonstration Designs for the Nexys2 and Basys2 boards are provided to verify correct
operation of the plug-in.
Software Versions Tested:
Xilinx ISE Design Suite Version 12.x only (Refer to http://www.digilentinc.com/ for versions of the
plugin for later Xilinx ISE versions)
Digilent Adept System 2.4 (or Digilent Runtime 2.3 for Linux) or greater
Supported Operating Systems:
• Microsoft Windows 32-bit and 64-bit Operating Systems
• Linux: Red Hat and CentOS 4.8, 5.4 (x86/x64), and SUSE 11.2 (x86/x64)
Windows Installation
To begin, ensure that the Xilinx ISE Suite (12.x only) and Digilent Adept System 2.4 (or greater) is
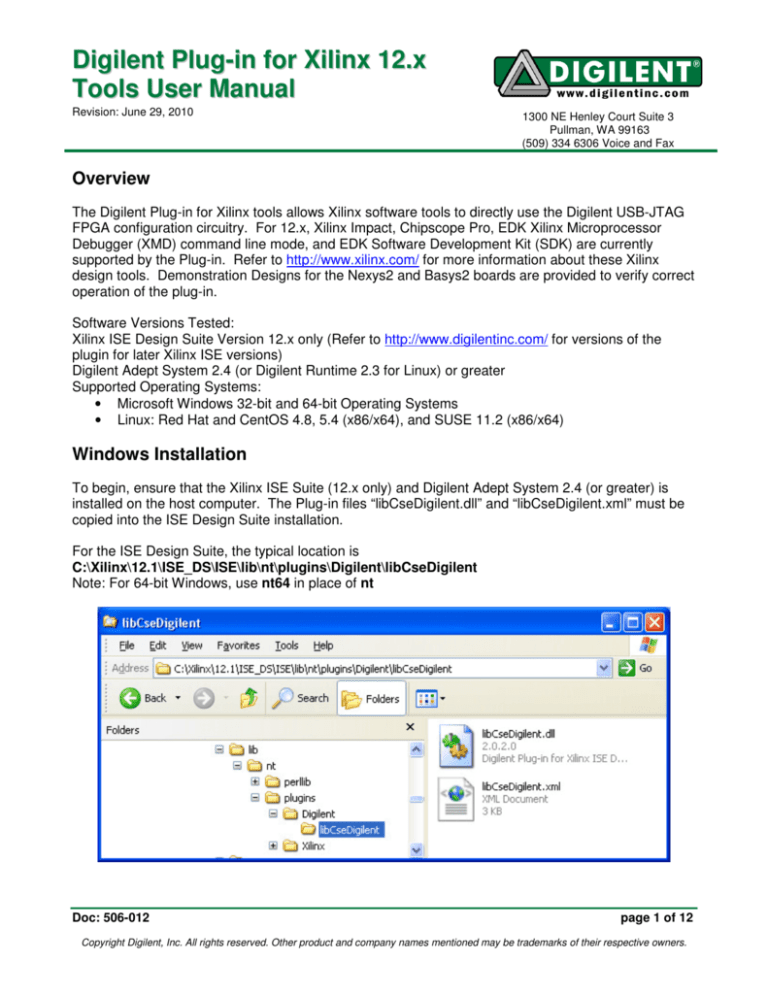
installed on the host computer. The Plug-in files “libCseDigilent.dll” and “libCseDigilent.xml” must be
copied into the ISE Design Suite installation.
For the ISE Design Suite, the typical location is
C:\Xilinx\12.1\ISE_DS\ISE\lib\nt\plugins\Digilent\libCseDigilent
Note: For 64-bit Windows, use nt64 in place of nt
Doc: 506-012
page 1 of 12
Copyright Digilent, Inc. All rights reserved. Other product and company names mentioned may be trademarks of their respective owners.
Digilent Plug-in for Xilinx Tools User’s Manual
Linux Installation
To begin, ensure that the Xilinx ISE Suite (12.x only) and Digilent Adept Runtime 2.3 (or greater) is
installed on the host computer. The Plug-in files “libCseDigilent.so” and “libCseDigilent.xml” must be
copied into the ISE Design Suite installation.
For the ISE Design Suite, the typical location is $XILINX/lib/lin/plugins/Digilent/libCseDigilent
Note: For 64-bit Linux, use lin64 in place of lin
Nexys2 Demonstration Project
The Nexys2 Demonstration Project can be used to verify correct installation and operation of the Plugin.
Chipscope Pro Setup
The Nexys2 Demonstration Project is a Xilinx EDK design with an embedded Chipscope Pro Virtual
IO module. Refer to http://www.xilinx.com/ for more information about these Xilinx design tools.
Launch Chipscope Pro Analyzer and Select the “JTAG ChainOpen Plug-in…” menu item.
Type “digilent_plugin” into the dialog box:
Chipscope Pro Analyzer will automatically detect the devices on the Nexys2 board:
www.digilentinc.com
page 2 of 12
Copyright Digilent, Inc. All rights reserved. Other product and company names mentioned may be trademarks of their respective owners.
Digilent Plug-in for Xilinx Tools User’s Manual
Right Click on “MyDevice0 (XC3S500E)” and select “Configure...”:
Select the “download.bit” file in the nexys2\binaries directory:
www.digilentinc.com
page 3 of 12
Copyright Digilent, Inc. All rights reserved. Other product and company names mentioned may be trademarks of their respective owners.
Digilent Plug-in for Xilinx Tools User’s Manual
After selecting “OK”, Chipscope Pro Analyzer will configure the FPGA with the “download.bit”
configuration file. After successful configuration, the Yellow “Done” LED should be light on the
Nexys2 board. The GUI will show there is one VIO Console device attached:
Double Click on the “VIO Console” item which brings up that window:
www.digilentinc.com
page 4 of 12
Copyright Digilent, Inc. All rights reserved. Other product and company names mentioned may be trademarks of their respective owners.
Digilent Plug-in for Xilinx Tools User’s Manual
Press BTN3 on the Nexys2 board and notice the VIO Console displays that action.
The AsyncOut values are connected to the 8 LEDs on the Nexys2 board. Click on any of the Value
cells to change their contents. The following configuration lights up 4 LEDs in a row:
www.digilentinc.com
page 5 of 12
Copyright Digilent, Inc. All rights reserved. Other product and company names mentioned may be trademarks of their respective owners.
Digilent Plug-in for Xilinx Tools User’s Manual
Close Chipscope Pro Analyzer. This concludes the Chipscope Pro part of the Demonstration Project.
While only the Virtual IO Console was used in this design, any Chipscope Pro module can be utilized
to assist in debugging the design.
Xilinx Microprocessor Debugger (XMD) Setup
The Plug-in can also be used with Xilinx Microprocessor Debugger (XMD) command line mode. By
adding the option “-cable type xilinx_plugin modulename digilent_plugin” to
commands which interface with the hardware, XMD will utilize the Plug-in.
Note: Answer Record #35580 contains an updated XMD version for 12.1:
http://www.xilinx.com/support/answers/35580.htm
Here is an annotated example iteration. Launch the EDK Bash Shell and type the following
commands in bold.
Xilinx Bash Shell
Xilinx EDK 12.1 Build EDK_MS1.53b
Copyright (c) 1995-2010 Xilinx, Inc.
All rights reserved.
~
$ cd /cygdrive/c/digilent/nexys2/binaries
Launch xmd
~ /cygdrive/c/digilent/nexys2/binaries
$ xmd
Xilinx Microprocessor Debugger (XMD) Engine
Xilinx EDK 12.1 Build EDK_MS1.53d
Copyright (c) 1995-2009 Xilinx, Inc. All rights reserved.
Configure FPGA
XMD%
XMD% fpga -f download.bit -cable type xilinx_plugin modulename digilent_plugin
www.digilentinc.com
page 6 of 12
Copyright Digilent, Inc. All rights reserved. Other product and company names mentioned may be trademarks of their respective owners.
Digilent Plug-in for Xilinx Tools User’s Manual
Fpga Programming Progress .......Done
JTAG chain configuration
-------------------------------------------------Device
ID Code
IR Length
Part Name
1
41c22093
6
XC3S500E
2
f5046093
8
XCF04S
Connect to the
Microblaze Soft
Processor Debug port
Successfully downloaded bit file.
XMD% connect mb mdm -cable type xilinx_plugin modulename digilent_plugin
MicroBlaze Processor Configuration :
------------------------------------Version............................7.20.a
Optimization.......................Area
Interconnect.......................PLBv46
MMU Type...........................No_MMU
No of PC Breakpoints...............1
No of Read Addr/Data Watchpoints...0
No of Write Addr/Data Watchpoints..0
Instruction Cache Support..........off
Data Cache Support.................off
Exceptions Support................off
FPU Support.......................off
Hard Divider Support...............off
Hard Multiplier Support............on - (Mul32)
Barrel Shifter Support.............off
MSR clr/set Instruction Support....on
Compare Instruction Support........on
Data Cache Write-back Support......off
Download Program
executable for
Connected to "mb" target. id = 0
Starting GDB server for "mb" target (id = 0) at Microblaze
TCP port no
to 1234
execute
XMD% dow executable.elf
System Reset .... DONE
Downloading Program -- executable.elf
section, .vectors.reset: 0x00000000-0x00000003
section, .vectors.sw_exception: 0x00000008-0x0000000b
section, .vectors.interrupt: 0x00000010-0x00000013
section, .vectors.hw_exception: 0x00000020-0x00000023
section, .text: 0x00000050-0x000005eb
section, .init: 0x000005ec-0x0000060f
section, .fini: 0x00000610-0x0000062b
section, .rodata: 0x0000062c-0x00000661
section, .sdata2: 0x00000662-0x00000667
section, .data: 0x00000668-0x00000777
section, .ctors: 0x00000778-0x0000077f
section, .dtors: 0x00000780-0x00000787
section, .eh_frame: 0x00000788-0x0000078b
section, .jcr: 0x0000078c-0x0000078f
section, .bss: 0x00000790-0x000007b3
section, .heap: 0x000007b4-0x000009b7
section, .stack: 0x000009b8-0x00000db7
Setting PC with Program Start Address 0x00000000
XMD% read_uart
Connected to MDM UART Target
XMD% con
RUNNING> XMD% -- Entering main() --- Exiting main() -XMD% stop
XMD%
www.digilentinc.com
Display UART output in XMD
Start Microblaze Executing
Stop Microblaze Execution
Display Microblaze registers
page 7 of 12
Copyright Digilent, Inc. All rights reserved. Other product and company names mentioned may be trademarks of their respective owners.
Digilent Plug-in for Xilinx Tools User’s Manual
XMD% rrd
r0: 00000000
r1: 00000d88
r2: 00000668
r3: 00000000
r4: 00000000
r5: 00000000
r6: 00000000
r7: 00000000
pc: 0000006c
XMD% mrd 0x81400000
81400000:
00000069
XMD% mrd 0x81400000
81400000:
00000095
r8:
r9:
r10:
r11:
r12:
r13:
r14:
r15:
msr:
00000000
00000000
00000000
00000000
00000000
00000790
00000000
000003a8
00000000
r16:
r17:
r18:
r19:
r20:
r21:
r22:
r23:
00000000
00000000
00000000
00000000
00000000
00000000
00000000
00000000
r24:
r25:
r26:
r27:
r28:
r29:
r30:
r31:
00000000
00000000
00000000
00000000
00000000
00000000
00000000
00000000
Read the values of the 8 Slide Switches via GPIO
Manually Change the Slide Switch positions and re-read the values
XMD% exit
~ /cygdrive/c/digilent/nexys2/binaries
This concludes the Xilinx Microprocessor Debugger (XMD) part of the Demonstration Project.
Impact Setup
Xilinx Impact is used to download FPGA bitstreams to FPGA boards. The following steps show how
to use Impact with the Plug-in. First, launch Impact and Select “OutputCable Setup…” menu item.
Select “Open Cable Plug-in” and type in “digilent_plugin”:
www.digilentinc.com
page 8 of 12
Copyright Digilent, Inc. All rights reserved. Other product and company names mentioned may be trademarks of their respective owners.
Digilent Plug-in for Xilinx Tools User’s Manual
Right Click in the “Boundary Scan” window to “Initialize Chain”:
Impact is now ready to communicate with the FPGA on the board:
www.digilentinc.com
page 9 of 12
Copyright Digilent, Inc. All rights reserved. Other product and company names mentioned may be trademarks of their respective owners.
Digilent Plug-in for Xilinx Tools User’s Manual
EDK Software Development Kit (SDK) Setup
The following steps show how to use the EDK Software Development Kit (SDK) with the Plug-in.
First, launch SDK and Select “Xilinx Tools Configure JTAG Settings” menu item.
www.digilentinc.com
page 10 of 12
Copyright Digilent, Inc. All rights reserved. Other product and company names mentioned may be trademarks of their respective owners.
Digilent Plug-in for Xilinx Tools User’s Manual
Select “3rd Party Cable, Xilinx Plug-in” and type in “-cable type xilinx_plugin modulename
digilent_plugin” into the “Other Options:” field.
www.digilentinc.com
page 11 of 12
Copyright Digilent, Inc. All rights reserved. Other product and company names mentioned may be trademarks of their respective owners.
Digilent Plug-in for Xilinx Tools User’s Manual
SDK is now setup to use the Plug-in to communicate with the FPGA on the board.
Basys2 Demonstration Project
The Basys2 Demonstration Project can be used to verify correct installation and operation of the Plugin. It is functionally equivalent to the Nexys2 design. Please follow the procedure documented in the
Nexys2 Demonstration Project section above.
www.digilentinc.com
page 12 of 12
Copyright Digilent, Inc. All rights reserved. Other product and company names mentioned may be trademarks of their respective owners.


