Creating Online Rooms in CougarView Using LTI
advertisement
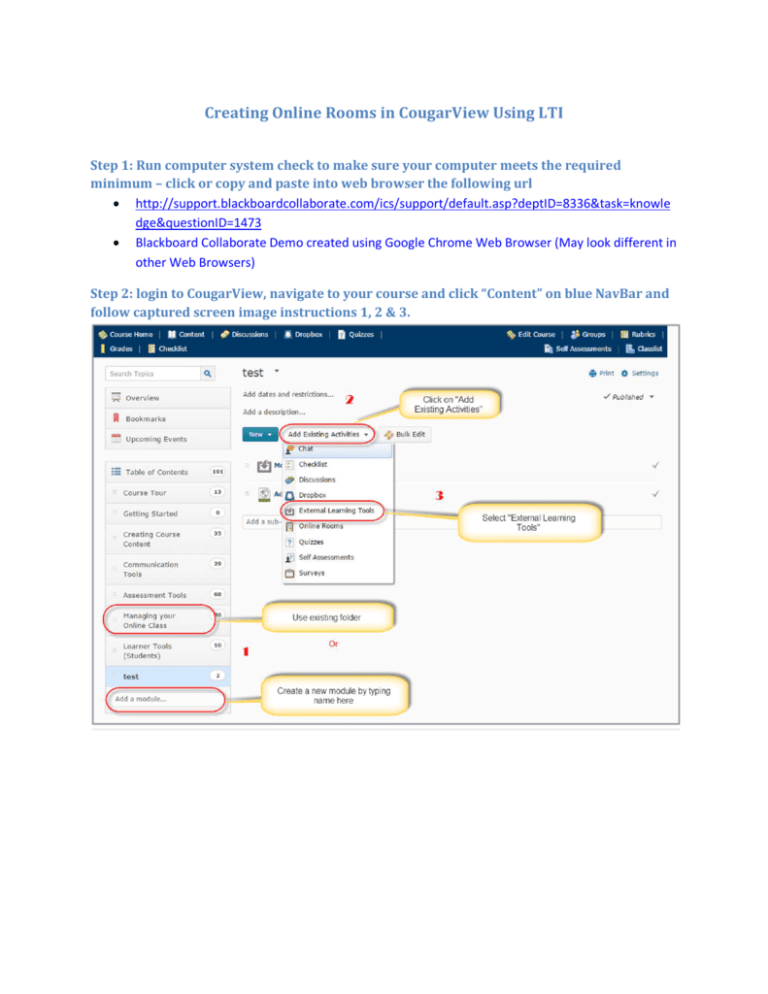
Creating Online Rooms in CougarView Using LTI Step 1: Run computer system check to make sure your computer meets the required minimum – click or copy and paste into web browser the following url http://support.blackboardcollaborate.com/ics/support/default.asp?deptID=8336&task=knowle dge&questionID=1473 Blackboard Collaborate Demo created using Google Chrome Web Browser (May look different in other Web Browsers) Step 2: login to CougarView, navigate to your course and click “Content” on blue NavBar and follow captured screen image instructions 1, 2 & 3. Step 3: Click on “Collaborate” option as shown below Step 4: You can edit the title or name of your activities as shown on the screen image below Step 5: Double-Click on the added icon to continue Step 6: Click on “Create Session” Step 7: Fill out the needed Session Information (Name, Start, End and Early Entry) then click on Options Tab Step 8: Fill the needed information on Option Tab (Permissions, Recording Mode, Max simultaneous talkers & Max Simultaneous Cameras) then click “Content Tab” Step 9: Upload any Whiteboard/ plan file or Multimedia files if need be and click “Create Session” to complete setup Step 10: Online Room/Collaborate Room Info is display ( Dial in#, Guest link and Time Info) Click “Join” to join the room Step 11: Select Java installation if you need it or click “Launch Blackboard Collaborate now” Step 12: Double-Click on "Meeting.Collab" to run Blackboard Collaborate Step 13: Setup and Joining in completed, start using Blackboard Collaborate/Online Room Look for Instruction Guides on how to use Blackboard Collaborate on the Instructors resource website of Center of Online Learning. For more assistance, please reach out to us through email at onlinelearning@columbusstate.edu or call us at (706) 507-8699
