Urine Dipstick Analysis: UTI Management Guide
advertisement
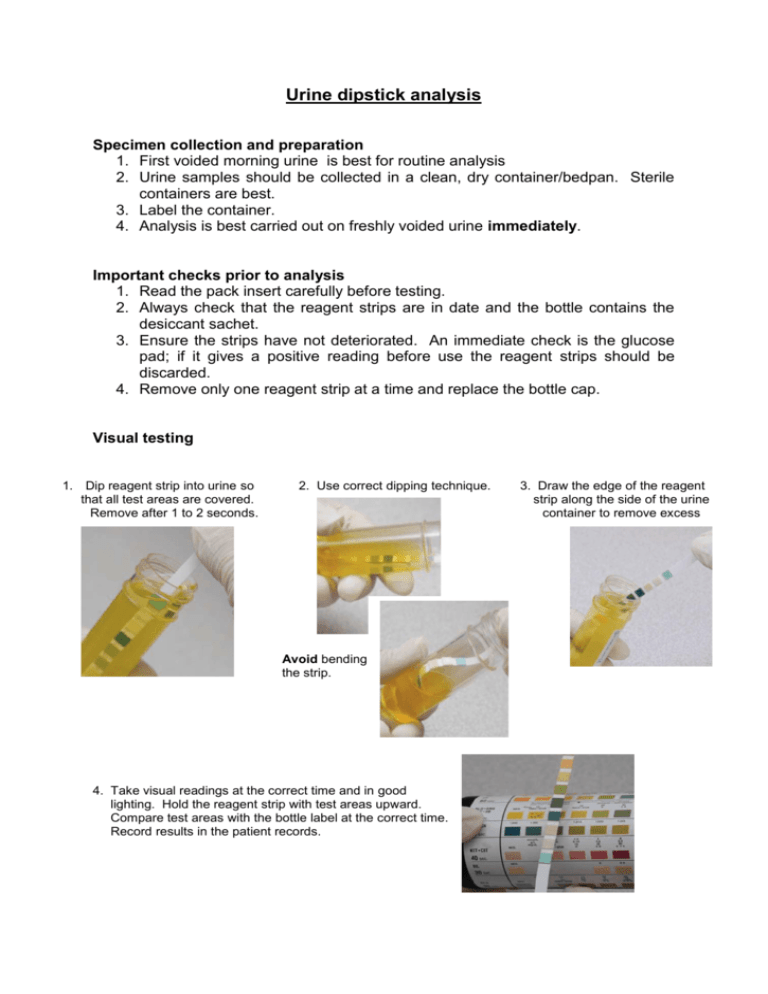
Urine dipstick analysis Specimen collection and preparation 1. First voided morning urine is best for routine analysis 2. Urine samples should be collected in a clean, dry container/bedpan. Sterile containers are best. 3. Label the container. 4. Analysis is best carried out on freshly voided urine immediately. Important checks prior to analysis 1. Read the pack insert carefully before testing. 2. Always check that the reagent strips are in date and the bottle contains the desiccant sachet. 3. Ensure the strips have not deteriorated. An immediate check is the glucose pad; if it gives a positive reading before use the reagent strips should be discarded. 4. Remove only one reagent strip at a time and replace the bottle cap. Visual testing 1. Dip reagent strip into urine so that all test areas are covered. Remove after 1 to 2 seconds. 2. Use correct dipping technique. urine. Avoid bending the strip. Avoid bending the strip. 4. Take visual readings at the correct time and in good lighting. Hold the reagent strip with test areas upward. Compare test areas with the bottle label at the correct time. Record results in the patient records. 3. Draw the edge of the reagent strip along the side of the urine container to remove excess Urine dipstick analysis for the management of suspected urinary tract infection. Always visually inspect the urine specimen. Normal urine should be transparent and yellow or amber. Cloudy urine indicates abnormality; however this does not necessarily confirm infection. Interpretation of urine dipstick test. Test with MULTISTIX GP LEUCOCYTES - POSITIVE LEUCOCYTES – POSITIVE LEUCOCYTES - NEGATIVE NITRITES - POSITIVE NITRITES - NEGATIVE NITRITES - NEGATIVE TREAT FOR UTI It is possible that the UTI may be caused by organisms that do not convert nitrates to nitrites, resulting in a negative result for nitrite presence on the dipstick. However this is uncommon. The decision to treat in this case should be based on clinical symptoms. ANTIBIOTICS ARE NOT REQUIRED.
