Photosynthesis Lab
advertisement
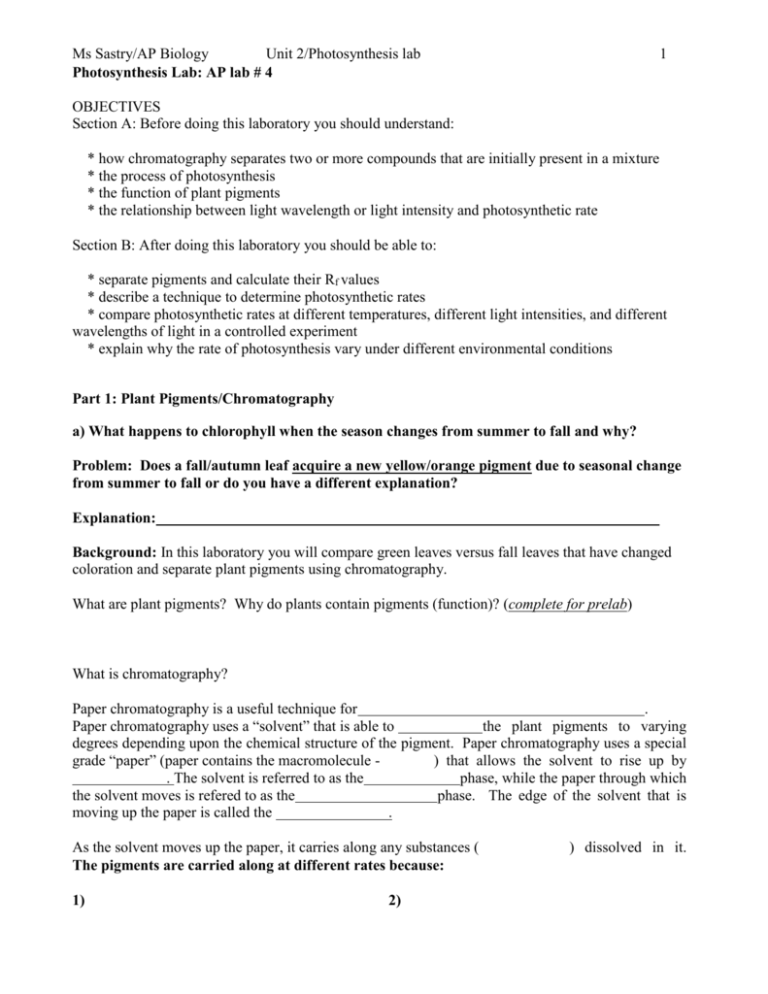
Ms Sastry/AP Biology Unit 2/Photosynthesis lab Photosynthesis Lab: AP lab # 4 1 OBJECTIVES Section A: Before doing this laboratory you should understand: * how chromatography separates two or more compounds that are initially present in a mixture * the process of photosynthesis * the function of plant pigments * the relationship between light wavelength or light intensity and photosynthetic rate Section B: After doing this laboratory you should be able to: * separate pigments and calculate their Rf values * describe a technique to determine photosynthetic rates * compare photosynthetic rates at different temperatures, different light intensities, and different wavelengths of light in a controlled experiment * explain why the rate of photosynthesis vary under different environmental conditions Part 1: Plant Pigments/Chromatography a) What happens to chlorophyll when the season changes from summer to fall and why? Problem: Does a fall/autumn leaf acquire a new yellow/orange pigment due to seasonal change from summer to fall or do you have a different explanation? Explanation: Background: In this laboratory you will compare green leaves versus fall leaves that have changed coloration and separate plant pigments using chromatography. What are plant pigments? Why do plants contain pigments (function)? (complete for prelab) What is chromatography? Paper chromatography is a useful technique for . Paper chromatography uses a “solvent” that is able to the plant pigments to varying degrees depending upon the chemical structure of the pigment. Paper chromatography uses a special grade “paper” (paper contains the macromolecule ) that allows the solvent to rise up by . The solvent is referred to as the phase, while the paper through which the solvent moves is refered to as the phase. The edge of the solvent that is moving up the paper is called the . As the solvent moves up the paper, it carries along any substances ( The pigments are carried along at different rates because: 1) 2) ) dissolved in it. Ms Sastry/AP Biology Unit 2/Photosynthesis lab The plant pigment that moves the farthest does so because: 2 The plant pigment that moves the least does so because: Identify: 1) Solvent Front 2) Stationary Phase 3) Mobile Phase 4) Pigment “line” 5) Solvent 6) Rf *What should be the level of solvent used in the tube? Why? Rf = distance specific pigment migrated (mm) distance ‘solvent front’ migrated (mm) How many pigments are we expecting to see in this lab? Fastest mover: Beta carotene (yellow orange) Next in Line: Xanthophyll (yellow) Followed by: Chlorophyll b (bright green to blue green) Last place goes to: Chlorophyll a (yellow green to olive green) Procedure 1. Obtain a 25 mL test tube which has about 1 cm of solvent at the bottom. Cover the tube with aluminum foil/cork to prevent the vapors from spreading. Wear goggles and gloves. 2. You will be working with chromatography paper – try to touch this paper only at its sides. Oils from your hands can change the separation of pigments. Cut a piece of chromatography paper which will be long enough to reach the solvent. Draw a line 1.5 cm from the bottom of the paper. Check to see if the line drawn is above the solvent surface by placing the paper next to the tube. 3. Use a quarter to extract the pigments from leaf cells. Place a small section of leaf on the top of the pencil line. Use the ribbed edge of the coin to crush the leaf cells. Be sure the pigment line is on top Ms Sastry/AP Biology Unit 2/Photosynthesis lab 3 of the pencil line. Use a back and forth movement exerting firm pressure through out. Do this 8-9 times and use a fresh part of the leaf each time. 4. Place the chromatography paper in the test tube with solvent carefully. Do not allow the pigment line to touch the solvent. 5. Cover the tube. When the solvent is about 1 cm from the top of the paper, remove the paper and immediately mark the location of the solvent front before it evaporates. 6. Mark the bottom of each pigment band. Measure the distance each pigment migrated from the bottom of the pigment origin (pencil line) to the bottom of the separated pigment band. Record the distance that each front, including the solvent front, moved in the table below. Depending on the species of plant used, you may be able to observe 4 or 5 pigment bands. Leaf type: Green Leaf type: Fall/Autumn leaf Distance moved by Pigment Band (millimeters) Band # Distance (mm) Band Color Band # 1 1 2 2 3 3 4 4 5 5 Distance (mm) Band Color Distance Solvent Front Moved: ________________ Analysis of Results The relationship of the distance moved by a pigment to the distance moved by the solvent is a constant called Rf . It can be calculated for each of the pigments using the formula: Rf = distance pigment migrated (mm)_____ distance solvent front migrated (mm) Record your Rf values in the table below. ___________________________ = Rf for carotene (yellow to yellow -orange) ___________________________ = Rf for xanthophyll (yellow) ___________________________ = Rf for Chlorophyll a (bright green to blue green) ___________________________ = Rf for Chlorophyll b (yellow green to olive green) Ms Sastry/AP Biology Unit 2/Photosynthesis lab 4 Part 2: SPECTROPHOTOMETRY of FOOD COLORING Spectrophotometry is a quantitative method of analysis involving the principles associated with how visible light interacts with atoms. Visible light is a small portion of the electromagnetic spectrum and includes the colors we observe (red, orange, yellow, green, blue and violet). It consists of electromagnetic radiation whose wavelengths range from 400-700 nm. When white light is observed, what is actually being seen is all the colors of light combined. When this light passes through a substance, certain energies (or colors) of light are absorbed while the other color(s) are allowed to pass through or are reflected. This is why some substances appear colored. The color we see is the combination of the energies of visible light that are not absorbed by the sample. If the substance does not absorb any light, it appears white or colorless. A solution appears a certain color due to the absorbance and transmittance of visible light. For example, an orange solution appears orange because it is absorbing . A sample may also appear orange if all colors of light except blue are transmitted. This is because blue and orange are complimentary colors. (see figure below) The wavelength associated with the complimentary color COLOR is known as the wavelength THIS of maximum absorbance. WHEEL as The wavelength of maximum specified! absorbance is used when determining the concentration of a colored solution since at this wavelength a slight change in concentration allows for a significant change in the absorbance of light. The amount of light absorbed by a solution is dependent on the ability of the compound to absorb light (molar absorptivity), the distance through which the light must pass through the sample (path length), and the molar concentration of the compound in the solution. This relationship is known as Beer's Law and is represented by the equation: A = l C where A is the absorbance, is the molar absorptivity, l is the path length and C is the molar concentration. If the same compound is being used and the path length is kept constant, then the absorbance is directly proportional to the concentration of the sample. Ms Sastry/AP Biology Unit 2/Photosynthesis lab 5 A spectrophotometer is used to provide light of certain energy (wavelength) and to measure the absorbance of that light. The basic operation of the spectrophotometer includes a white light radiation source which passes through a monochromator. The monochromator is either a prism or a diffraction grating which separates the light into the colored components and allows only light of a particular wavelength to strike the sample. The sample is poured into a cuvette, which is similar to a small test tube. It is marked so that it can be positioned in the light beam the same way each time to avoid variations due to the differences in the composition of the glass. The light passes through the sample, and the unabsorbed portion strikes a photodetector, which produces an electrical signal proportional to the intensity of light. The signal is converted to a readable output that is used in the analysis of the sample. DETERMINATION OF WAVELENGTH OF MAXIMUM ABSORBANCE – PART 2 Colored solutions are colored because they absorb certain wavelengths of light while allowing other wavelengths of light to pass through. As observers, we see the wavelengths of light that are By measuring the amount of light absorbed, we can find the of solutions (because Before doing this type of spectral analysis, the wavelength at which absorbance is greatest needs to be determined. The spectrophotometer is more sensitive to absorbance changes at this wavelength. . ). The purpose of this experiment is to demonstrate the procedure to find the wavelength of maximum absorbance for any colored solution. The process involves recording the absorbance over the range of 350 nm to 650 nm, usually in intervals of 25 nm. The data can be graphed to visualize the highest absorbance, or the data pairs can be examined to determine the wavelength. Purpose: The purpose of this lab is to find the wavelength of maximum absorbance of a colored solution using a spectrophotometer. Equipment / Materials: spectrophotometer 2 cuvettes small test tube rack 150 mL beaker food coloring (red, blue, yellow, green) DI water Procedure: 1. Turn on the Spec 20 so it can warm up for about 15 min. Turn Power switch. 2. Add one drop of food coloring to 100 mL of water, and mix well. 3. Rinse the cuvette with a small amount of colored solution, and then fill the cuvette 3/4 full. 4. Fill the second cuvette with deionized water to be used as a blank. 5. Set the spectrophotometer to 350 nm. using the wavelength control. Set mode to Transmittance. Using the adjuster control set the % Transmittance to 0%. 6. Set the mode to absorbance. Wipe the blank cuvette with a Kimwipe/kleenex tissue. Place the blank (water) into the unit so that the white line of the cuvette matches the notch in the sample compartment. Set to zero absorbance (100% transmittance). 7. Remove the blank, wipe the sample cuvette, and place the colored solution into the spectrophotometer. Record the absorbance on the data sheet. 8. Reset the wavelength to 375 nm, and repeat steps 6 and 7. Repeat steps 6 and 7, recording absorbances at every 25 nm, using this technique until you reach 650 nm. 10. Locate the reading with the highest absorbance. Record the absorbance at 10 nm and 20 nm around this reading. Ms Sastry/AP Biology Unit 2/Photosynthesis lab 6 11. *If the reading shows a square box that you cannot read (teacher will show you this), you can switch the sensitivity to a lower setting . Data Table: Color of solution : Green Color of solution: Wavelength of green color: Wavength of color above: I expect green color to absorb I expect this color above to absorb color light based on the color wheel Wavelength of light for color absorbed is wavelength (nm) absorbance Notes On spec’s performance color light based on the color wheel Wavelength of light for color absorbed is wavelength (nm) 350 350 375 375 400 400 425 425 450 450 475 475 500 500 525 525 550 550 575 575 600 600 625 625 650 650 absorbance Notes On spec’s performance Ms Sastry/AP Biology Unit 2/Photosynthesis lab 7 Part 3: How does boiling and color of light used affect photosynthesis and DPIP dye reduction? Photosynthesis / The Light Reaction: Light is a part of a continuum of radiation or energy waves. Shorter wavelengths of energy have greater amounts of energy. For example, high-energy ultraviolet rays can harm living things. Wavelengths of light within the visible spectrum of light power photosynthesis. When light is absorbed by leaf pigments, electrons within each photosystem are boosted to a higher energy level and this energy level is used to produce and to reduce NADP to . ATP and NADPH are then used to incorporate CO2 into organic molecules, a process called . Design of the Exercise: Photosynthesis may be studied in a number of ways. For this experiment, a dye-reduction technique will be used. The dye-reduction experiment tests the hypothesis that and are required for the light reactions to occur. In place of the electron accepter, NADP, the compound DPIP ( 2.6-dichlorophenol-indophenol), will be substituted. When light strikes the chloroplasts, electrons boosted to high energy levels from chlorophyll will reduce DPIP. It will change from blue to colorless. This means we expect as there is MORE reaction in a test tube, the transmittance will: and absorption will . Principle behind Part 3: draw this using lab bench site (HW site) In this experiment, chloroplasts are extracted from spinach leaves and incubated with DPIP in the presence of light. As the DPIP is reduced and becomes colorless, the resultant in light transmittance is measured over a period of time using a spectrophotometer. The experimental design matrix is presented in Table 4.3. You will be comparing the effect of light and the condition of the chloroplast (boiled and unboiled) in being able to reduce the dye DPIP (final electron acceptor in this lab). Write a hypothesis statement that predicts how increasing light intensity and boiling will affect DPIP (dye) transmittance in this investigation. Independent variables: Dependent variable: Your hypothesis statements: (one for unboiled vs boiled chloroplast; one for color of light used) Ms Sastry/AP Biology Unit 2/Photosynthesis lab 8 Table 4.3: Photosynthesis Setup Cuvettes 5 2 3 4 Color No 1 light Chloroplasts Setup/purpose what Unboiled Unboiled Boiled color did Blank Chloroplasts Chloroplasts Chloroplasts 1 ml. you use) Dark Light Light 3 ml + 3 drops Phosphate 1 ml 1 ml 1 ml. 1 ml. 1ml 1ml Buffer 4 ml + 3ml + 3 Distilled Water 3 3 ml 3 ml. 3 ml. 3ml drops drops DPIP ---1 ml 1 ml. 1 ml. 1ml 1ml Unboiled 3 drops 3 drops ---3 drops Chloroplasts Boiled ---------3 drops Chloroplasts Total volume Notes Procedure 1. Turn on the spectrophotometer to warm up the instrument and set the wavelength to 605 nm by adjusting the wavelength control knob. 2. While the spectrophotometer is warming up, your teacher may demonstrate how to prepare a chloroplast suspension from spinach leaves. 3. Set up an incubation area that includes a light, water flask, and test tube rack. The water in the flask acts as a heat sink by absorbing most of the light's infrared radiation while having little effect on the light's visible radiation. Figure 4.2: Incubation Setup Flood Light -------Water Heat Sink-------Cuvettes 4. Your teacher will provide you with two tubes, one containing unboiled chloroplasts, and one that has been boiled. Be sure to keep these on ice at all times. 5. At the top rim (ONLY), label the cuvettes 1,2,3,4, and 5, respectively. Using lens tissue, wipe the outside walls of each cuvette ( Remember: handle cuvettes only near the top). Using foil paper, Ms Sastry/AP Biology Unit 2/Photosynthesis lab 9 cover the walls and bottom of cuvette 2. Light should not be permitted inside cuvette 2 because it is the dark condition for this experiment. 6. Refer to Table 4.3 to prepare each cuvette. Do not add unboiled or boiled chloroplasts yet. To each cuvette, add 1 ml of phosphate buffer. (See table for what to add from this point on). 7. Bring the spectrophotometer to zero by adjusting the amplifier control knob (left) until the meter reads 0% transmittance. Cover the top of cuvette 1 with Parafilm@ and invert to mix. Insert cuvette 1 into the sample holder and adjust the instrument to 100% transmittance by adjusting the light -control knob. Cuvette 1 is the blank to be used to recalibrate the instrument between readings. In other words, you will measure the light transmitted through the other sample tube as a percentage of the light transmitted through the blank tube. For each reading, make sure that the cuvettes are inserted into the sample holder so that they face the same way as in the previous reading. 8. Obtain the unboiled chloroplast suspension, stir to mix, and transfer three drops to cuvette 2. Immediately cover and mix cuvette 2. Then remove it from the foil sleeve and insert it into the spectrophotometer's sample holder, read the % transmittance, and record it as the time 0 reading in Table 4.4 . Replace cuvette 2 into the foil sleeve, and place it into the incubation test tube rack. Turn on the flood light. Take and record additional readings at 5,10,and 15 minutes. Mix the cuvette's contents just prior to each readings. Remember to use cuvette 1 occasionally to check and adjust the spectrophotometer to 100% transmittance. 9. Obtain the unboiled chloroplast suspension, mix, and transfer three drops to cuvette 3. Immediately cover and mix cuvette 3. Insert it into the spectrophotometer's sample holder, read the % transmittance, and record it in Table 4.4 . Replace cuvette 3 into the incubation test tube rack. Take and record additional readings at 5,10,and 15 minutes. Mix the cuvette's contents just prior to each readings. Remember to use cuvette 1 occasionally to check and adjust the spectrophotometer to 100% transmittance. 10. Obtain the boiled chloroplast suspension, mix, and transfer three drops to cuvette 4. Immediately cover and mix cuvette 4. Insert it into the spectrophotometer's sample holder, read the % transmittance, and record it in Table 4.4 . Replace cuvette 4 into the incubation test tube rack. Take and record additional readings at 5, 10, and 15 minutes. Mix the cuvette contents just prior to each readings. Remember to use cuvette 1 occasionally to check and adjust the spectrophotometer to 100% transmittance. 11. Cover and mix the contents of cuvette 5. Insert it into the spectrophotometer's sample holder, read the % transmittance, and record it in Table 4.4 . Replace cuvette 5 into the incubation test tube rack. Take and record additional readings at 5,10,and 15 minutes. Mix the cuvette contents just prior to each readings. Remember to use cuvette 1 (blank) occasionally to check and adjust the spectrophotometer to 100% transmittance. Table 4.4: Transmittance (%) Cuvette 0 #2 Unboiled /Dark #3 Unboiled/ Light #4 Boiled / Light #5 No Chloroplasts Time (minutes) 5 10 15 Ms Sastry/AP Biology Graph Unit 2/Photosynthesis lab 10 Ms Sastry/AP Biology Unit 2/Photosynthesis lab 11 Reference: ideal data for food coloring solution absorbance Spectrum of Food Coloring 1 .8 1 .6 1 .4 1 .2 1 0 .8 0 .6 0 .4 0 .2 0 3 50 y ello w blue 4 00 4 50 5 00 5 50 wa ve len gth 6 00 6 50 7 00 7 50
