hw9
advertisement
Homework#9: CSS Basics
Create a navigation table for a web site of your choosing. Format the table with some Cascading
Style Sheet (CSS) rules in FrontPage.
Creating the basic page structure
1. Open FrontPage and create a page called navtable.htm. Since we’ll be posting it to your
students.depaul.edu account later, save it in your hci201 subdirectory under public_html,
e.g. on your USB stick,
HCI201.Evelyn\web site\public_html\hci201
2. At the top of the page, type “Navigating Table with CSS”. On the next line, type “Created
by” and then your name.
3. Format the 1st line with <h2> tags.
4. Format the 2nd line with <h3> tags.
5. Below the headings, insert a few blank lines, and then create a table with these attributes:
1 row and 5 columns
Border: 0
Uncheck Specify Width and Height.
6. Think about some categories of content for your web site. For example, a business might
have “Products”, “Contact Us”, “Locations”, “About Us”, etc.
Type a category name in each cell. Keep the name brief, preferably one word.
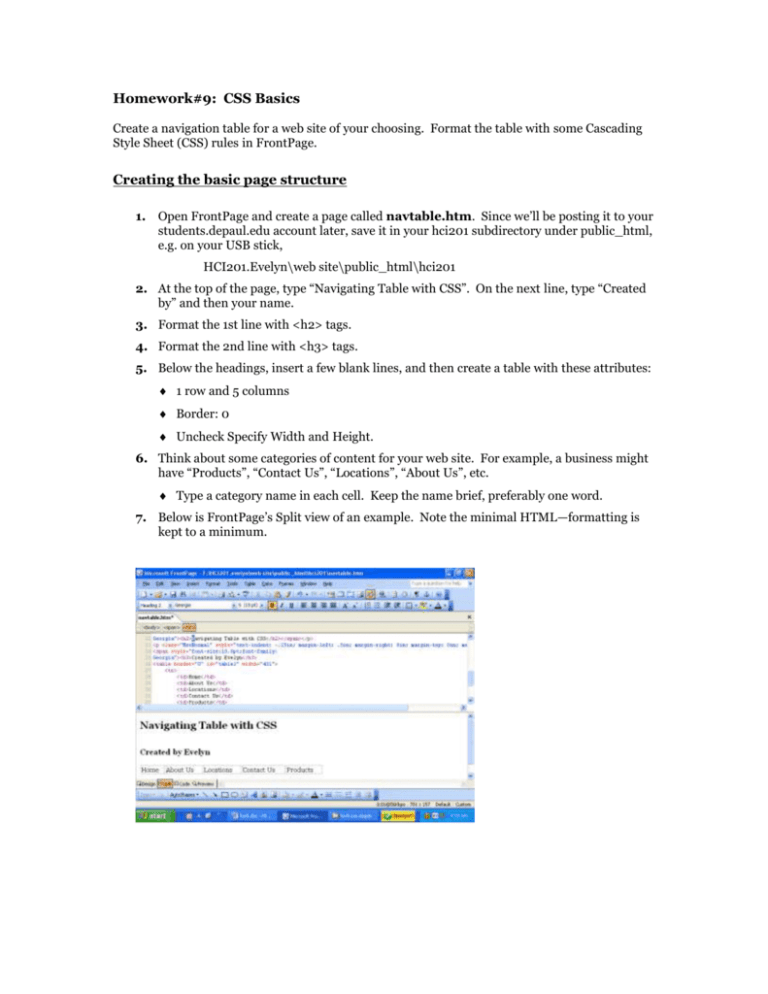
7. Below is FrontPage’s Split view of an example. Note the minimal HTML—formatting is
kept to a minimum.
8. Let’s create some style rules.
Creating a document-level style rule
1. First, we’ll modify the properties of the <h2> tag.
2. On the main menu in FrontPage, click Format and then Style.
3. The List box on the bottom should say “HTML tags”.
4. Select h2 from the list of Styles. Now click the Modify button and then OK.
5. In the Modify Style popup window, click the Format dropdown button and select Font.
6. We are changing the font properties of the h2 tag. Select a new Font, Font Style and
Color. For example, below I changed the font to Georgia, Bold and Maroon color.
7. Click OK once.
8. In the Modify Style box, note the style rule we just created:
9. Click OK.
10. What did we just do? We created a document-level style rule. The style rule will be
placed between the <head> tags at the top of the document.
11. Look at your HTML code, e.g. the Split view. You should see your style rule between
<style>...</style> tags. The rule is the same as what we saw in the Modify Style rule box
above.
12. To be consistent, we should make the <h3> tag look similar to the <h2> tag.
13. We could repeat steps 1-12 above, but that takes too long. There’s a much faster way.
a.
Recall we can apply the same rule to multiple tags by simply created a list of them,
separated by commas.
b. Switch to the Split view so you can see the HTML. Go to the <style> rule we just
created.
c.
Add the tag name h3 in front of the rule. Separate it from h2 with a comma.
<style>
<!-h2, h3
{ font-family: Georgia; color: #800000; font-weight: bold }
-->
</style>
d. Now click on the web page. Both headings should now have the same font type and
color. Cool!
Table Style Rules
Now, we’ll create some rules to modify the <table> and <td> tags.
1. On the main menu in FrontPage, click Format and then Style.
2. You’ll probably see the User-defined styles you created.
a.
The table tag is not there, because it’s not a User-defined style. Yet.
b. In the lower left corner, change the List box to “HTML tags”.
3. Select table from the list of Styles. Now click the Modify button and then OK.
4. From the Format button, choose Border.
5. Go to the Shading tab. Change the background and foreground colors.
6. Click OK.
a.
Again, note the style rule text in the Modify Style popup.
7. Now change the padding of the <td> tag to at least 10 (pixels). Try to do this from
memory. Here are a couple hints:
a.
You are creating a new Formatting Style rule.
b. You’ll be modifying the HTML tag to turn it into a User-defined tag.
c.
In FrontPage, the padding can be accessed at the bottom of the Border tab in the
Border pop up window.
8. Add a couple more rules to your page.
a.
Change the background color of the body tag.
b. Change the Font type and Font color of the body tag.
i. This will be your default font for the page, e.g. for text you type between the
<body>...</body> tags.
1.
You may want to keep the font family the same as you used before
(Georgia).
2. The font color should contrast with the body’s background color.
3. Use Normal, not Bold.
9. Type some text below the table you created. Verify the body rule is being applied.
10. Save the file as navtable.htm.
11. Open your assignments.htm file and add a new list item for this assignment. Create a
hyperlink to navtable.htm, i.e. <a href=navtable.htm>Navigation Table</a>.
12. Save assignments.htm.
What to Submit:
Upload (FTP) your assignment.htm and navtable.htm to your students.depaul.edu
account. Verify your assignments page will take you to navtable.htm on the server.
To submit this assignment, go into COL and click on Submit Assignments. Submit the
URL to your assignments.htm page to COL in the text box.
Grading:
You can earn up to 5 points for this assignment. Here are the criteria:
Submission
Completed file, all style rules correct.
Missing rules
No submission
Points
5 pts.
-1 each
0


