File - RUTH BALL enamel + design
advertisement
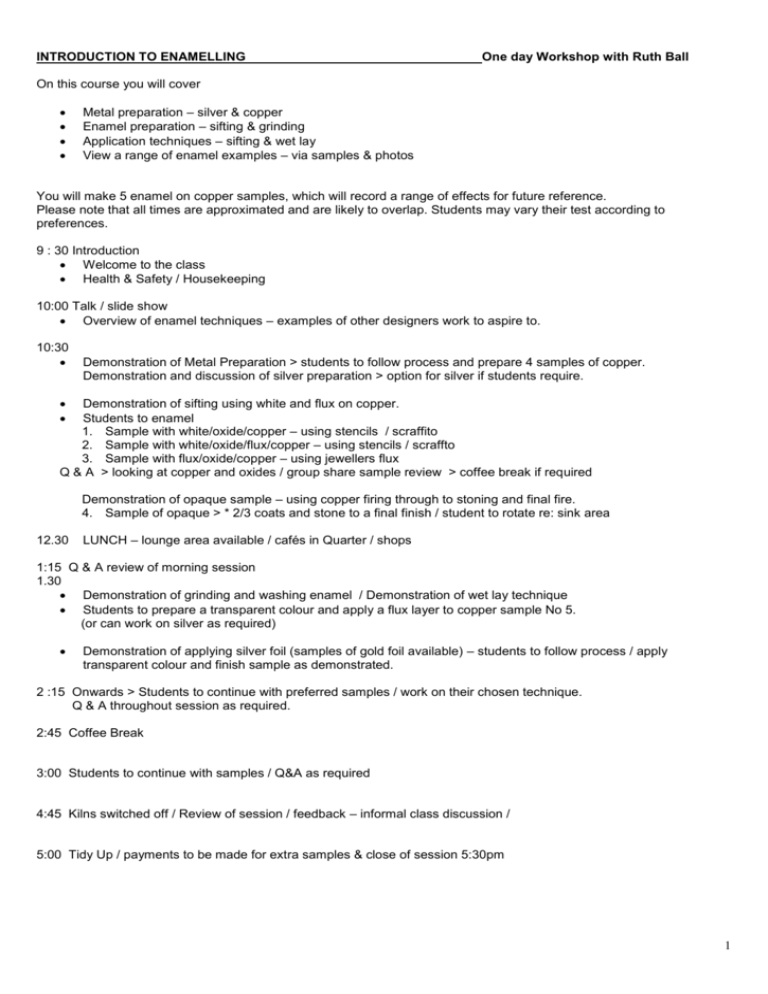
INTRODUCTION TO ENAMELLING One day Workshop with Ruth Ball On this course you will cover Metal preparation – silver & copper Enamel preparation – sifting & grinding Application techniques – sifting & wet lay View a range of enamel examples – via samples & photos You will make 5 enamel on copper samples, which will record a range of effects for future reference. Please note that all times are approximated and are likely to overlap. Students may vary their test according to preferences. 9 : 30 Introduction Welcome to the class Health & Safety / Housekeeping 10:00 Talk / slide show Overview of enamel techniques – examples of other designers work to aspire to. 10:30 Demonstration of Metal Preparation > students to follow process and prepare 4 samples of copper. Demonstration and discussion of silver preparation > option for silver if students require. Demonstration of sifting using white and flux on copper. Students to enamel 1. Sample with white/oxide/copper – using stencils / scraffito 2. Sample with white/oxide/flux/copper – using stencils / scraffto 3. Sample with flux/oxide/copper – using jewellers flux Q & A > looking at copper and oxides / group share sample review > coffee break if required Demonstration of opaque sample – using copper firing through to stoning and final fire. 4. Sample of opaque > * 2/3 coats and stone to a final finish / student to rotate re: sink area 12.30 LUNCH – lounge area available / cafés in Quarter / shops 1:15 Q & A review of morning session 1.30 Demonstration of grinding and washing enamel / Demonstration of wet lay technique Students to prepare a transparent colour and apply a flux layer to copper sample No 5. (or can work on silver as required) Demonstration of applying silver foil (samples of gold foil available) – students to follow process / apply transparent colour and finish sample as demonstrated. 2 :15 Onwards > Students to continue with preferred samples / work on their chosen technique. Q & A throughout session as required. 2:45 Coffee Break 3:00 Students to continue with samples / Q&A as required 4:45 Kilns switched off / Review of session / feedback – informal class discussion / 5:00 Tidy Up / payments to be made for extra samples & close of session 5:30pm 1 HEALTH & SAFETY Enamelling is a safe and rewarding activity, but there are considerations to be made and common sense approach to be employed in order to protect your self against possible risks. Basic care is needed to protect against the potential affects of dust, and the control of heat and fumes. Extreme care is needed if you use chemicals. GENERAL POINTS All work areas should be kept tidy and free from any obstructions. Good ventilation in your workshop is essential. You should wear a dust / fume mask if using the enamels dry, and keep areas free of dust. Clothing should be kept “tidy” – no long scarves, sleeves or items that could get caught in equipment. Keep long hair tied back. Safety goggles / Face visor should be worn when engraving, or using machinery. You may need specialist UV glasses* if you are firing enamels for long periods over time. (*Blue tinted or green the same as welding glasses) Kilns and trivets will get very hot so always wear heat resistant gloves when firing work. Use tweezers to handle pieces. A Glass brush should always be used under running water. The fibres in the brush are very fine and can irritate the skin. Always brush away from yourself and wear protective gloves. Equipment should be used with care, following manufactures guidelines and should always be well maintained. If you use Acids, you should always wear full safety clothing (rubber gloves, safety goggles, safety apron, and solid footwear) and must only work in supervised specialist facilities, with full ventilation LEAD IN ENAMEL Enamels can be bought with or without lead content. All lead bearing enamels carry the toxicity / poison symbols as they contain lead and hazardous compounds. Unleaded enamels carry the harmful / irritant symbol. As with any lead bearing material there are safety measures to be considered. Lead is potentially harmful. In regard to enamel the exposure risks are linked to dust and fumes. The health hazards when using enamel depend on the level of exposure and method of control. There is little risk involved unless enamel powder enters the body, therefore risks can be minimised by safe working practise. Lead can be absorbed into your body by inhalation (breathing) or ingestion (eating) It is unlikely that you will want to eat your enamel, but you must ensure that you do not eat, drink or smoke in your workshop to minimise any contamination from enamel particles. You should always wash your hands after handling enamel. The most likely occupational hazard is in breathing in the enamel, as dust or fume. Therefore, you should only enamel in a very well ventilated area, exercise vigilant dust control and the wearing of a suitable dust mask is recommended. As a precaution, if you are using enamel in a group or educational setting, particularly with children, unleaded enamels are preferable in terms of health & safety. If you are working in an industrial setting you should seek advice from your health & safety officer. If you consider that you are / or have been at risk of over exposure to lead it is advisable get regular blood tests and seek medical advice. ENAMEL TYPES Enamel is a form of glass. Its constituent parts are of the combination of glass flux with silica, flint, soda or potash, and borax, each element effecting the composition and fluidity of the enamel. The addition of metal oxides gives the substance its colours. Other compounds are notably present in some enamel, lead for example is used in clear fluxes and a number of colours for brilliance, and tin is added to enamel to give it its opaque properties. There are different types of enamel, namely OPAQUE enamels are totally solid in colour. They can be used over silver & gold but are more typically used over copper, as the metal base does not need to be interactive with the colour of the enamel. OPALESCENT enamels have a beautiful milky iridescent quality. There is a more limited colour range in opalescent enamels. They are best fired over an engraved surface to catch the light through the metal surface, allowing the sheen of the colour to show through. Firing of opalescent colours can be tricky, and will require practice. The first firing should be high whilst the second firing requires a lower rate of heat to reduce the finish to its required opalescence. TRANSPARENT colours show light through and allow the metal surface to be revealed. They also need to be fired over engraved or textured surfaces. Transparent colours respond to their best effects when washed thoroughly and 2 are generally better ground fairly coarsely. They are mostly used over silver and gold as these metals have good reflective qualities. PAINTED enamel is very finely ground powdered enamel oxide. A wide range of effects can be produced. Painted enamels can be used over opaque, opalescent or transparent enamels. When mixed it is applied with a fine brush, over a previously enamelled base coat of enamel. Images are built up in layers over several firings. Colours can be purchased as under glaze or over glaze colours. Under glaze colours need an additional layer of clear flux to finish and protect the image. LIQUID enamel is finely ground enamel that is suspended in an aqueous solution combined with special additives. Liquid enamel can be applied by dipping, spraying, pouring or painting onto the metal surface. Each enamel colour, in addition to its type, has a different fusing characteristic. Based on the compositional elements the melting temperature of enamel can vary, they are categorised into three common sorts: SOFT referring to enamels that fire at a low melting range, which is from about 730 degrees MEDIUM indicates enamels that in the mid range of between around 780 to 840 degrees and HARD, implies enamels have the highest melting point, firing at temperatures above 840 degrees. Generally it is important to fire colours together from the same firing groups. This produces the best results. However, some interesting effects can be achieved by firing soft colours over hard and vice versa. The colours break through one another and cause spotting or salt and pepper effects. Light and dark colours used together can produce effective results. Likewise over firing colours can be problematic, enamels will burn out if over fired, but they may also produce alternative solutions if controlled. Certain opaque colours over copper for example, when over fired will go transparent with surprising results. Testing colour combinations, experimenting with careful observation and adequate control of your blending method can create alternative mixtures for a specific purpose. ENAMEL FLUX Enamel flux is basically clear transparent enamel, and not a flux in as in the term used for silver soldering. Flux is used for various reasons. It can be used as a base for transparent colours, or as a base for embedding cloisonné wires. It is used as a protective coating over painted enamel and foil or it can be used as a colour effect. Flux reflects the whiteness of the metal when fired onto silver. Over copper, reacting with the oxide, enamel flux can be a fired to a range of colours from yellow through to pinkish orange and red brown hues, which can provide interesting effects. Special fluxes can be used for specific requirements. A blue flux can be used, for instance, to enhance some transparent reds. MAKING TESTS The combinations of enamel are quite extensive, therefore, the best and only way to determine the success of colour compatibility is to make a test piece, firing all colours together and noting the rate at which colours fire. The accumulated test that you create will form an essential guide for your reference. Unfortunately enamels are not labelled as to their firing characteristics, so an element of discovery is part of the challenge. To developing your own colour chart it is also useful to create a firing test for each individual colour you use. Small tests are best done on the metal you want to fire the colours onto. However, firing over copper and adding a layer of flux and gold / silver foil to the test strip is a useful and more economical method. The colours over each material will give an indication of the hue over the flux and the different metals. The choices of enamel colour are many. It is worth noting that some colours require specific treatment. For example most blues and greens are generally stable colours and will fire well in most situations, however, all transparent reds, pinks, some yellows and oranges need to be fired over a layer of flux. Reds in particular burn out very quickly so careful control when firing is essential. Some opaque whites will over fire rapidly and some opaque blacks prefer only two or three firings. The testing of colours is essential in learning the properties of each enamel colour and the combination of it’s firing possibilities. The test on the one day workshop are designed to introduce a range of techniques and cover the basic information in these notes. 3 ENAMEL PREPARATION Enamel can be bought in lump or powdered form. Lump, also called frit, is preferred for longevity. It does not deteriorate over time. However for convenience powdered enamel is quite adequate, and if stored correctly will last well. There are three main ways of using enamel, dry sifting with sieves, wet laying with quills / brushes, and with finely ground enamel oxides, painting techniques can be pursued. Sifting allows the enamel to be graded dry, with this method no washing of the enamel is needed. When employing wet laying techniques or if using transparent colours the washing and grinding of colour is important. Washing is done, not to remove dirt particularly, but to wash out the fine silt formed when grinding. Painted enamel needs to be ground with oil based medium or uni media or distilled water, depending on preference and technique. Sifting Sifting is a term used for applying dry enamel to the metal with sieves. The term is used also as an expression for grading the enamel particles. Grade sifting is done to maintain defined regular particle size. When enamel is bought in powder form, unless stated, the mix is a general grind of particles. Particles of enamel are often referred to in “mesh” sizes. The fine meshes used for sifting are measured on the number of holes per square inch. The size of enamel therefore relates to the enamel grain size when passing through the mesh. A number of mesh sizes are used. The meshes are contained in small containers called sifts or sieves. They can be bought in individual sizes or they can be purchased as stacking sets. The reasons for wanting different grades of enamel are various, as a general guide the following may be helpful; 60 / 80 mesh – Looks like fine grains of sand or sugar. Use for transparent and plique a jour methods. If ground too finely transparent colours can loose their clarity. For plique a jour, the particle size, needs to be quite coarse to enable a more cohesive bond when firing across the open cell framework. The grains sizes can vary from practitioner to practitioner each enameller preferring their own formula. 100/150 mesh. A Common sifting sizes for dry applications, and suitable for general wet laying methods, also good for opaque colours. 200/300 mesh for wet packing fine narrow spaces. In sifting techniques finer sifts can create toned effects. 325 / 400 mesh. Described as “fines”, the enamel almost looks like talcum powder in consistency. It is ground at this level for several methods. For Example: The flux for painted enamel requires a very fine surface coating. The grains of enamel have to be very small as otherwise they would lift the painted image they cover and aim to protect. Some colours such as opaque white benefit from being ground finely. The enamel as “fines” can be mixed with water or gum and painted on to a previously fired layer of enamel to create a “watercolour” effect. Additionally, if firing pieces three dimensionally the enamel adheres better if the particles are finer enabling them to cover more densely. It is worth considering the firing variances in relation to mesh size. Smaller particles will fire more quickly than larger particles and smaller particles will fire at lower temperatures. Grinding Lump(frit) enamel must be ground in order to form it into a granular powdered state. The grinding of enamel from lump is done largely to determine particle size. The lump enamel is ground down to size using a pestle and mortar. Grinding Method: Put a small amount of enamel lump into the ceramic mortar bowl and add a little water, just enough to cover. Place a kitchen towel over the pestle & mortar so that it catches any particles when breaking down the lump sizes initially Hit the lump sharply several times until it breaks down into smaller sizes. Rock the mortar firmly over sections that are harder to crush, if needed. Remove the kitchen towel and add a little more water over the enamel lump, but don’t over fill, just an inch / few centimetres of water Grind in a circular motion working on the centre of the bowl, you should aim to grind the enamel steadily, rather than just swirl it around. A firm pressure should be maintained. Keep checking the enamel to observe particle size. Periodically, tip the cloudy water off if needed to check the grains visually. You an also develop “an ear” for knowing when you have ground the enamel to the right consistency. When the enamel is coarse, as your grinding it sounds gritty and when it is fine it will sound smoother and glassier. Stop when you have the viscosity you need. 4 Washing Washing of the ground particles is done to remove any possible contaminants, for example dust / impurities / residues in the enamel. More directly it is done to refine and wash away any very fine over ground enamel, thus aiming to leave a regular particle sizes in the main body of enamel. Tap water can be used for rinsing ground enamel, but for the best effect purified / distilled water should be used. This gives the best clarity and avoids further contaminant. Washing method: Fill the to the top of the pestle with the distilled water, tap the side and allow to settle for a few seconds. Pour the cloudy silt water away; be careful not to wash the enamel away with it. Refill and repeat the process several times until the enamel can be seen clearly through the water. In the final rinses the enamel should settle rapidly and the water should be clear with no clouding. Transfer the enamel to a small watercolour dish / pallet, which should be kept covered. Preferably use within the same day – will keep overnight in a cool place / fridge. Once ground the enamel should be used as soon as possible. It can be fully dried and stored in air tight containers if required, however, it should not be stored suspended in water for longer than a day or so, as over time enamel will deteriorate if left in contact with water. METALS The choice of metal within jewellery enamelling is limited to using enamel with copper, silver or higher carat gold alloys. Any metals alloyed with zinc or nickel content are not suitable. This includes 9ct gold, if you require 9ct a special alloy should be purchased. Each metal has its own unique qualities when fired with enamel. Copper is economic and useful for learning the basics. It is a good base for opaque works. If you are using copper for transparent colours, the metal does not have the same reflectivity as silver or gold. To get a result with transparent over copper an initial flux layer is needed as a base. Transparent colours over copper can be further improved by inlaying gold or silver foils over the flux to enhance the quality of colour. Copper has to be a suitable grade for enamelling, an alloy that is phosphorus and oxygen free is best. Silver fires an extensive colour range and works well with transparent, opaque and opalescent colours. Standard silver is the most common alloy, used for strength and design considerations. It must be free of fire stain though before it can be enamelled. Fine silver gives bright colours and doesn’t need any cleaning in acids however it is a soft metal so some designs can be problematic in regards to the metal warping. Gold fuses beautifully and the colour ranges are excellent. The colours have slight variations to the effects over silver, due to the difference in metal colour. The higher carats are best to use – check some of the alloys for nickel/zinc content. 9ct must be ordered as an enamel quality alloy. Steel can be enamelled but they must be coated with liquid enamel, as in an industrial process, before coloured enamels are applied. Enamel panellists more commonly use steel for its strength – again a specific enamel grade alloy is preferred. METAL PREPARATION The preparation of the metal surface is very important. The metal area, which is to take the enamel, must be free from any dirt, grease and oxide / fire stain. If any of these are present it will affect the colours and the results will be disappointing. Even finger grease is a contaminant to enamel. You must always remember not to touch the enamel or the areas to be enamelled once prepared. Always enamel the work as soon as possible once it has been cleaned, alternatively wrap in tissue and enamel as soon as you can. The methods for cleaning metals vary slightly and different pickling solutions can be used. Pickle is a general term for the chemicals used to clean metals. The two most common solutions used are: Diluted sulphuric acid can be diluted to different strengths. A weak solution is mixed as one part acid to nine parts water or a stronger solution that is commonly used is a ratio of one part acid to five parts water. Sulphuric is used for pickling copper, silver and gold. It should be mixed with care, slowly, using cold water. The Acid mixed to the Water and not vice versa. Safety pickle, (sodium hydrogen sulphate) is an effective alternative to sulphuric. It is purchased as a dry powder and mixed with water to the supplier’s instructions. It works more effectively when the solution is kept at a warm temperature, ventilating effectively to avoid any vapours. Acids should always be situated in a well-ventilated area, as vapours are harmful. All acids are corrosive and safety instructions should always be followed fully. Always remember to use tweezers that are plastic in pickle solutions, not metal tweezers with either steel or iron content as they react with the pickle. 5 CLEANING COPPER Copper is easy to clean. The main objective is that it be grease free, particularly if you are using transparent colours. If you are using transparent colours rigorous cleaning is needed as they will reveal irregularities in the metal surface. The annealed metal should be wet-sanded with emery paper or pumiced back to remove the oxide layer, using water with a few drops of dishwashing detergent to the removal of grease and other soils. The piece should then be immersed in the pickle. Pickling serves to further remove the copper oxides, called fire scale, which is formed when the metal is heated above about 650° C. After pickling, the piece should be rinsed in water to remove any pickle. Rinsing underwater with a glass brush will ensure further cleaning / removal of grease. Dry the piece off before enamelling. CLEANING STANDARD SILVER Standard silver contains fire stain (oxide) which must be removed before enamelling. Enamel will not fire well over fire stain and it will give problems with the finish and will produce muddy colours. It is better to design and construct your piece so that fire stain is prevented from forming. To Protect against oxide forming. It is possible to protect against fire stain forming whilst soldering parts to your piece by coating the area to be enamelled with a layer of inhibitor such as a soldering flux, i.e. Auflux or FM flux, borax or Scalex. This will make the metal less prone to oxidising. If you are engraving or etching, the oxide is presumably removed from the surface that is to be enamelled, so general pickling should be an adequate cleaning method. Removal of fire stain using pickle (Sulphuric or safety pickle) If fire stain is a problem, it is possible with controlled heating and immersion in pickle, to raise a layer of fine silver to the surface of standard silver and eliminate the fire stain. The silver should be heated carefully to the point when the light grey fire sale is formed. The silver should then be immersed in pickle and brushed with a brass / glass brush under running water. The process should be repeated until the silver is white in appearance. This helps remove the copper oxide present in the silver and leaves a fine layer of fine silver on the surface of the metal. Care must be given to any soldered elements of your piece not to expose them to excessive heating as they will burn out and become brittle. You should additionally protect yourself against any potential splashes from the pickle solution and follow all safety instructions. It is quite a tricky method to do and will require some practice. It is not a foolproof method for enamelling as if residual oxide may remain. Transparent colours particularly will be effected by small amounts of oxide, resulting in dull patches or spotting in the surface. Fire stain removal in standard silver using Nitric acid. The processes will be demonstrated on the workshop if required but it is best to avoid using acid and design your work in order to eliminate the posiblity of fire stain in the surface of the silver. If needed, the fire stain can be removed by immersion in Nitric acid. General safety pickle or sulphuric acid will remove light surface oxide, but deeper oxidation can be removed via repeated dipping of the piece in nitric acid. Using nitric acid is a dangerous hazard and is not really recommended. It is essential to stress that all health and safety guidelines should be followed for the correct handling of any acid, particularly nitric. It is extremely corrosive and the vapours, which are constantly given off, should never be inhaled. If you have to use it only ever do so in a controlled, well ventilated, specialist area under supervision, wearing full safety clothing. It should be noted with all methods that after too much contact with the nitric there is also the danger of etching the piece. Note too that the acid may weaken solder joints. Health & Safety with acid Acid should be used in a specialist fume cupboard with full ventilation. Only ever add Acid to Water (never vice versa ) Only mix and store acid in suitable containers (glass or plastic) and label appropriately. All safety clothing should be worn, goggles, mask, safety gauntlets, safety apron, solid footwear etc. Baking soda / sodium bicarbonate should be kept to hand to neutralise any potential spillage. Acid should be disposed of safely, in accordance with local health authority guidelines. Seek immediate medical help in the event of injury or inhalation. CLEANING FINE SILVER Fine silver does not contain fire stain, as it does not have the copper alloy content. It is a very soft metal so the design of any enamel section should be considered in terms of wear. The cleaning method is the same as for copper, which is general degreasing with emery paper or pumice. Then immersion in safety pickle, followed by rinsing and washing with a glass brush to ensure grease free surfaces. 6 CLEANING GOLD The cleaning method is the same as for fine silver and copper. The piece should be degreased, then immersed in pickle, either safety pickle or sulphuric acid solution. On removal from pickle glass brush the piece under running water to rinse and clean. For a quicker action gold can be immersed into the pickle hot, but very great care should be taken to guard against splashing, pickles are corrosive and injurious to eyes and skin. (Wear goggles and full safety clothing etc) PICKLE AND ENAMEL It is advisable to plan the final finish and polishing of an enamelled piece. In general, enamel colours are acid resistant but some colours will react in pickle, affecting the surface of the enamel. The surface if affected will become watermarked, porous or pitted. It is best to minimise the time in the pickle for the final cleaning of metal parts. Sensitive colours can be painted with colourless nail varnish or lacquer for protection in the pickle. The varnish should be removed before final polishing. DESIGNING FOR ENAMEL Designing for enamel involves basic planning and an awareness of suitable construction methods. There are a few common techniques that lend themselves to being used in combination within enamelled jewellery forms. Often a series of techniques can be used to build the desired construction. Engraving, Etching or Die Stamping will provide the cut recesses for the enamel to be placed. Setting can be employed on a practical or decorative level to incorporate sections of enamel into a design. Chasing and Repousse techniques enable the shaping of more three-dimensional forms, giving greater interest to the overall form of a piece. Pressformed shapes, typically cushioned in format, lend themselves well to enamel. The added advantage of this method is that repeated shapes can be made very easily and at low cost. Castings can be enamelled but will often be problematic. The casting has to be of a very high quality and must not be porous. The assembly of pieces can be done via different methods, soldering, riveting or screw fitting provide adequate methods of fixing sections and the fitting of findings. There are points to consider with each method. Solder cannot be used near any enamel parts, as it will discolour the enamel and may cause the enamel to chip off. However, soldered pieces can be used if they are not adjacent to enamel parts. The solder used for any joint or fitting must be able to withstand repeated firings in the kiln. Specific hard enamel solder can be used but most enamellers tend to use standard hard solder. Medium 18ct gold solder is also useful. Riveting is a useful method of joining two sections together without soldering. The position of the rivet in the design has to be considered. Rivets must be situated so that they do not crack the enamel. A common, simple solution to joining two parts is to use tube rivets. Using tube, soldered to the back of a piece, reduces the pressure placed when the enamel section is assembled. The tube is splayed out gently, forming a secure hold over the two sections. The rivet can be counter sunk and hidden, or be made decorative to combine with the overall design of the piece involved Screw fitting is an ideal method for building complex shapes together, no pressure is placed on the enamel areas and the fixings are permanently secure whilst enabling the facility for the piece to be dismantled in the event of future repair work. Sections can be constructed to form larger pieces or more complex forms. An important factor in the creation of enamel pieces is that the metal and the enamel expands and contract at different rates. It is therefore essential to understand the basic processes needed to prevent the metal warping. Counter enamel is applied to balance out this characteristic. A layer of enamel is fired to the back of a piece. The enamel that is used should be similar in fusibility and thickness to the layers applied to the front of the piece. It acts to strengthen the piece and prevents warping of the metal. By applying enamel to the front and back of the piece the expansions involved are evened out. In the case of bowls or pieces that are to have both sides of the article showing, counter enamel of a complementary colour can be used to enhance the overall effect of the piece. Metal Thickness determines the need for counter enamel. The additional elements to consider for all enamel designs are the thickness of enamel glaze required, the metal thickness and importantly, the size and shape of the article. Pieces that are curved or domed are less prone to warping and because the metal is structurally stable and stronger when formed, therefore thinner metal sections can be permitted. Smaller pieces are less likely to warp than larger pieces. Certain shapes will warp more than others. For example, rounded curved, shapes perform better than triangular flat shapes. With a rounded shape the surface is spread and even, but with flat triangular shapes, the points of the triangle are thinner in surface area and therefore more prone to bending. Any metal below 1.0 mm in thickness, either flat or domed, should be counter enamelled. Curved or domed metal will have fewer tendencies to warp. Metal 1mm / 1.3mm in thickness can be enamelled without counter enamel if it is domed, but needs counter enamel if it is flat. Above 1.3mm and more with more stability at 1.5 mm counter enamel is not needed. Pieces can be flat in construction and will not have the same tendency to warp because of the greater thickness of metal. Thicker metal 7 sections are more suited to the champleve techniques where metal has to be carved away to form the recesses for enamel. It should be noted that this guide refers to silver, and copper. The cohesion rates for gold are different, with gold, thinner sections of metal may be enamelled without counter enamel. FIRING Enamel fuses very quickly and a lot of attention is needed for just the briefest of moments when firing the enamel in the kiln. There are no clear definitions to the exact length of firing time, each piece will have its variables, but firing is quick, generally between 30 – 90 seconds. All enamel must be fully dry when inserted into the kiln. Moisture from wet packing techniques / applications of gum / or painted medium must be dried off, either, by briefly holding the piece in front of the open door / muffle of the kiln or by leaving to dry in a dust free area of the workshop. On fusing with the metal, enamel goes through several changes in state and appearance. (see samples) 1> 2> 3> 4> 5> 6> The enamel sits on the metal unfired. The enamel starts fusing, looking crystalline. The enamel becomes more granular. The enamel fires at the orange peel stage. The enamel is more fully fired and bumpy. The enamel is fires to full maturity, is smooth and fully fused to the metal. It is possible to estimate the approximate temperature of the kiln by viewing the internal colour of the kiln. These figures are approximate but offer a rough guide. C F Dull cherry red 700+ 1300+ Cherry red 760+ 1400+ Orange red 850+ 1550+ Orange yellow 900+ 1600+ Yellow white 950+ 1650+ Generally, when firing enamel, a high temperature and a short rapid firing is the best. However, the control of temperature can be very important in the various techniques. Low firing and high firing methods can be varied and combined for differing effects. Supporting the work in the Kiln An essential part of the design process is planning how to support the piece when it is fired. The article that is being fired needs to be able to sit securely on a mesh, or balance steadily on trivet. It is occasionally necessary to custom make a supporting devise for work. Three-dimensional pieces pose the most challenges. Ceramic fibre board is a useful firing support. It is highly heat reflective and will withstand temperatures of up to 1260C. It can be useful in preventing warping when firing flat sections and can be customised to hold findings and individual items on firing. It can be cut and shaped with a craft knife, and drilled by hand, although great care should be taken with dust control as it will be powdery on cutting and the internal fibres should not be inhaled. ( work in a ventilated area & wear a dust mask) A variety of trivets are useful for shaped articles. Meshes can be added to with mesh wire and shaped to aid the support of three-dimensional piece or work that needs to hang. Always balance and check the suitability of support before firing. FINISHES The one day workshop will cover the finishing to the basic gloss finish – more info is here for added reference. A range of surfaces can be achieved through the control of different processes. The enamel surface is typically glossy but it an also be treated to become matt, satin or granular in texture. Like wise the surrounding metal may be designed as a highly polished, textured or matted element. To matt the enamel surfaces there are two methods. Stoning the enamel surface back with carborundum or diagrit pads by hand reveals a stony matt texture. Immersing your piece in a chemical solution called Matting Salts, will give a smooth matt surface. To create a granular texture, the final layer of enamel or a clear flux can be under fired in the final firing leaving an interesting crystalline surface. Metal surfaces can be machine polished but I prefer to polish by hand. It is better to have control of the piece so that the enamel sections are not damaged. 8 Sample 1 Sample 2 Sample 3 Sample 4 Sample 5 Notes : 9
