inv5_student
advertisement
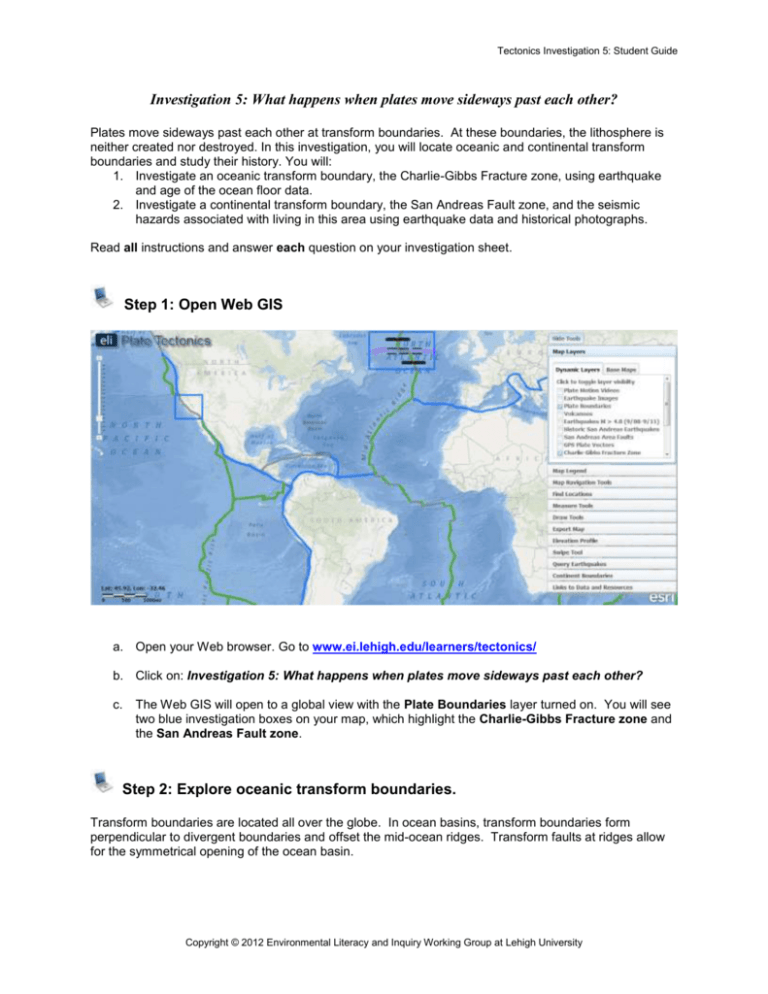
Tectonics Investigation 5: Student Guide Investigation 5: What happens when plates move sideways past each other? Plates move sideways past each other at transform boundaries. At these boundaries, the lithosphere is neither created nor destroyed. In this investigation, you will locate oceanic and continental transform boundaries and study their history. You will: 1. Investigate an oceanic transform boundary, the Charlie-Gibbs Fracture zone, using earthquake and age of the ocean floor data. 2. Investigate a continental transform boundary, the San Andreas Fault zone, and the seismic hazards associated with living in this area using earthquake data and historical photographs. Read all instructions and answer each question on your investigation sheet. Step 1: Open Web GIS a. Open your Web browser. Go to www.ei.lehigh.edu/learners/tectonics/ b. Click on: Investigation 5: What happens when plates move sideways past each other? c. The Web GIS will open to a global view with the Plate Boundaries layer turned on. You will see two blue investigation boxes on your map, which highlight the Charlie-Gibbs Fracture zone and the San Andreas Fault zone. Step 2: Explore oceanic transform boundaries. Transform boundaries are located all over the globe. In ocean basins, transform boundaries form perpendicular to divergent boundaries and offset the mid-ocean ridges. Transform faults at ridges allow for the symmetrical opening of the ocean basin. Copyright © 2012 Environmental Literacy and Inquiry Working Group at Lehigh University Tectonics Investigation 5: Student Guide a. Click on the Map Navigation Tools tab in the toolbox menu. Select Charlie-Gibbs Fracture Zone from the list of bookmark locations. b. Your map will zoom into the Charlie-Gibbs Fracture Zone. You will see 10 black lines that will be used later to explore the motion of the plates in this tectonic area. c. First, investigate the type of plate boundary that defines the Charlie Gibbs Fracture Zone. d. To do this, click on the Map Legend tab to interpret the data displayed on your map. Answer Questions #1 and #2 on your investigation sheet. e. Earthquakes along transform boundaries record the Earth’s fracture between ridge segments. This fracturing is known as a transform fault, or “strike-slip fault”. The plates move past one another at these locations. Inactive transform faults are fossilized as fracture zones outside the seismically active central transform fault. In this view, a purple outline defines the fracture zone. f. Click on the Map Layers tab in the toolbox menu. g. Turn on the Earthquakes M > 4.0 (9/08-9/11) layer. h. Click on the Query Earthquakes tab in the toolbox menu. i. Select “Transform” from the Select Primary Fault Type drop down menu (A). j. Make sure the “All Depths” option is selected from the Select Earthquake Depth drop down menu (B). 2 Tectonics Investigation 5: Student Guide k. Click to observe the plate boundary earthquakes that occurred on the transform plate boundary. l. There are not many earthquakes greater than magnitude 5.0 along oceanic transform boundaries. m. Click on an earthquake to find out its magnitude. This magnitude is similar to the other earthquakes along the transform boundary. Answer Questions #3-4 on your investigation sheet. Step 3: Explore a transform plate boundary and fracture zone to learn about seismicity. Transform faults leave scars on the ocean floor called fracture zones. The motions of the plates can be traced by following these fracture zones. a. Click on the Map Layers tab in the toolbox menu. b. Turn on the Age of the Ocean Floor layer. c. To view the map legend, click the Map Legend tab in the toolbox menu. The color indicates the age of the ocean floor at the location. d. Notice the color bands that represent the age are “offset”, and do not line up on opposite sides of the fracture zone. The plates are actively moving past each other between the ridge segments, along the transform plate boundary in the Charlie-Gibbs Fracture zone. In the area outside of the transform boundary, the offset ocean floor preserves the inactive fault or “scar” where the ocean floor now moves in the same direction at the same rate across the fracture zone. 3 Tectonics Investigation 5: Student Guide e. Watch a video to see the difference between the active transform fault and the inactive fracture. i. Click on the Map Layers tab in the toolbox menu. ii. Turn on the Plate Motion Videos layer. iii. Click on the icon located on the transform plate boundary to watch the video. iv. f. Click on , located in the upper right hand corner, so you can see the whole popup window. Notice (see image to the right) that in between the divergent boundaries the plates slide past one another, along the transform boundaries. Notice how the crust moves in opposite directions at the transform boundary. To the left and the right of the transform boundary you can see the crust is “fractured”. g. Use the Draw Tools to draw the plate motions you saw in the video on your map. i. Click on the toolbox menu. to open ii. Click on the Draw Tools tab in the toolbox menu. h. Click on the tool and then click a point on your map to start drawing. 4 Tectonics Investigation 5: Student Guide i. First, draw arrowheads on each of the four large bold line segments that point in the direction that the crust is spreading away from the divergent boundaries (see figure to the right). Hint: The arrows should be pointing towards the oldest crust. Click on the Map Legend tab in the toolbox menu to learn which color represents the oldest crust. j. Next, draw arrowheads on each of the six thin line segments that point in the direction that the crust is spreading away from the divergent boundaries on each side of the Charlie Gibbs Fracture Zone (see figure to the right). Answer Questions #5-9 on your investigation sheet. k. Submit your map image using the Export Map tool. (Note: Your teacher may ask you to take a screenshot instead). l. Click on the Query Earthquakes tab in the toolbox menu. Click “Clear”. Next, Click on the Map Layers tab in the toolbox menu and turn-off off the Earthquakes M > 4.0 (9/08-9/11) layer and the Plate Motion Videos layer. m. Then, click on the Export Map tab in the toolbox menu. Next, click . This will create an image of your GIS map to be exported to your computer. Next, follow directions in the toolbox for Macintosh or PC depending upon the computer you are using. Your teacher will instruct you with specific file naming instructions and location directions. 5 Tectonics Investigation 5: Student Guide When you are finished, click return to your map. to n. Use the bar on the left to zoom out so you can see the entire Atlantic Ocean. o. You will now use the Draw Tools to trace five (5) more fracture zones in the Atlantic Ocean. i. Click on the Draw Tools tab in the toolbox menu. ii. Use the tool to trace a location where you see a fracture zone. First, click on a point at the western edge of fracture to start drawing a line (see figure to the right). Next, hold your mouse down while you drag along the fracture. To finish your line, let go of your mouse at the eastern edge of fracture (see figure to the right). If you make a mistake, you can erase a line segment by clicking iii. . Find and trace four (4) more fracture zones. Answer Questions #10 on your investigation sheet. p. Submit your map image using the Export Map tool. Refer to instructions above in “o”. 6 Tectonics Investigation 5: Student Guide Step 4: Locate a continental transform boundary, the San Andreas Fault Zone. Transform boundaries are also found on land and occur between divergent boundaries. They have more impact on humans. a. Click on the Map Navigation Tools tab in the toolbox menu. Select San Andreas Fault Zone from the list of bookmark locations. b. Your map will zoom to the transform plate boundary located in western California. c. Click on the Map Layers tab in the toolbox menu. d. Turn off Age of the Ocean Floor and activate GPS Plate Vectors layers. e. The red arrows on your map represent “vectors” of the plate motion at that location. A vector consists of a direction and a magnitude. - The arrow points in the direction the plate is moving at that location. - The arrow’s size represents the magnitude of motion, or how much that location moves. Bigger arrows represent faster motion. The biggest arrows on your map represent speeds of ~30 mm/yr, and the smallest ~5 mm/yr. Answer Question #11 on your investigation sheet. f. Follow the steps below to watch a video to see how the San Andreas Fault zone has evolved 7 Tectonics Investigation 5: Student Guide over the past 20 million years. i. Click on the Map Layers tab in the toolbox menu. ii. Turn on the Plate Motion Videos layer. iii. Click on the icon located on the transform plate boundary to watch the video. iv. Turn off the Plate Motion Videos layer. g. Determine the San Andreas Fault zone. i. Click on the Map Layers tab in the toolbox menu. ii. Turn off the GPS Plate Vectors layer and activate the Earthquakes M > 4.0 (9/08-9/11) layer. iii. Use the Query Earthquake tool to display only the Transform fault earthquakes. See Step 2 h-k above if you need assistance. h. Use the Draw Tools to outline the San Andreas Fault zone. i. Click on the Draw Tools tab in the toolbox menu. Select “Black” from the Select a Color drop down menu. ii. Use the tool to draw a line on each side of the transform earthquakes and the plate boundary. First, click on a point at the northwest end of the transform plate boundary on the western edge of the investigation box to start drawing a line (A). Next, hold your mouse down while you draw a line to the 8 Tectonics Investigation 5: Student Guide left of the plate boundary and include all the transform earthquakes. To finish your line, let go of your mouse at the southern edge of the investigation box (B). If you make a mistake, you can erase a line segment by clicking iii. . Draw a line on the eastern edge of the San Andreas Fault zone. Start at the northeast end of the transform plate boundary on the edge of the investigation box to start drawing a line (C). Next, hold your mouse down while you draw a line to the right of the plate boundary and include all the transform earthquakes. To finish your line, let go of your mouse at the southern edge of the investigation box (D) i. The area you outlined represents the San Andreas Fault zone. It is made up of many faults that accommodate the tectonic stresses. j. To see all the faults, click on the Map Layers tab in the toolbox menu. k. Turn on the San Andreas Area Faults layer. l. Click on the Map Legend tab to interpret the data displayed on your map. Note the ages of the displayed faults. m. Submit your map image using the Export Map tool. (Note: Your teacher may ask you to take a screenshot instead). See Step 3, above for a review if needed. 9 Tectonics Investigation 5: Student Guide Step 5: Learn about seismic hazard along the San Andreas Fault Zone. a. Click on the Map Layers tab in the toolbox menu. b. Turn off the Earthquakes M > 4.0 (9/08-9/11) and San Andreas Area Faults layers and activate the USA Population Density, the Historic San Andreas Earthquakes, and the Volcanoes layer. Answer Questions #12 and #13 on your investigation sheet. c. Compare the age of the seismic hazard along the San Andreas Fault zone with the Population Density. d. Click on the Map Layers tab in the toolbox menu. Turn-off the Historic San Andreas Earthquakes and Volcanoes layer and activate the Seismic Hazards layer by clicking on the check box. e. Click on the Swipe Tool tab in the toolbox menu. f. From the “Choose Layer to Swipe” drop down menu, select Population. g. Click on the swipe tool. to activate h. Click on in the upper right hand corner to hide the toolbox menu. i. Use the mouse to click and drag the divider across the map. As you drag the swipe bar to the left, the USA Population Density layer is removed, revealing the seismic hazard layer underneath. Answer Question #14 on your investigation sheet. 10 Tectonics Investigation 5: Student Guide j. When you are finished, click on in the upper right hand corner to show the toolbox menu and click in the Swipe Tool tab to turn the tool off. k. Click on the Map Layers tab in the toolbox menu. l. Turn off the USA Population Density and Seismic Hazards layers and activate the Historic San Andreas Earthquakes and Earthquake Images layers. m. Click on each image to see a picture of damage caused by earthquakes in the San Andreas Fault zone. Note: You may be able to see more than one image in a pop-up window by using the arrow to move forward. Answer Question #15 on your investigation sheet. 11

